Transforming your backyard into a welcoming retreat doesn’t require professional skills—just a bit of creativity and the right guidance. Whether you’re new to hands-on projects or a seasoned DIY enthusiast, crafting rustic shelters can add both charm and comfort to your outdoor space.
In this article, you’ll discover practical tips for building cozy, rustic structures that blend seamlessly with nature. From selecting materials to step-by-step construction advice, we’ll help you create inviting shelters that make your backyard a year-round haven.
Choosing Rustic Materials for Shelters
When choosing rustic materials for your outdoor shelter, prioritize natural wood like cedar, pine, or reclaimed barn wood for durability and authentic charm. Opt for untreated or lightly treated wood to maintain a weathered look, and consider using rough-hewn beams or branches to add texture. For advanced builders, incorporating natural stone foundations or accents can significantly enhance stability and rustic appeal.
To keep the construction practical, use simple joinery techniques such as mortise and tenon or lap joints which provide strength without heavy metal fasteners. Additionally, plan for a roof using corrugated metal or wooden shingles to balance rustic aesthetics with weather resistance. Remember to measure your shelter carefully—common cozy dimensions are around 8×10 feet with a ceiling height of 7 feet for comfortable use.
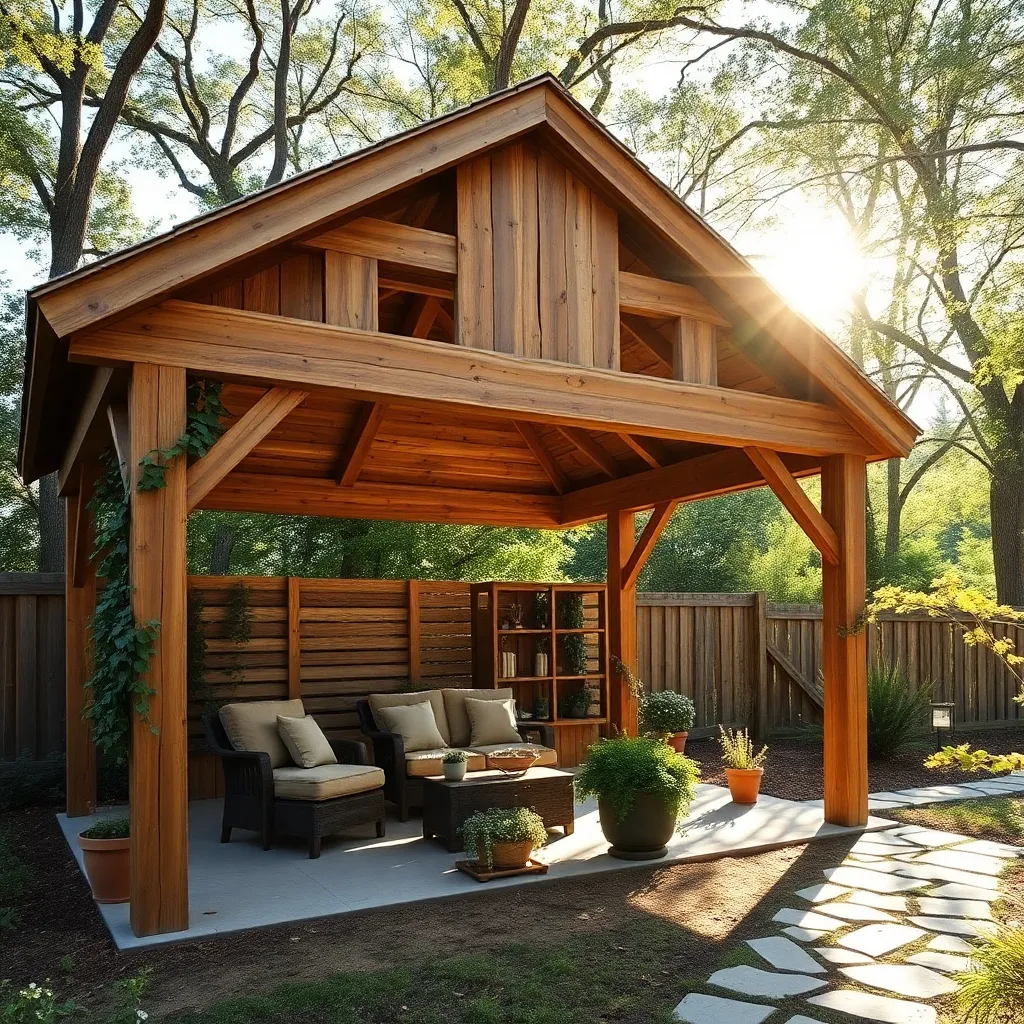
Building a Simple Wooden Frame
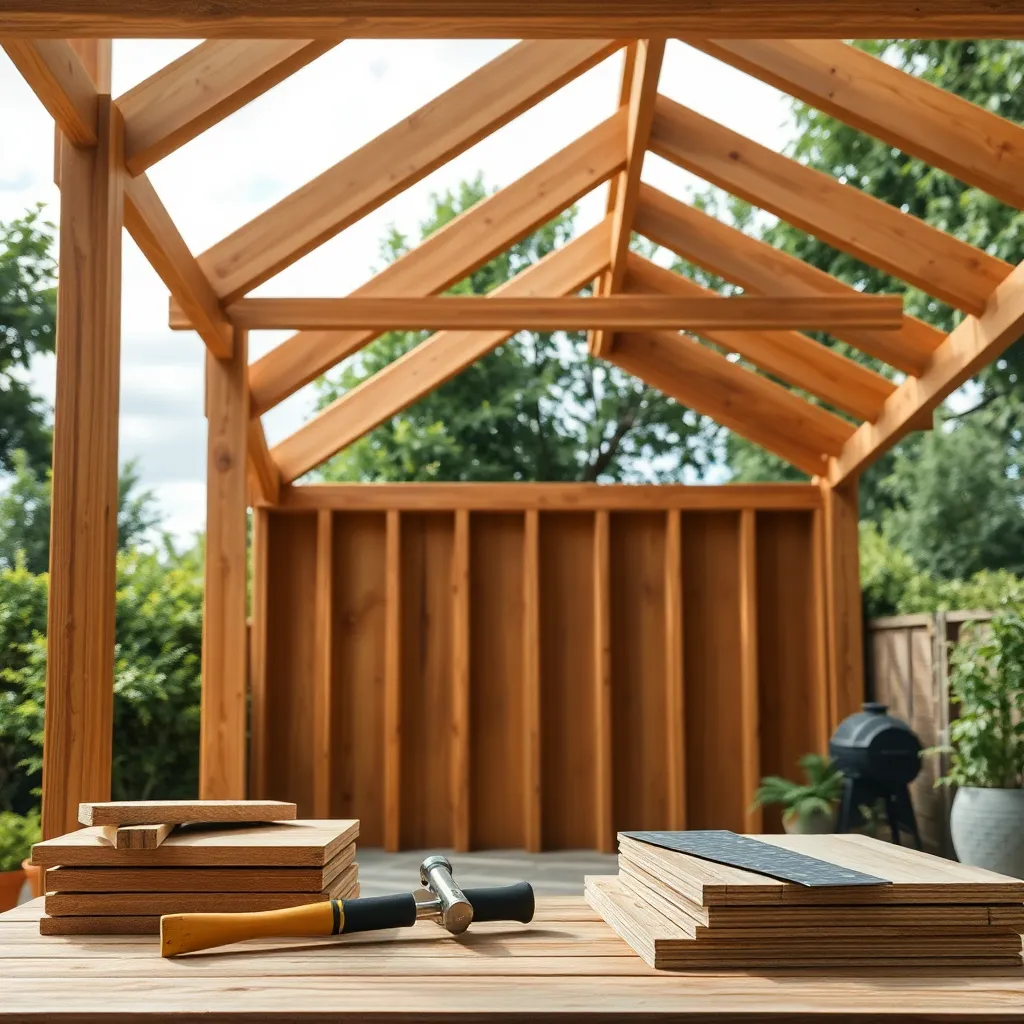

Starting with a simple wooden frame is an excellent way to create a rustic outdoor shelter that feels cozy and sturdy. Use pressure-treated lumber or cedar, which resist rot and insects, and cut 4×4 posts to a height of about 7 feet for strong vertical supports. For the frame, connect these posts with 2×4 or 2×6 beams to form a rectangle, ensuring the corners are square and secure with galvanized screws or brackets for durability.
To add stability and a charming rustic touch, consider cross-bracing the frame diagonally with smaller timber pieces, which also helps withstand wind. When planning your frame, leave enough space for an open front or partial walls, depending on your shelter’s purpose, and remember to check local building codes for size and anchoring requirements. This straightforward design can be customized by adjusting dimensions or adding a sloped roof to shed rain effectively, making your backyard shelter both practical and inviting.
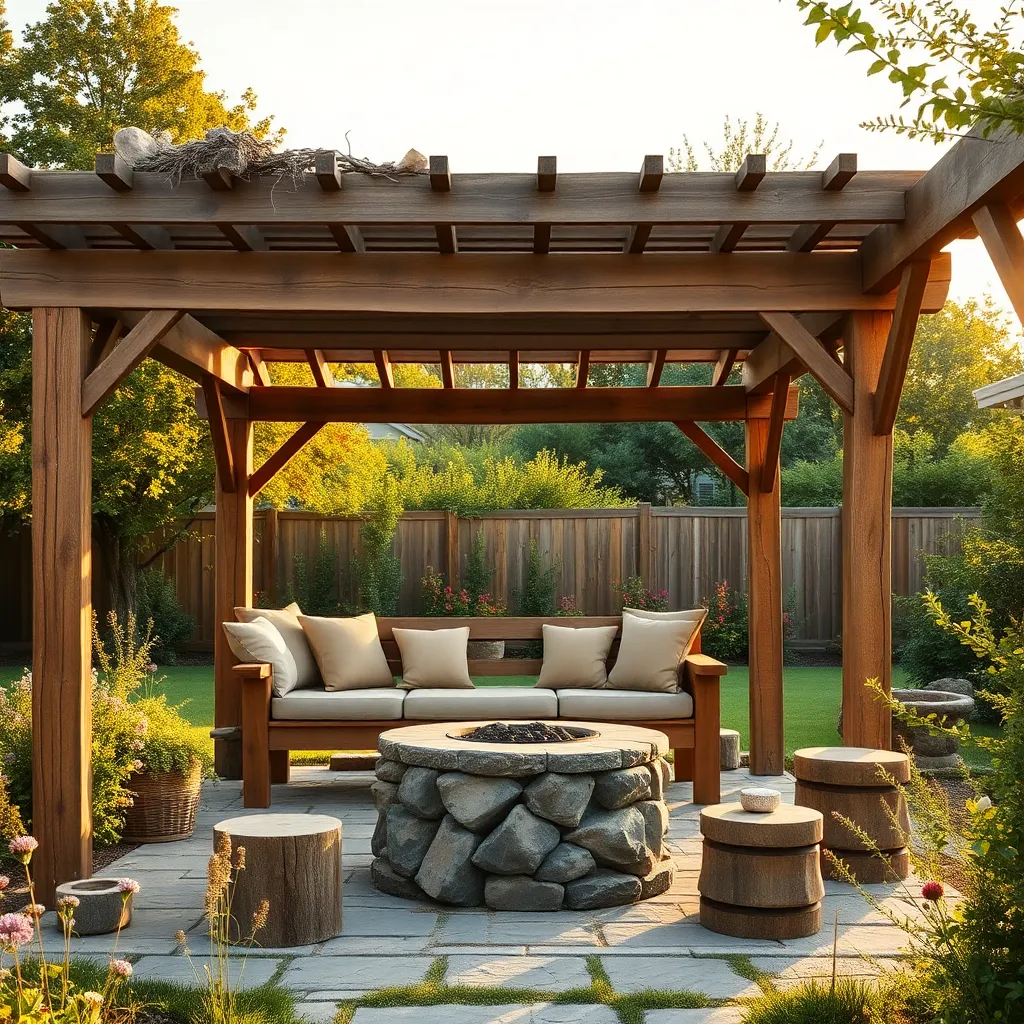
Incorporating Natural Elements Seamlessly

To seamlessly incorporate natural elements into your rustic shelter, start by selecting locally sourced wood and stone that blend with your backyard’s environment. Use untreated timber for a more authentic look, and consider building stone foundation piers or accents for stability and charm. For beginners, simple additions like a live-edge wooden bench or a stone pathway leading to the shelter can create a cohesive, nature-inspired aesthetic.
Advanced gardeners can elevate the design by integrating vertical gardens or climbing plants such as clematis or ivy along the shelter’s frame, which adds greenery and softens the structure’s lines. Incorporate natural roofing materials like cedar shakes or thatch for enhanced rustic appeal and better insulation. Remember to maintain proper spacing—around 12 to 18 inches between support beams—to allow plant growth without compromising structural integrity.

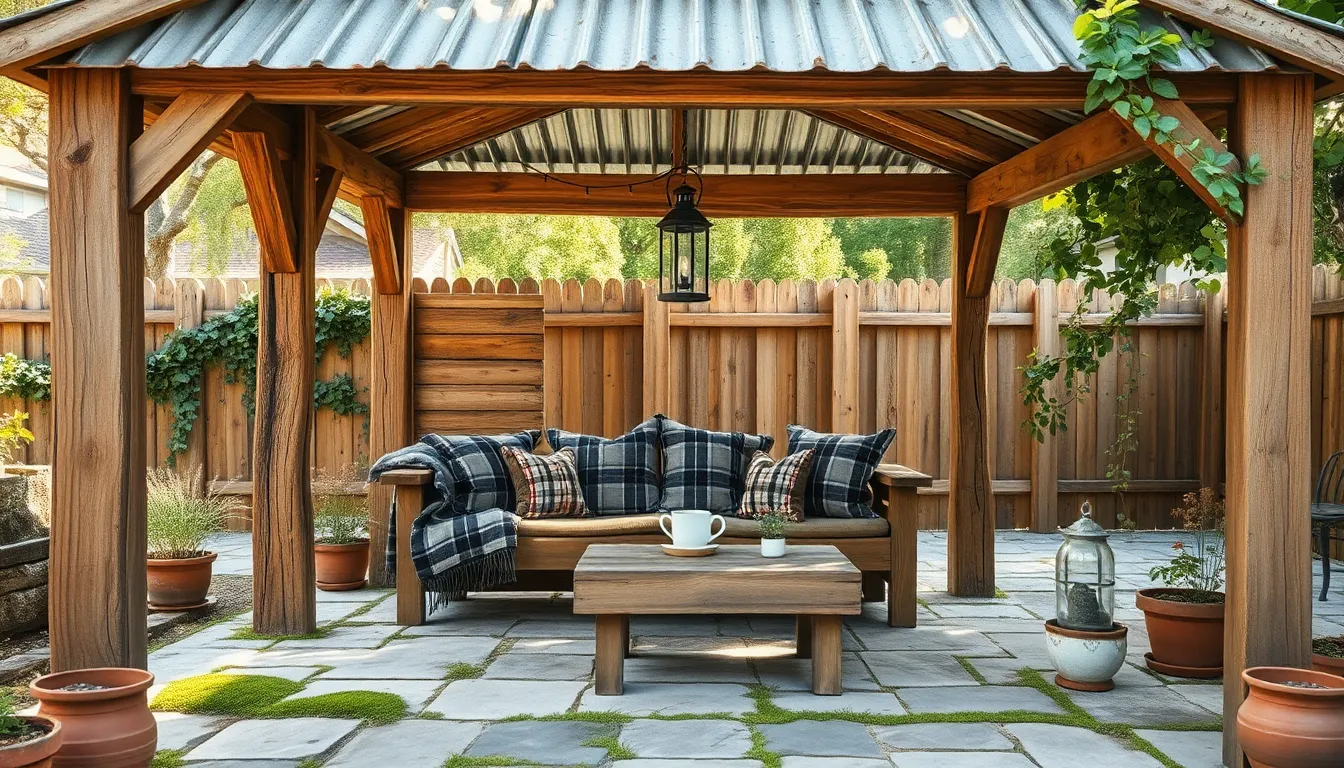
Adding Cozy Features and Furnishings
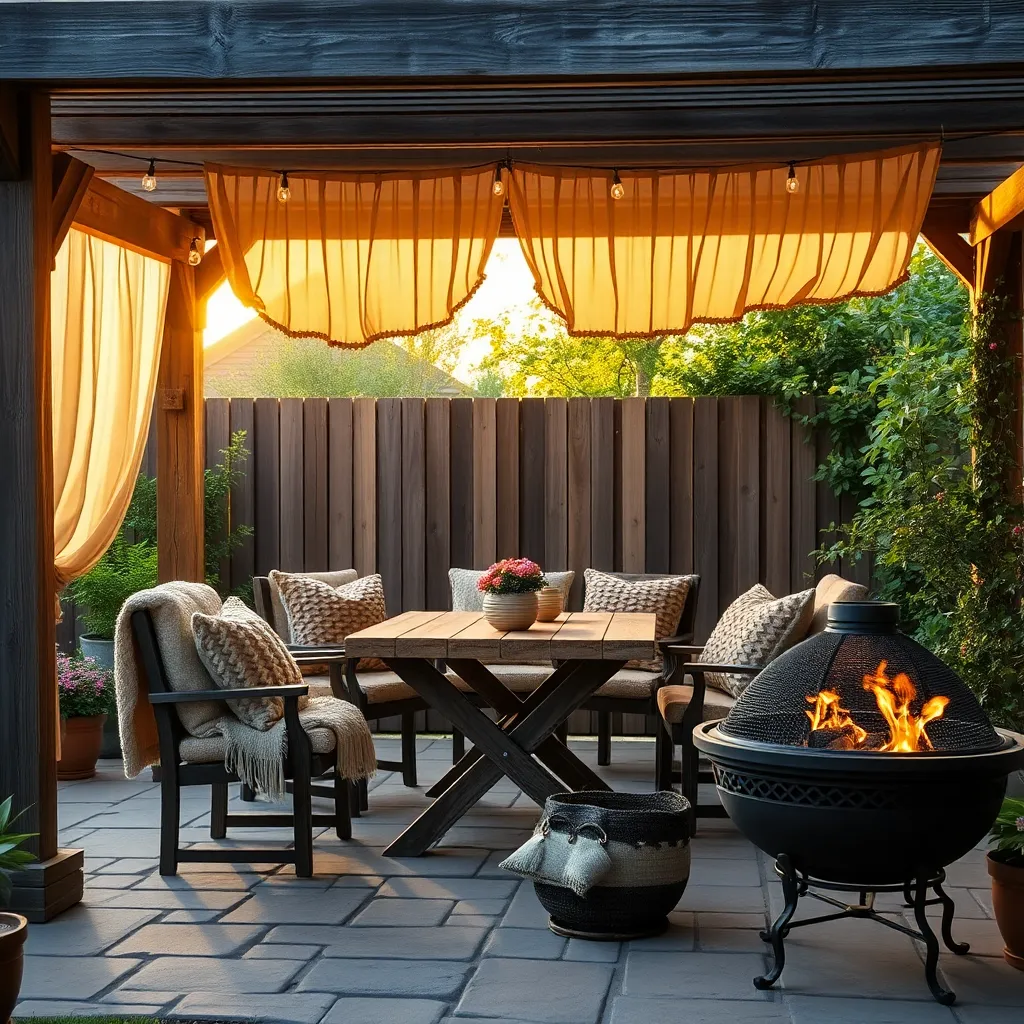
Start by choosing durable, weather-resistant materials such as teak or cedar for furniture, which naturally complement a rustic outdoor shelter. Incorporate cozy textiles like waterproof cushions and wool throws in warm, earthy tones to enhance comfort while maintaining the rustic aesthetic. For advanced DIYers, consider building custom benches with storage underneath to maximize space and functionality.
Lighting plays a crucial role in creating a welcoming atmosphere; opt for solar-powered lanterns or string lights with warm LED bulbs to provide soft, inviting illumination without added wiring. Adding natural elements like potted plants or a small herb garden can further soften the space and add life. Remember to anchor furniture securely and use outdoor rugs made of polypropylene for easy maintenance and to define your seating area clearly.
Maintaining Your Backyard Rustic Shelter
To keep your backyard rustic shelter in top shape, regularly inspect wooden elements for signs of rot, mold, or insect damage. Applying a quality outdoor wood sealant or stain every 1-2 years protects the timber from moisture and UV damage, preserving its cozy charm and structural integrity. For beginners, focus on cleaning debris off the roof and ensuring drainage pathways remain clear to prevent water pooling.

Advanced maintenance includes tightening any loose joints and replacing worn fasteners with weather-resistant screws or bolts to enhance durability. Consider adding a simple roof overhang of at least 12 inches to shield walls from rain, and if your shelter includes fabric curtains or cushions, store them during harsh weather to extend their lifespan. Consistent upkeep will ensure your rustic shelter remains a welcoming retreat season after season.
Conclusion: Creating Beautiful Outdoor Spaces
Creating DIY rustic shelters for your backyard is more than just a fun project—it’s a meaningful way to strengthen your relationship while building a cozy retreat together. We explored five key concepts: collaboration and teamwork, effective communication during planning, embracing patience through the building process, celebrating small victories along the way, and creating a shared space that nurtures connection.
Now, take a simple but powerful next step: set aside 30 minutes this week to brainstorm ideas with your partner for your own rustic shelter. Sketch a rough design, list materials, or even search for inspiration photos together. This small action will spark creativity and deepen your bond.
Remember to bookmark or save this article so you can return whenever you need guidance or fresh motivation. By investing time and love into this shared project, you’re laying the foundation for a relationship that’s not only cozy and inviting but also resilient and joyful. Your journey toward a stronger connection starts right at home—embrace it with warmth and intention!