Transforming your backyard with a covered patio featuring a wooden roof is a rewarding project that enhances both comfort and style. Whether you’re new to DIY or have tackled home improvements before, this guide breaks down the essential steps to create a sturdy, inviting outdoor space tailored to your needs.
Inside, you’ll find practical tips on selecting materials, framing techniques, and finishing touches that bring warmth and durability to your patio. By the end, you’ll have the confidence to build a beautiful shelter that extends your living area and invites year-round enjoyment.
Measure and Mark Patio Dimensions

Begin by deciding the exact size of your covered patio, keeping in mind common dimensions like 10×12 or 12×16 feet for comfortable seating and movement. Use stakes and a durable outdoor string or garden hose to outline the perimeter, ensuring your space is square by measuring diagonals; both should be equal for accuracy. For advanced precision, consider a laser level to mark even ground levels, especially important if your patio will have a wooden roof that requires stable support.
Next, mark the key points where posts and beams will go, typically at the corners and midpoints if your design requires extra support. Use bright spray paint or flags to highlight these spots clearly, and double-check measurements before digging post holes or pouring concrete footings. Remember, accurate markings prevent costly mistakes later, and planning for features like roof overhangs or gutter placements now will save time and materials as you build.
Construct Support Posts and Beams

Start by selecting sturdy, pressure-treated lumber for your support posts, ideally 4×4 or 6×6 inches, to ensure durability against weather and weight. Set posts securely in concrete footings at least 2 feet deep to prevent shifting, and space them according to your patio dimensions—commonly 6 to 8 feet apart—to provide balanced support for the wooden roof.
Next, attach horizontal beams on top of the posts using galvanized metal brackets or heavy-duty lag bolts for a strong connection that resists wind and movement. For added stability and a polished look, consider adding cross braces or decorative corbels between posts and beams, which also help distribute roof load evenly across the structure.
Assemble Wooden Roof Frame
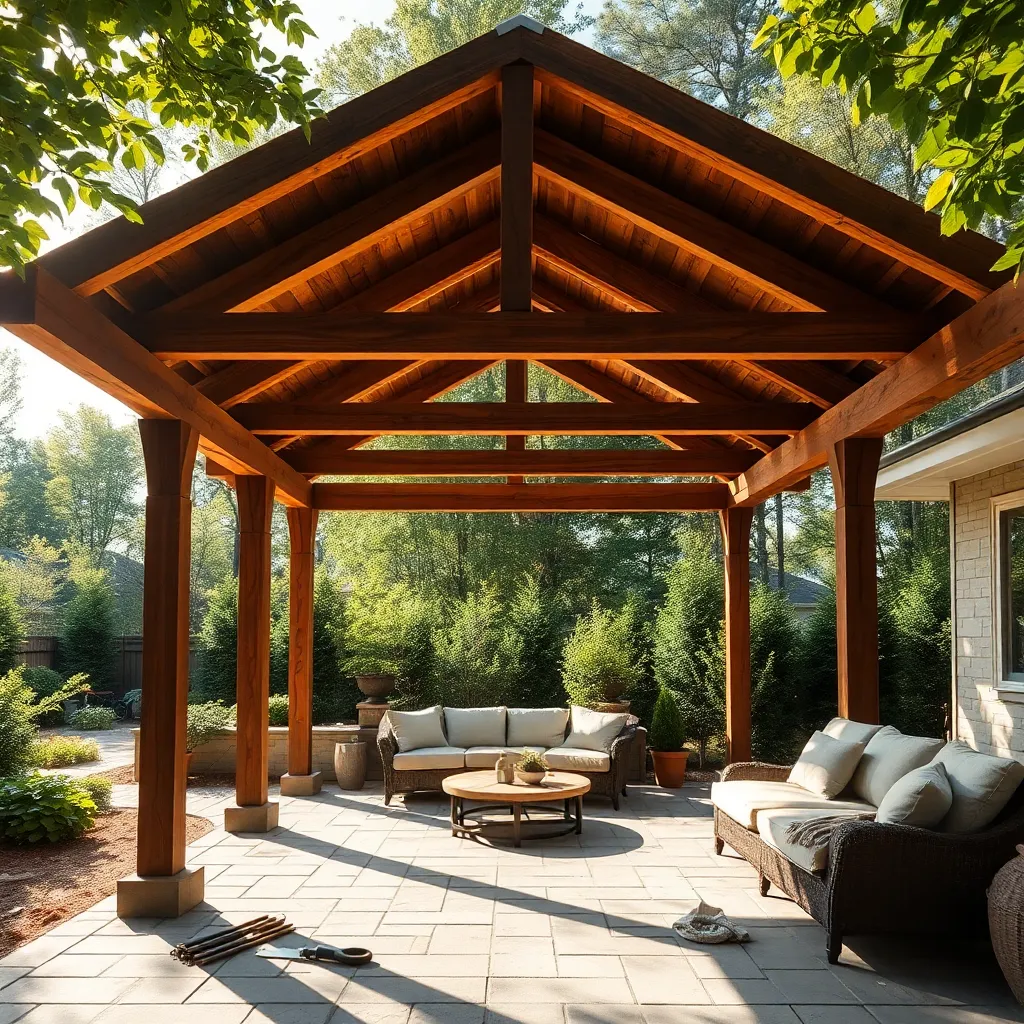
Begin by cutting your rafters from durable, weather-resistant wood like cedar or pressure-treated pine, ideally 2×6 or 2×8 lumber for strength and stability. Arrange them evenly across the support beams, spacing rafters about 16 to 24 inches apart to provide proper support while keeping the roof lightweight.
Next, secure the rafters with galvanized metal hurricane ties or strong wood screws to ensure longevity and resistance to wind uplift. For a polished, structurally sound finish, consider adding a ridge board along the peak and cross-bracing for extra rigidity, especially if your patio roof will have a steeper pitch or heavier roofing materials.

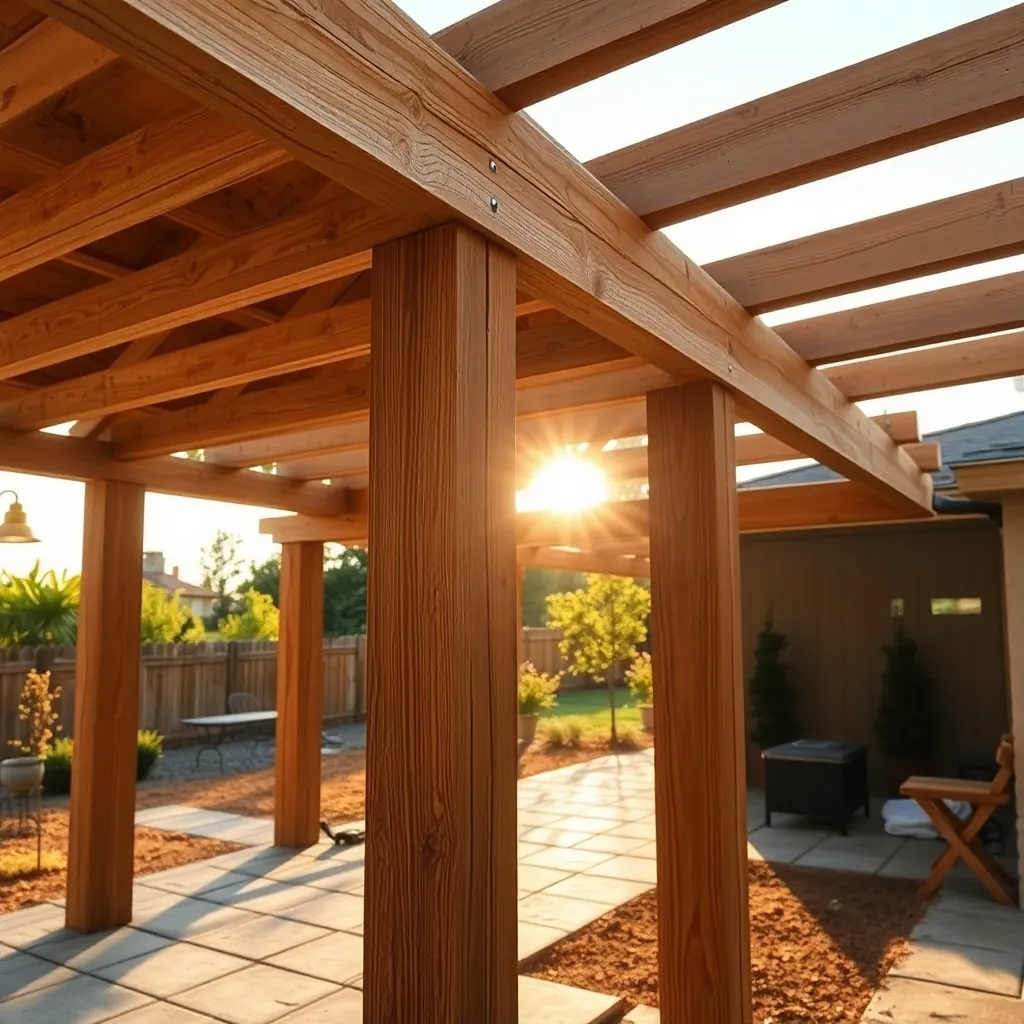
Install Roof Sheathing and Covering
Begin by installing roof sheathing such as ½-inch exterior-grade plywood or oriented strand board (OSB) directly onto the assembled wooden frame. Ensure each sheet is securely fastened with galvanized nails or screws spaced about 6 inches apart along the edges and 12 inches in the field to provide a strong, stable base for your roof covering. For added durability, stagger the seams between sheets and leave a small gap of 1/8 inch to allow for wood expansion.
Next, choose a roof covering that suits both your climate and aesthetic preferences, such as asphalt shingles for affordability or metal panels for longevity and modern style. Before installing, lay down a high-quality underlayment like roofing felt or synthetic membrane to protect against moisture. Finally, carefully follow manufacturer instructions for your chosen material, paying attention to proper overlapping and fastening techniques to ensure a weatherproof, attractive finish for your wooden patio roof.
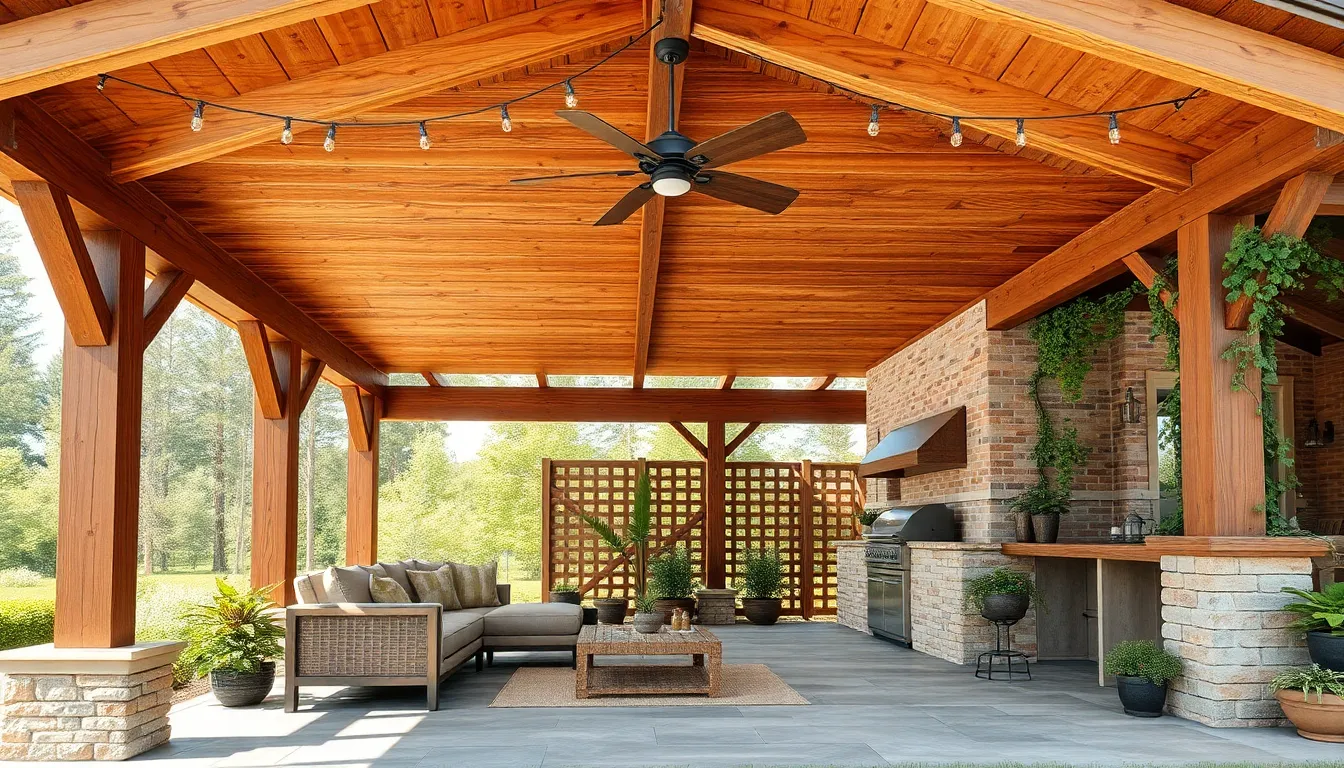
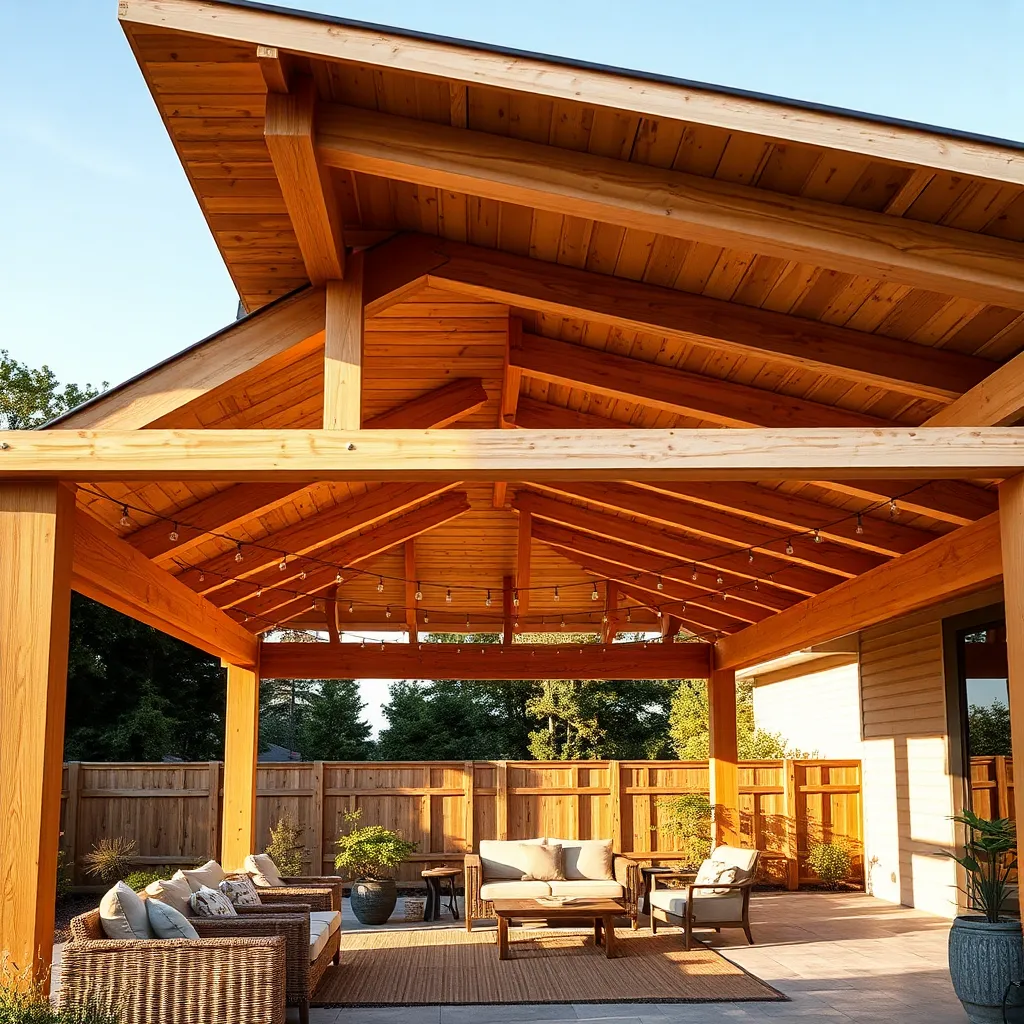
Apply Finishing Touches and Sealant
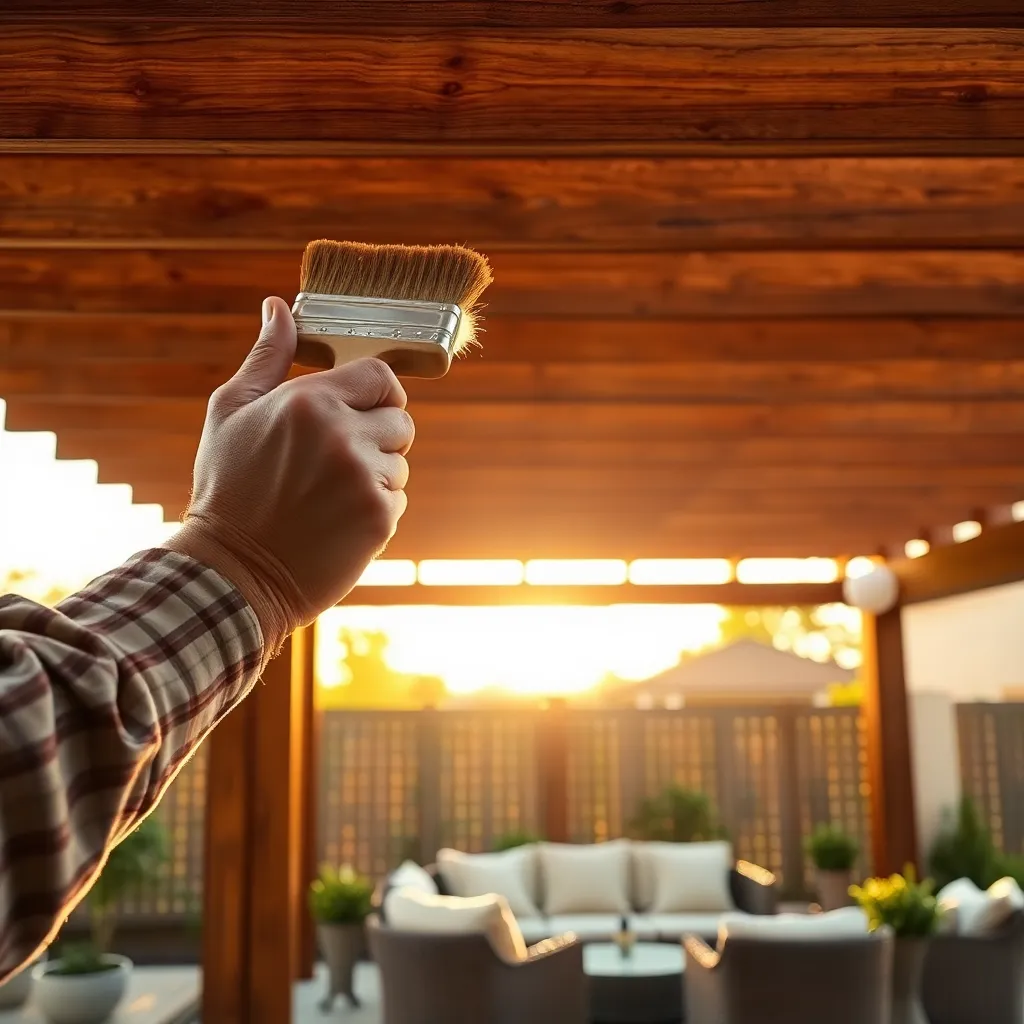
Once the roof sheathing and covering are securely in place, focus on adding finishing touches such as trim and fascia boards to give your wooden roof a polished look. Use weather-resistant wood or PVC trim, cut to fit snugly along edges and corners, and secure with galvanized nails to prevent rust. For a seamless appearance, sand any rough edges before applying a high-quality exterior paint or stain that complements your patio design.
Next, apply a clear waterproof sealant over all exposed wooden surfaces to protect against moisture, UV damage, and mildew. Choose a penetrating sealant with mildew inhibitors, and apply it evenly with a brush or sprayer, ensuring at least two coats for durable coverage. For advanced protection, consider using a sealant that also offers UV resistance to maintain the wood’s color and integrity over time.
Conclusion: Creating Beautiful Outdoor Spaces
Building a covered patio with a wooden roof isn’t just a home improvement project—it’s a powerful metaphor for nurturing your relationship. Just like constructing a sturdy patio, strong relationships rest on five key foundations: clear communication, shared vision, teamwork, patience, and consistent care. Each plank you lay and nail you drive mirrors the effort you invest in understanding, supporting, and growing with your partner.
Today, take the first step by discussing your shared goals and dreams—whether it’s about your home, future plans, or simply carving out quality time together. This simple conversation can set the framework for deeper connection and collaboration.
Be sure to save or bookmark this article so you can return to these insights whenever you need a reminder or a boost of inspiration. Remember, just as a well-built patio provides shelter and joy for years, the relationship skills you cultivate now will create a lasting foundation for happiness and resilience.
Embrace the process with kindness and commitment, and watch your relationship flourish into a beautiful, enduring space of love and trust. You’ve got this!