Transforming your pergola into a captivating centerpiece can elevate your outdoor space, whether you’re just starting to explore backyard design or have years of experience. A thoughtfully styled pergola not only enhances visual appeal but also creates a welcoming spot for relaxation and gatherings.
In this article, you’ll discover practical tips on selecting materials, incorporating lighting and greenery, and arranging furnishings to highlight your pergola’s unique charm. With easy-to-follow advice, you’ll gain confidence to craft a stunning focal point that reflects your personal style and makes every outdoor moment more enjoyable.
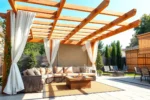
Choose Pergola Style and Size
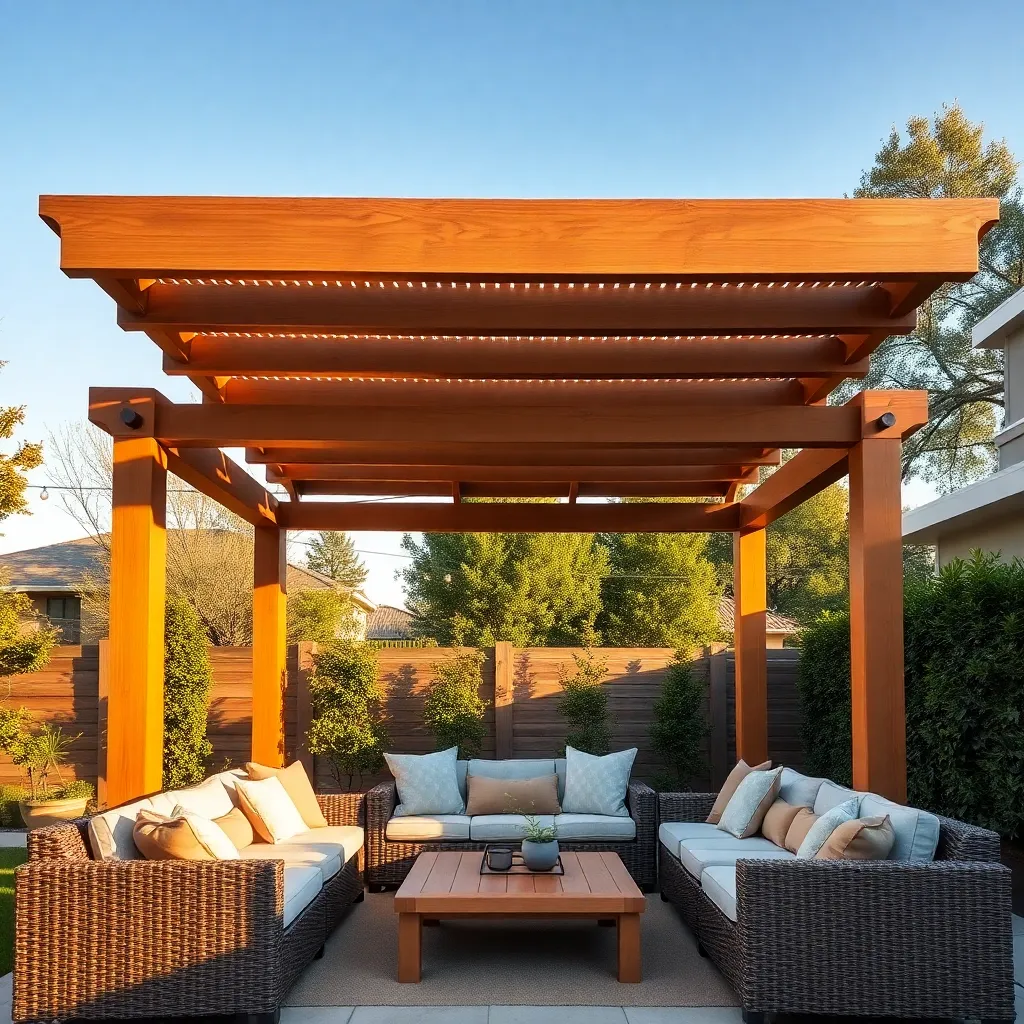
When choosing a pergola style and size, start by assessing your available outdoor space and how you plan to use the structure. A standard pergola size ranges from 10×10 to 12×16 feet, which comfortably accommodates seating or dining areas. Opt for sturdy materials like cedar or pressure-treated pine for durability and a natural look, and consider adding decorative elements such as curved rafters or lattice side panels to enhance visual appeal.
For a more advanced touch, integrate adjustable features like retractable canopies or climbing plant supports to create versatile shade and texture. Keep in mind that the pergola’s height should be at least 8 feet to maintain an open feel while ensuring structural stability. Use galvanized or stainless steel hardware to prevent rust and extend the lifespan of your outdoor shelter.
Prepare and Level Ground Area
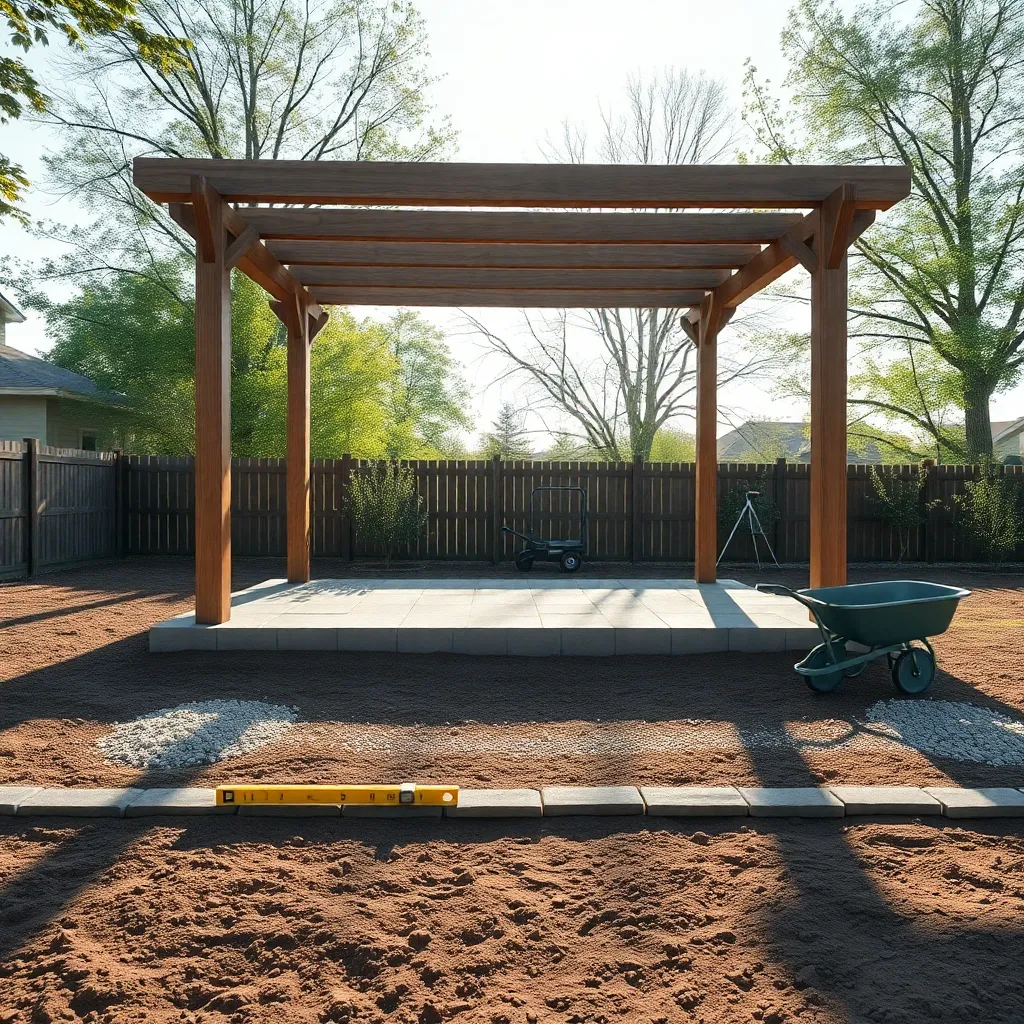

Start by clearing the pergola site of any debris, rocks, or vegetation to create a clean workspace. Use a spirit level and string lines to mark a perfectly square and level perimeter, ensuring your pergola’s base will be stable and structurally sound. For best results, aim for a flat area no more than 1 inch off level across the entire foundation.
Next, consider adding a compacted gravel or crushed stone base about 3 to 4 inches deep to improve drainage and prevent wood posts from rotting. Advanced tip: install concrete footings or piers below frost line for extra stability, especially in colder climates. This groundwork sets the stage for a durable pergola that stays beautifully aligned for years.
Install Sturdy Posts and Beams
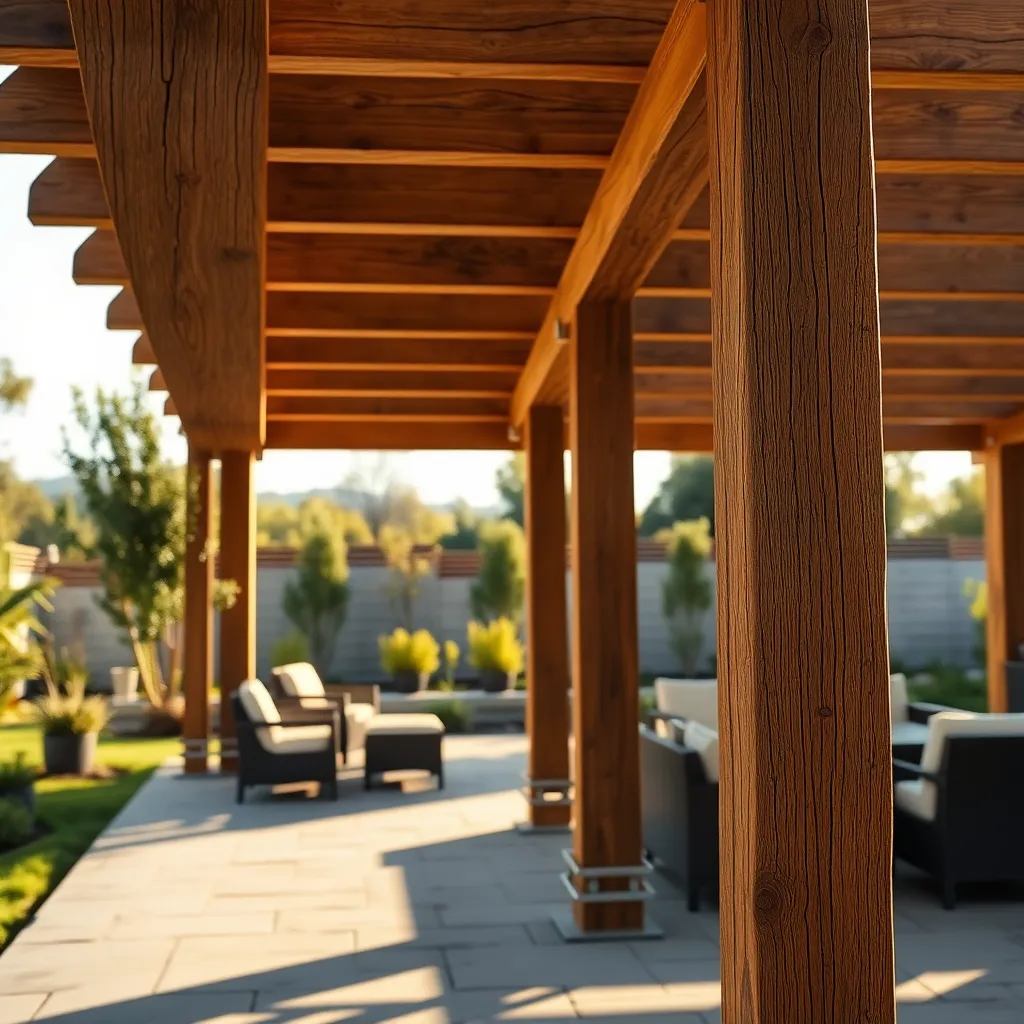
Start by choosing pressure-treated lumber or cedar posts for durability and resistance to outdoor elements. Set your posts at least 4×4 inches in thickness and ensure they are anchored securely in concrete footings that extend below the frost line to prevent shifting. Use a level and string lines to keep posts perfectly vertical and aligned, which is crucial for the structural integrity and aesthetic of your pergola.
Next, install sturdy beams that will support the rafters and add visual weight to your pergola’s design. Opt for 2×8 or 2×10 beams depending on the span and load requirements, and secure them with galvanized metal brackets or heavy-duty lag bolts for added strength. For an elevated look, consider decorative beam ends such as notches or corbels, which enhance the pergola’s character while maintaining solid support.
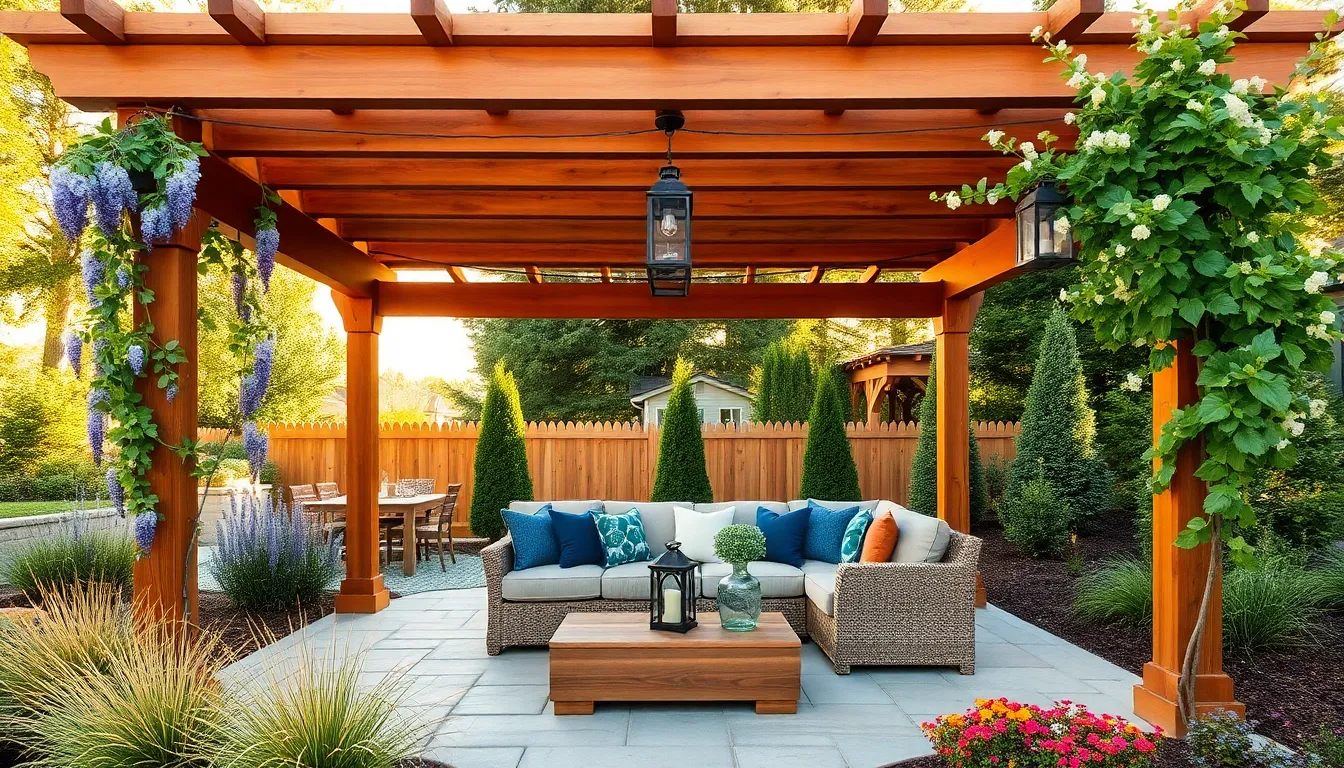
Add Decorative Lighting and Plants
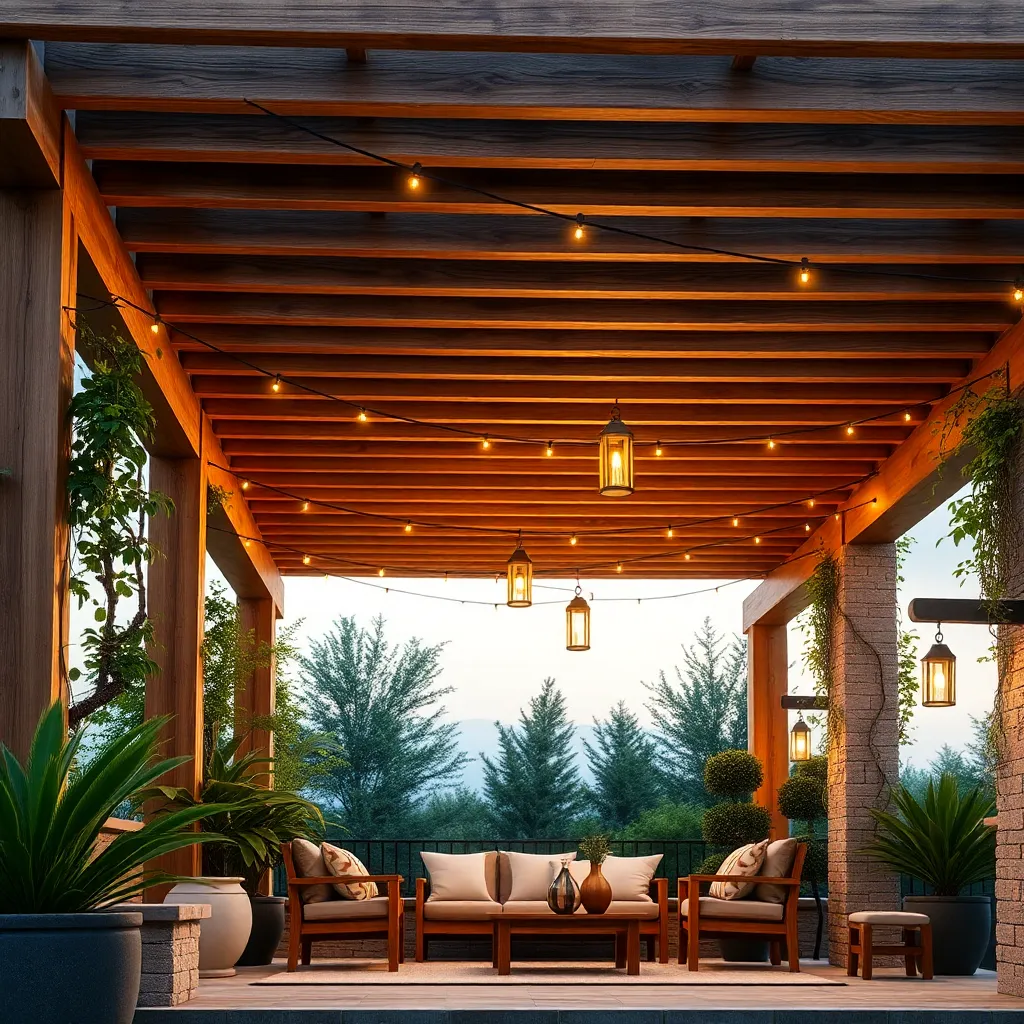
Enhance your pergola’s ambiance by incorporating weather-resistant string lights or LED lanterns along the beams and posts. Opt for warm white bulbs to create a cozy glow, and consider solar-powered options for easy installation without wiring. For a polished look, wrap lights tightly around posts or weave them through overhead slats at 6-8 inch intervals to evenly distribute illumination.
Complement lighting with lush greenery by adding climbing plants like clematis or wisteria that thrive in your climate, training them to grow up the pergola posts and across the beams. For a more advanced touch, install built-in planter boxes at the base of posts using rot-resistant cedar or composite materials, filling them with a mix of trailing vines and colorful seasonal flowers. This not only softens the structure but also creates a vibrant, inviting focal point.
Apply Finish to Enhance Appearance
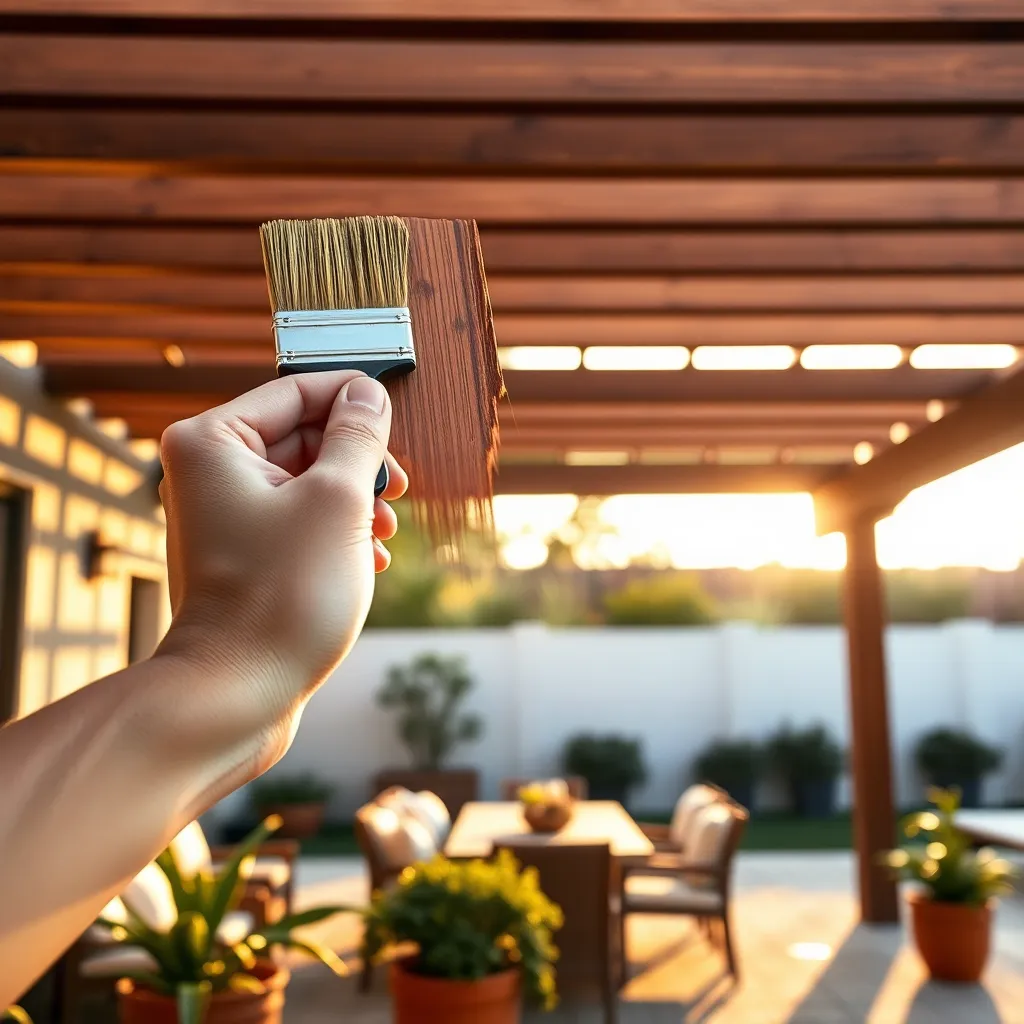
To enhance your pergola’s appearance and protect the wood, apply a high-quality exterior wood finish such as a clear sealer, stain, or paint. For a natural look, opt for a semi-transparent stain that highlights the wood grain while providing UV and moisture protection. Use a brush or sprayer to apply evenly, and follow the manufacturer’s instructions for drying times and the number of coats—typically two to three coats ensure lasting durability.
For an advanced touch, consider using finishes with fungicide or mildew-resistant properties to increase longevity in humid climates. Additionally, sanding the wood surface lightly before finishing helps the product adhere better and creates a smoother, more polished look. Remember to maintain your pergola by reapplying the finish every 2-3 years to keep it looking fresh and protected against the elements.
Conclusion: Creating Beautiful Outdoor Spaces
Transforming your pergola into a stunning focal point is much like nurturing a strong relationship—it requires attention, creativity, and care. We explored five key concepts: choosing the right design to reflect your personal style, incorporating lighting to set the perfect mood, adding comfortable seating for connection, using greenery to bring life and warmth, and maintaining your space to keep the beauty lasting. Your next step? Take a moment today to visualize how you want your pergola to feel—cozy, vibrant, or serene—and jot down one idea you can start implementing this week. Remember, just as relationships thrive with ongoing effort, your outdoor space will blossom with thoughtful touches. Bookmark this article now so you can revisit these tips whenever you need inspiration. By investing time in your pergola—and by extension, your relationships—you’re creating a welcoming haven where memories flourish and love grows. Embrace this journey with confidence, knowing that every small step brings you closer to lasting beauty and meaningful connection.