Transforming your backyard into a peaceful sanctuary doesn’t require a sprawling renovation—sometimes, a well-designed pergola is all it takes. Whether you’re just starting to explore outdoor living or looking to elevate your existing space, a pergola offers a stylish way to add privacy and character to your retreat.
In this article, you’ll discover practical tips for selecting the perfect pergola design and materials that suit your lifestyle and climate. From clever privacy solutions to thoughtful decor ideas, we’ll guide you through creating an inviting outdoor haven that feels truly your own.
Choose Pergola Style and Dimensions
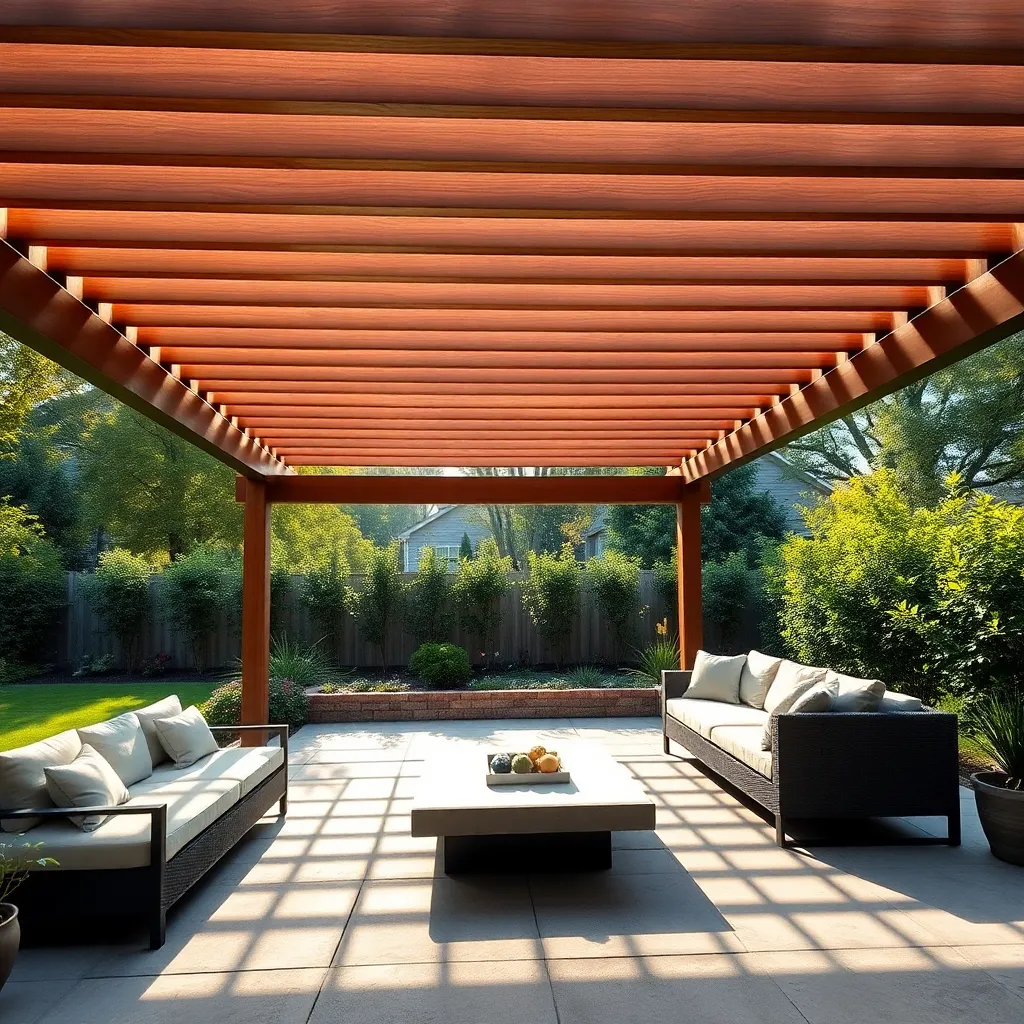
When choosing your pergola style, consider whether you want a traditional, rustic look with wood beams or a sleek, modern design using metal or vinyl. Standard pergola dimensions typically range from 8×8 to 12×16 feet, providing enough space for seating or dining areas without overwhelming your yard. For advanced customization, think about adjustable louvered roofs or integrated lighting to enhance comfort and usability.
Start by measuring the available outdoor space and envisioning how you’ll use the pergola to ensure it fits both physically and functionally. Opt for durable materials like cedar or redwood for natural resistance to weather, or powder-coated aluminum for low maintenance. Remember, anchoring your pergola securely with concrete footings will increase stability and longevity, especially in windy areas.
Measure and Mark Installation Area
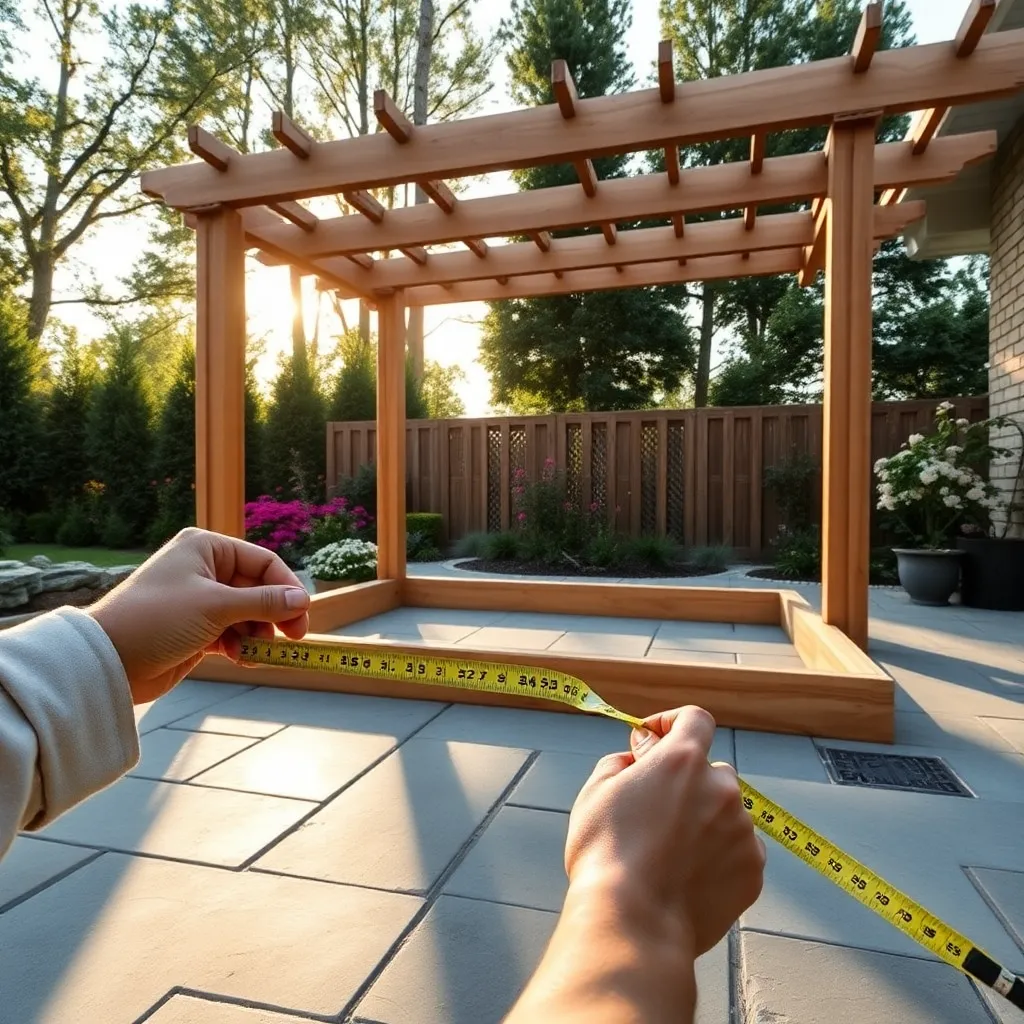

Start by clearing the installation area of debris and vegetation to ensure a flat, stable surface. Use a tape measure and marking paint or stakes to outline the pergola’s exact footprint, paying close attention to the chosen dimensions and ensuring sufficient space for foot traffic around the structure. Double-check measurements diagonally to confirm the layout is square before proceeding.
For added precision, consider using a builder’s square or string lines stretched between stakes to mark straight edges and corners. Advanced tip: account for any slope by marking high and low points to adjust post heights accordingly, ensuring your pergola sits level and stable throughout its lifespan.
Secure Posts into Ground Foundation
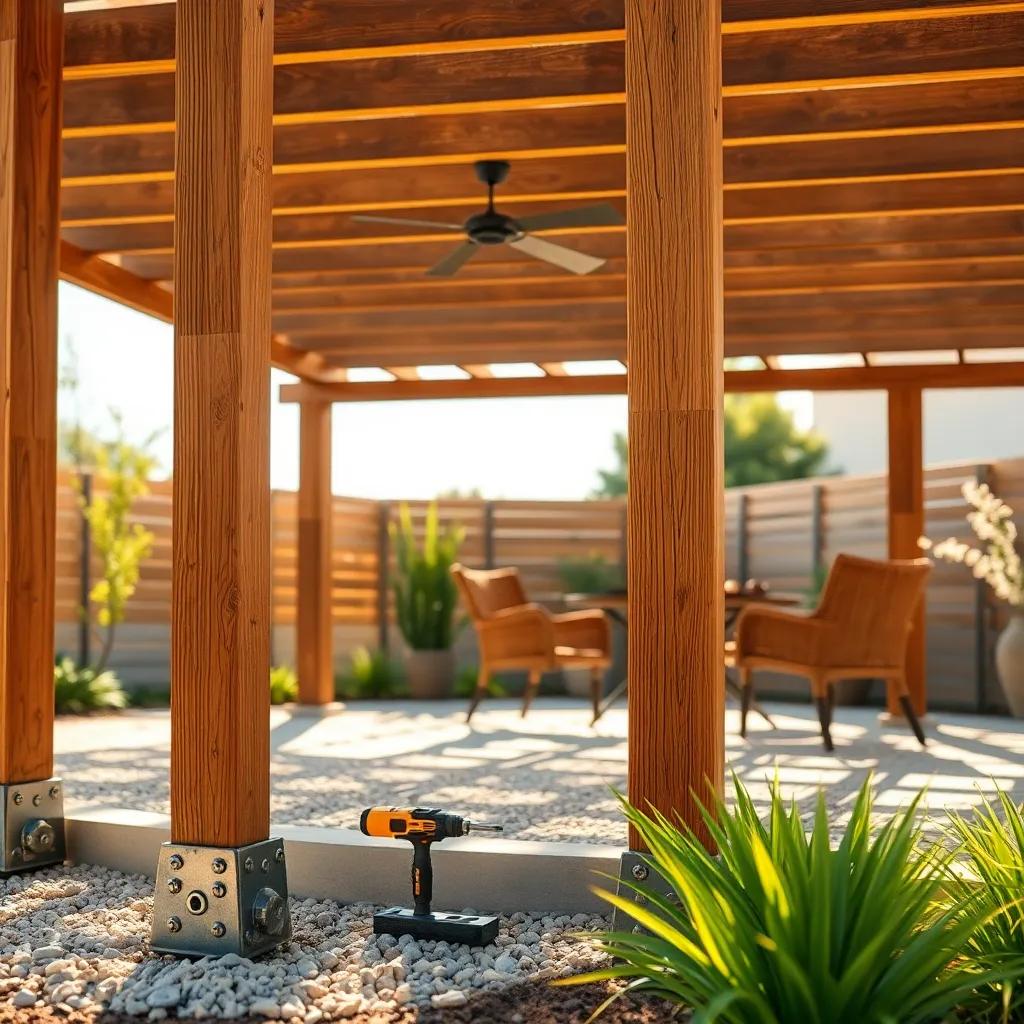
Start by digging post holes at least 24 inches deep to ensure stability, especially if you live in areas with frost or shifting soil. Use a level and string lines to keep your posts perfectly vertical and aligned, which is crucial for a structurally sound pergola that will last for years.
For securing the posts, pour quick-setting concrete into the holes around treated lumber or steel posts to create a solid foundation. Advanced gardeners can add a gravel base below the concrete for improved drainage, preventing rot and extending the life of the pergola’s support structure.

Assemble and Attach Pergola Beams
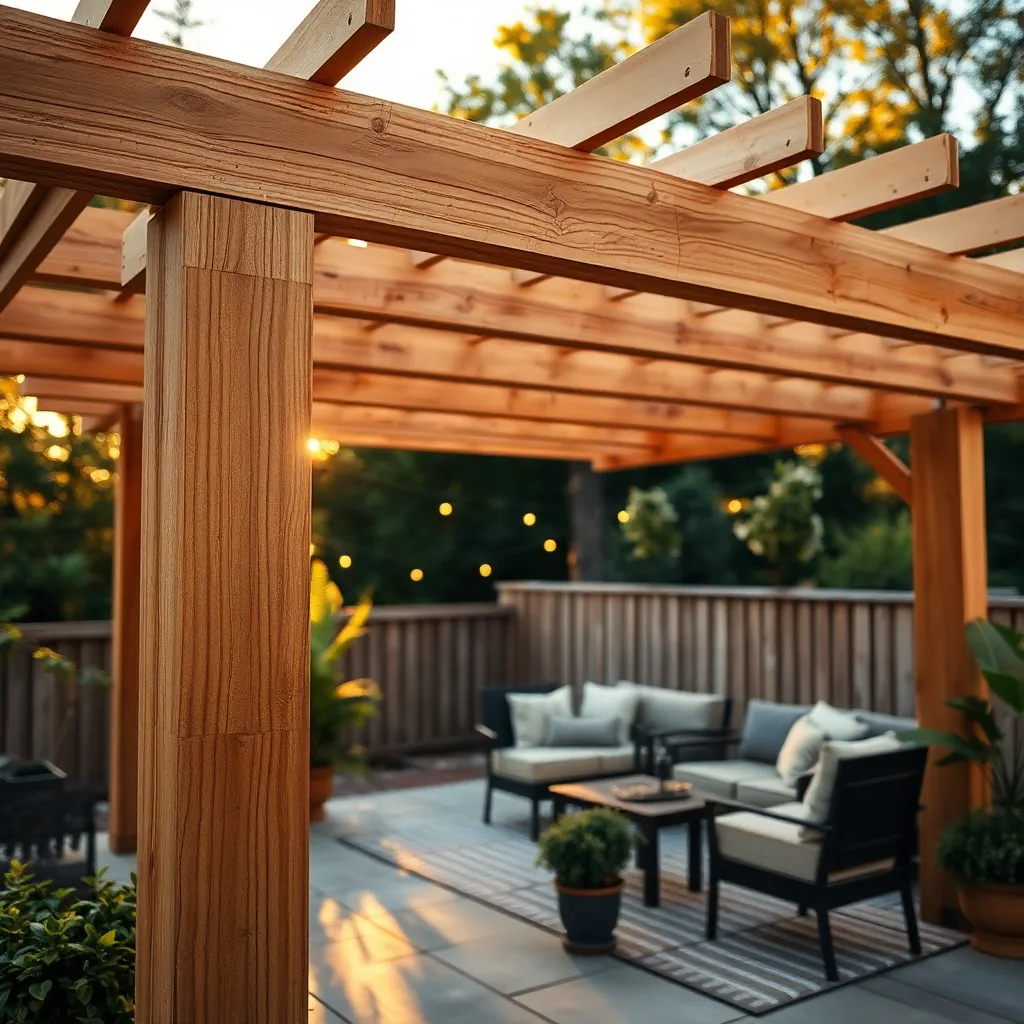
Start by selecting sturdy, weather-resistant lumber such as cedar or pressure-treated pine for your pergola beams to ensure long-term durability. Cut the beams to fit the dimensions between your secured posts, typically spanning 8 to 12 feet, and use galvanized screws or metal brackets to attach them firmly to the posts, preventing movement and enhancing stability.
For a polished look and added shade, consider spacing your beams evenly about 12 to 18 inches apart and adding decorative notches or bevels to the ends before assembly. If you want to create a more private retreat, you can also install cross rafters or lattice panels atop the beams to support climbing plants or outdoor curtains, adding both style and functionality to your pergola.
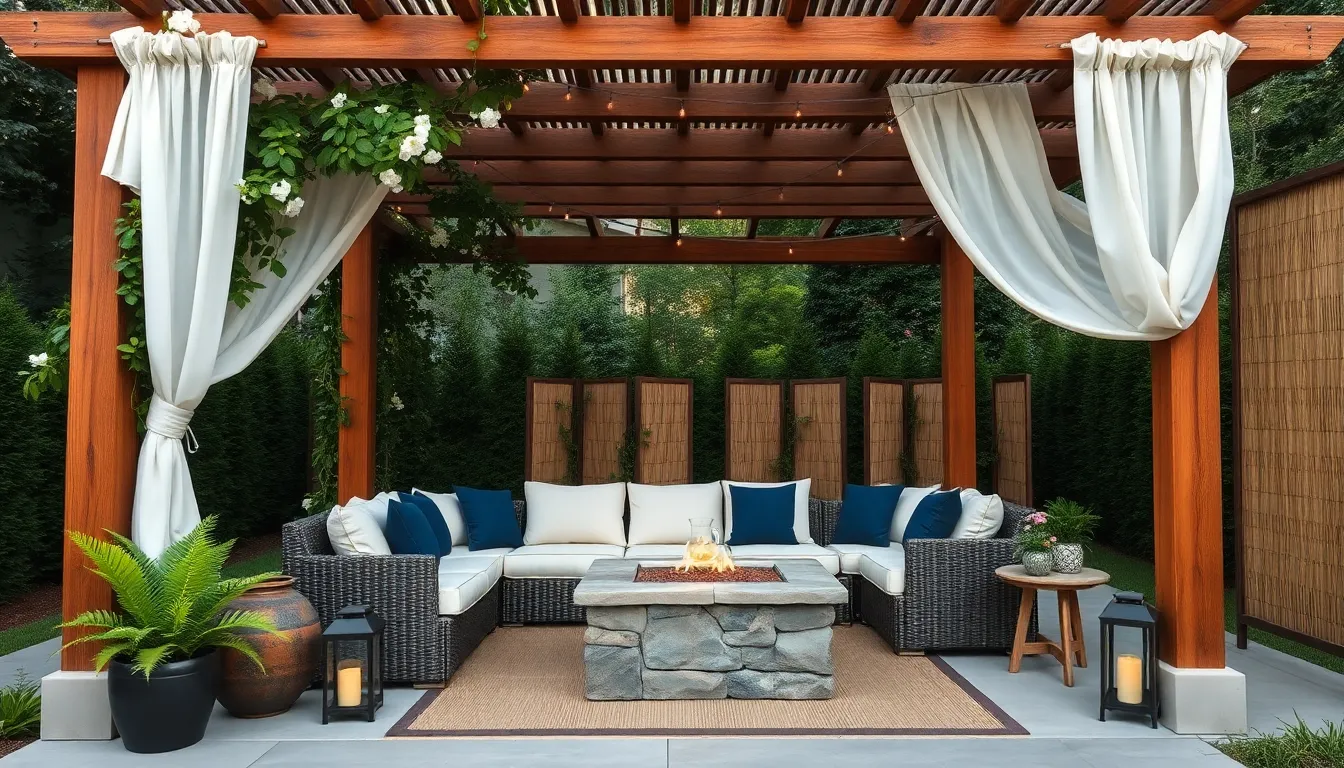
Add Privacy Screens and Greenery
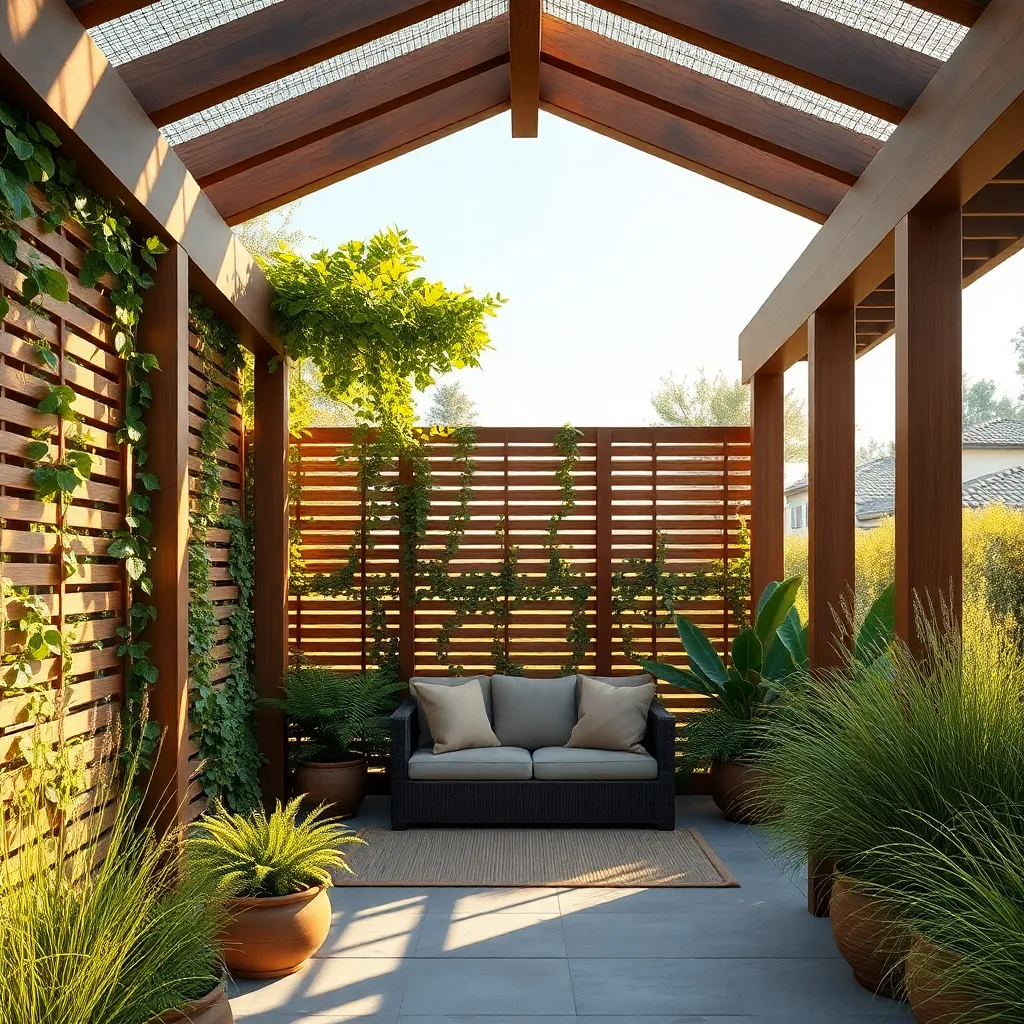
To enhance privacy around your pergola, install privacy screens made from durable materials like cedar, bamboo, or weather-resistant lattice panels. These can be attached directly to the pergola posts or freestanding nearby, typically standing 6 to 8 feet tall to block unwanted views effectively. For a seamless look, consider painting or staining the screens to match your pergola’s finish.
Incorporating greenery not only softens the structure but also adds natural privacy and shade. Train climbing plants such as clematis, wisteria, or climbing roses along the pergola beams and screens, using trellis wires or garden ties for support. For advanced gardeners, mixing evergreen vines with seasonal flowering varieties can create year-round coverage and visual interest.
Conclusion: Creating Beautiful Outdoor Spaces
Creating a private outdoor retreat with a pergola isn’t just about enhancing your space—it’s about nurturing the connection you share with your loved ones. Throughout this article, we explored five key concepts: designing with intention to foster intimacy, choosing elements that encourage relaxation together, incorporating privacy for meaningful conversations, personalizing your space to reflect your unique bond, and maintaining the retreat as a shared sanctuary. Now, take a simple but powerful next step: sketch out a basic plan of your ideal pergola space, focusing on what will make you and your partner feel most connected and comfortable. Remember, this article is a valuable guide—save or bookmark it now so you can revisit these ideas anytime inspiration strikes. By investing in a shared outdoor haven, you’re planting the seeds for deeper communication, trust, and joy in your relationship. Embrace this journey with openness, and watch your connection flourish under the shelter of your personalized retreat. Your relationship deserves a space as special as the love you nurture—start creating it today!