Step into the world of outdoor elegance with our guide, “20 Unique Patio Ceiling Ideas,” where both beginners and seasoned homeowners will discover innovative ways to elevate their outdoor living spaces. Whether you’re dreaming of a cozy retreat or a vibrant gathering spot, these creative ceiling options are your ticket to a stunning patio transformation that blends beauty with functionality.
Imagine the joy of sipping your morning coffee beneath a beautifully crafted ceiling or hosting an evening soirée under a canopy of style. With our carefully curated list, you’ll gain practical insights and inspiration to enhance your outdoor sanctuary, ensuring it’s both inviting and uniquely yours. Get ready to feel empowered and confident as you transform your patio into a captivating oasis that reflects your personality and brings endless enjoyment.
Incorporate Reclaimed Wood Panels
Incorporating reclaimed wood panels into your patio ceiling not only brings a rustic charm but also offers a sustainable choice for eco-conscious homeowners. Begin by sourcing quality reclaimed wood from local salvage yards or online marketplaces. Ensure the wood is properly treated to withstand outdoor conditions. For a beginner-friendly approach, consider using tongue-and-groove panels, which are easier to install and provide a seamless finish.
For those with advanced DIY skills, experiment with different wood finishes to create unique patterns or textures. You might use a combination of stains to highlight the wood’s natural grain, or even alternate between horizontal and vertical paneling for a modern twist. To enhance durability, apply a UV-protective sealant, which will help preserve the wood’s appearance against sun exposure. This method not only extends the life of your ceiling but also adds a distinctive touch to your outdoor space.
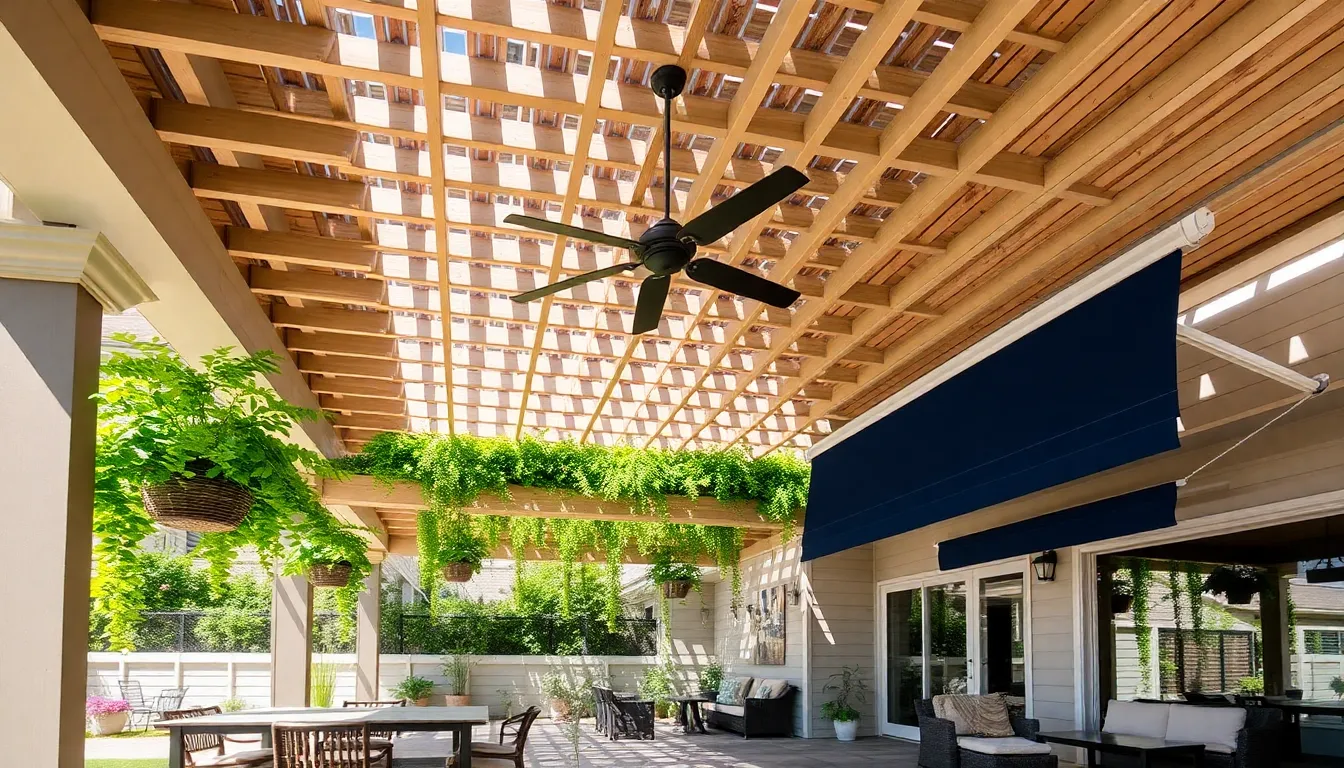
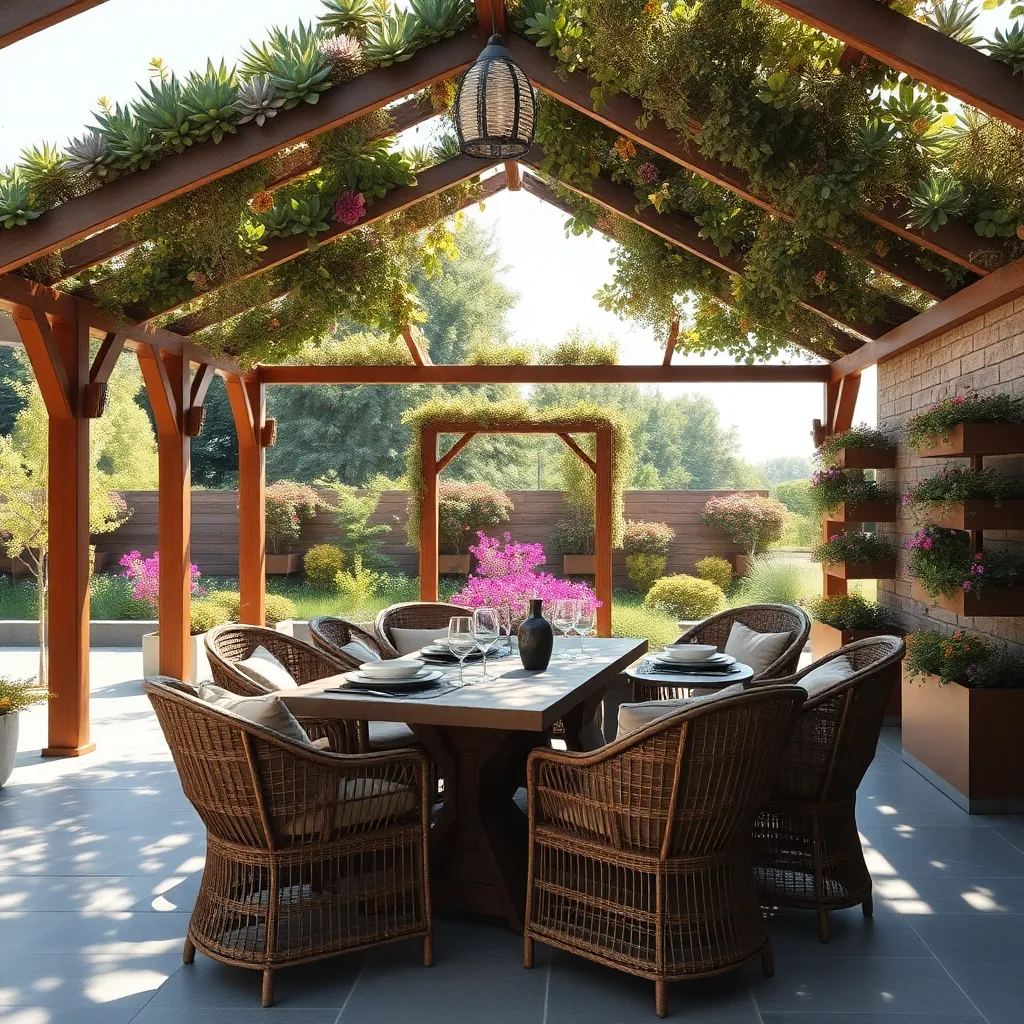
Install Suspended Garden Planters
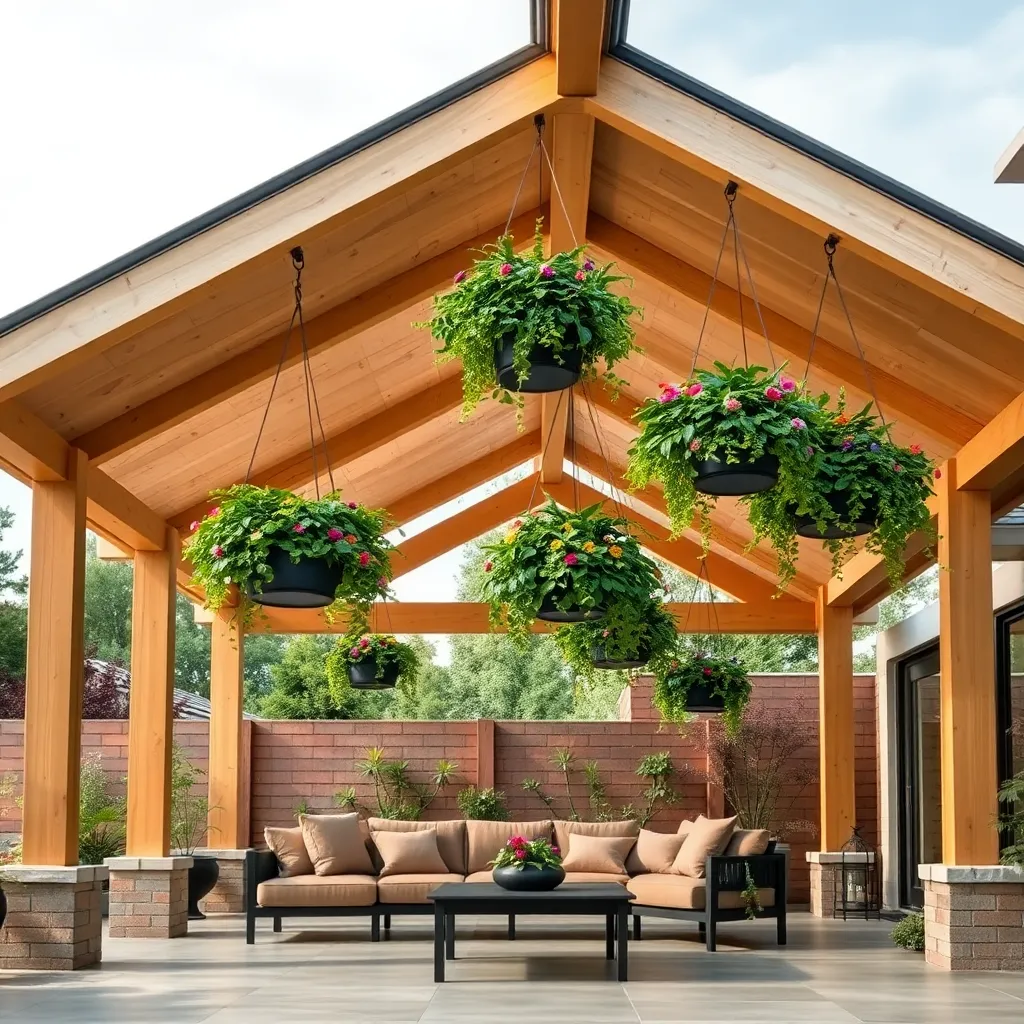
Transform your patio ceiling into a lush aerial garden by installing suspended garden planters. These hanging planters allow you to utilize vertical space creatively, making them ideal for small patios or those looking to add a green touch without sacrificing floor space. Choose lightweight materials like wicker, metal, or sturdy plastic to ensure they hang securely from the ceiling. For beginners, start with easy-care plants like spider plants or pothos, which thrive in various conditions.
To hang your planters safely, use durable, weather-resistant hooks and chains that match your patio’s style. Ensure the ceiling structure can support the additional weight by checking for sturdy beams or joists to anchor the hooks securely. For an advanced touch, consider incorporating a drip irrigation system to keep your plants hydrated with minimal maintenance.
- Consider planter sizes based on your ceiling height and desired visual impact.
- Regularly check the stability of your setup to prevent accidents.
With the right setup, your patio will become an inviting oasis, perfect for relaxation and entertaining.
Use Bamboo for Tropical Vibes
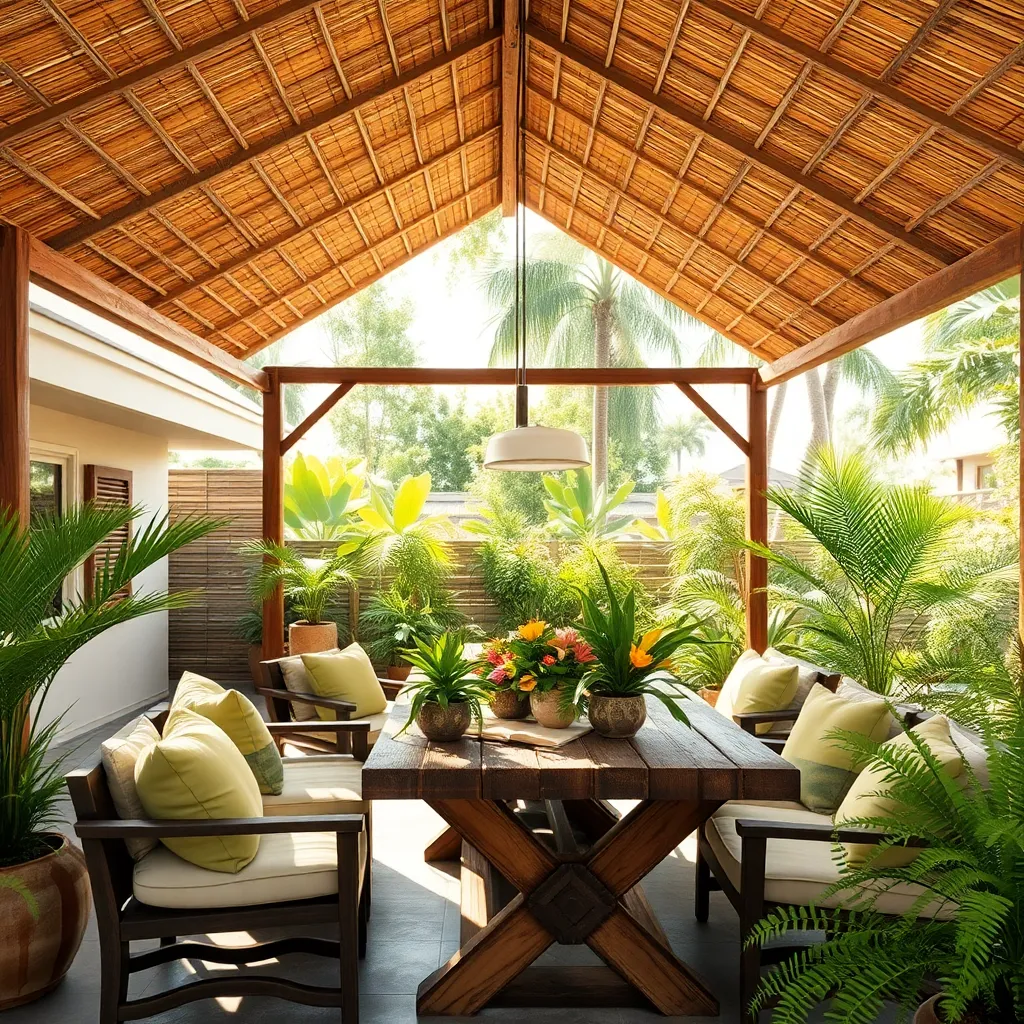
Using bamboo for your patio ceiling can instantly create a lush, tropical vibe that’s both inviting and stylish. Start by selecting sturdy bamboo poles, ideally between 2 to 4 inches in diameter, to ensure durability. These can be installed either parallel or crisscrossed across the ceiling’s framework for a dynamic look. Secure the bamboo with galvanized screws or stainless steel fixtures to withstand outdoor conditions.
For added flair, consider incorporating bamboo matting between the poles to enhance the tropical feel and provide additional shade. Choose mats of high-quality, weather-resistant bamboo to ensure longevity. As an advanced tip, treat the bamboo with a clear sealant to protect against moisture and UV rays, preserving its natural beauty. This setup not only elevates the aesthetic appeal but also creates a serene retreat right in your backyard.
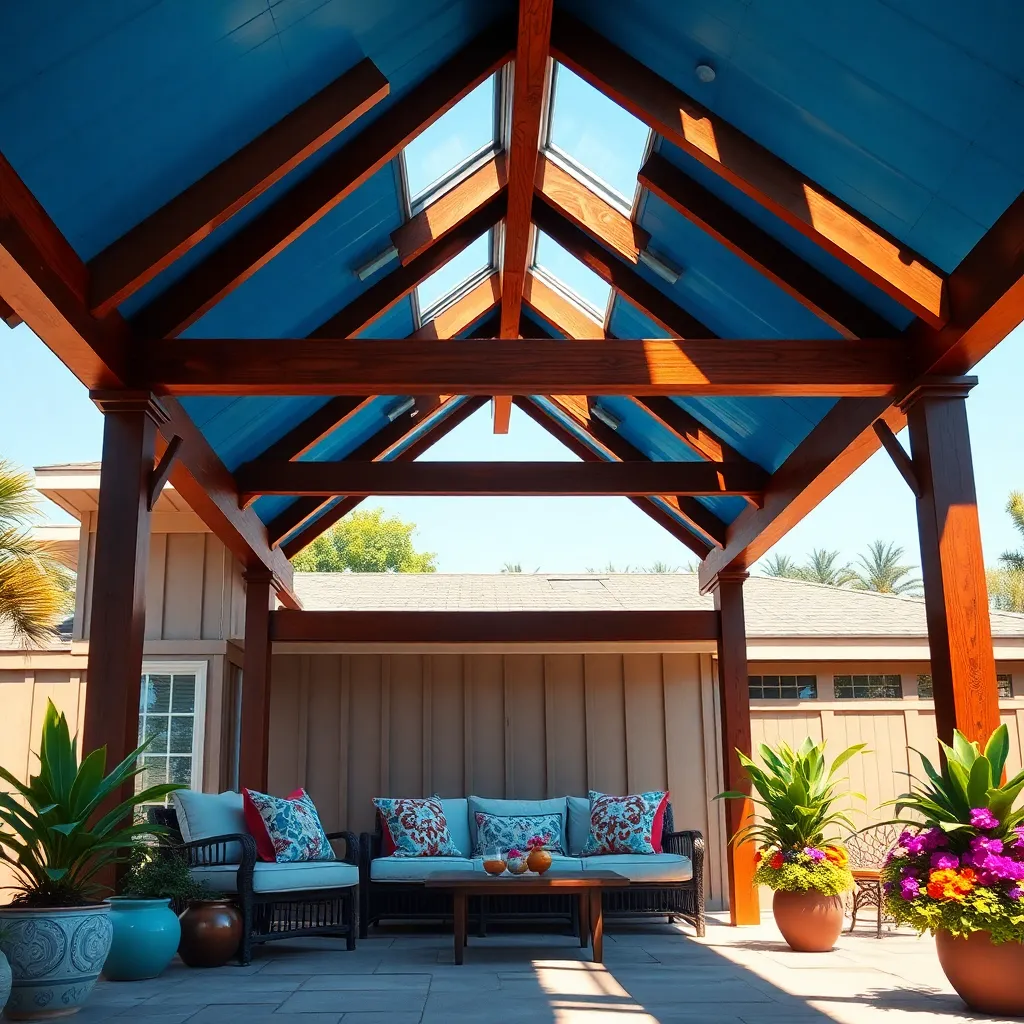
Add Skylights for Natural Light
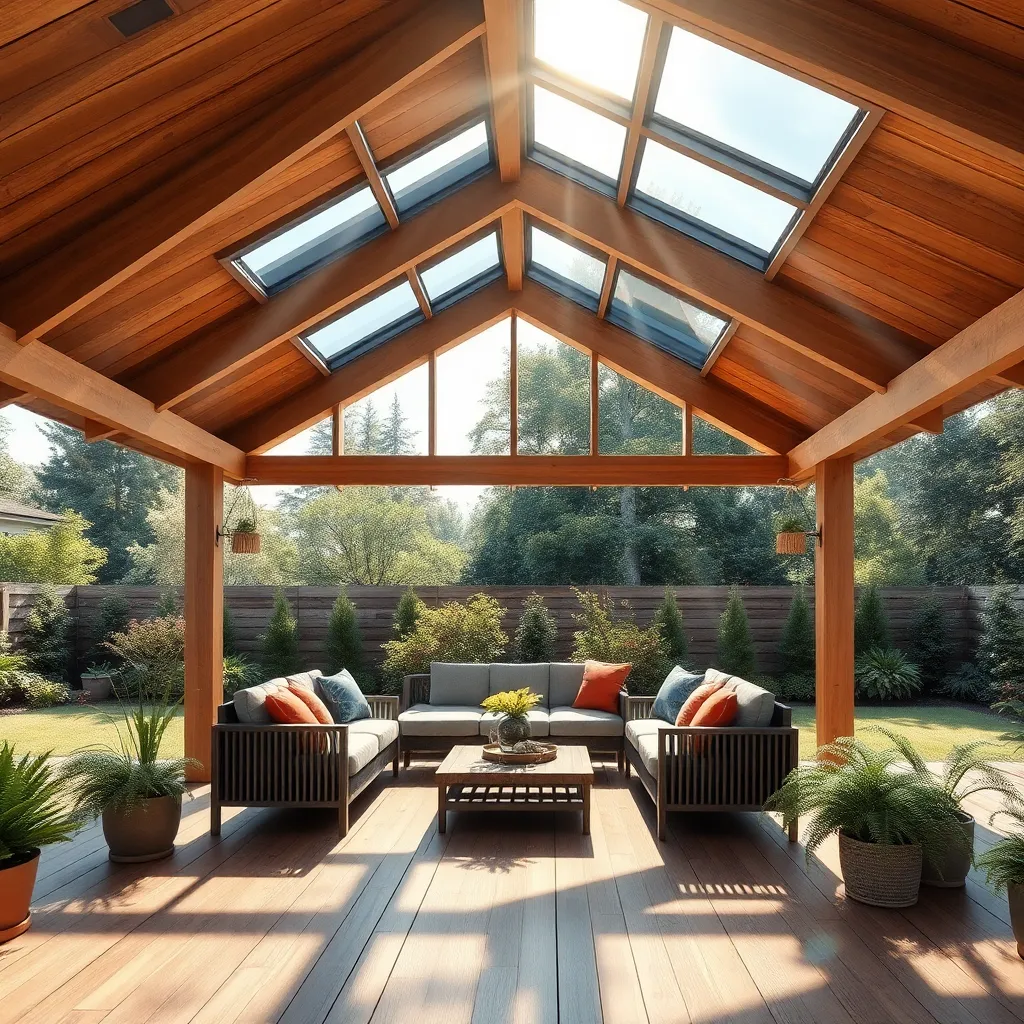
Incorporating skylights into your patio ceiling is a brilliant way to enhance natural lighting and create an inviting atmosphere. Opt for durable materials like tempered glass or polycarbonate panels, which are both weather-resistant and provide excellent insulation. For beginners, consider starting with a single, strategically placed skylight to test its impact before committing to a larger installation. This not only brightens the space but also allows you to enjoy stargazing or cloud watching right from your patio.
For those looking to add a touch of sophistication, consider integrating multiple smaller skylights in a grid pattern for a modern look. Ensure adequate support by consulting with a structural engineer if you plan to alter existing beams or rafters. Advanced DIYers can explore options like motorized skylights that open for ventilation, combining form and function seamlessly. Remember to include UV-protective coatings on your skylights to shield your furniture and plants from potential sun damage.
Paint with Weatherproof Colors
Transform your patio ceiling into a vibrant outdoor focal point by using weatherproof paint designed specifically for exterior use. This type of paint is formulated to withstand harsh elements, ensuring your colors last through rain, sun, and wind. When choosing your palette, consider light-reflective colors that can enhance the brightness of your space—ideal for those who want to maximize natural light. Opt for high-quality acrylic latex paint, which provides excellent adhesion and flexibility, making it perfect for wood, metal, or plastic surfaces.
For those looking to add a touch of creativity, consider incorporating stencils or geometric patterns to give your ceiling a unique flair. Advanced DIYers might experiment with ombre effects or color blocking to create a dynamic visual impact. Before you start painting, ensure the surface is clean and dry, and apply a primer if required for better paint adherence. Don’t forget to use a UV-protective topcoat to extend the vibrancy of your colors and protect your investment. With these steps, your patio ceiling will not only withstand the elements but also become an enduring expression of your style.
Create a Starry Night Effect
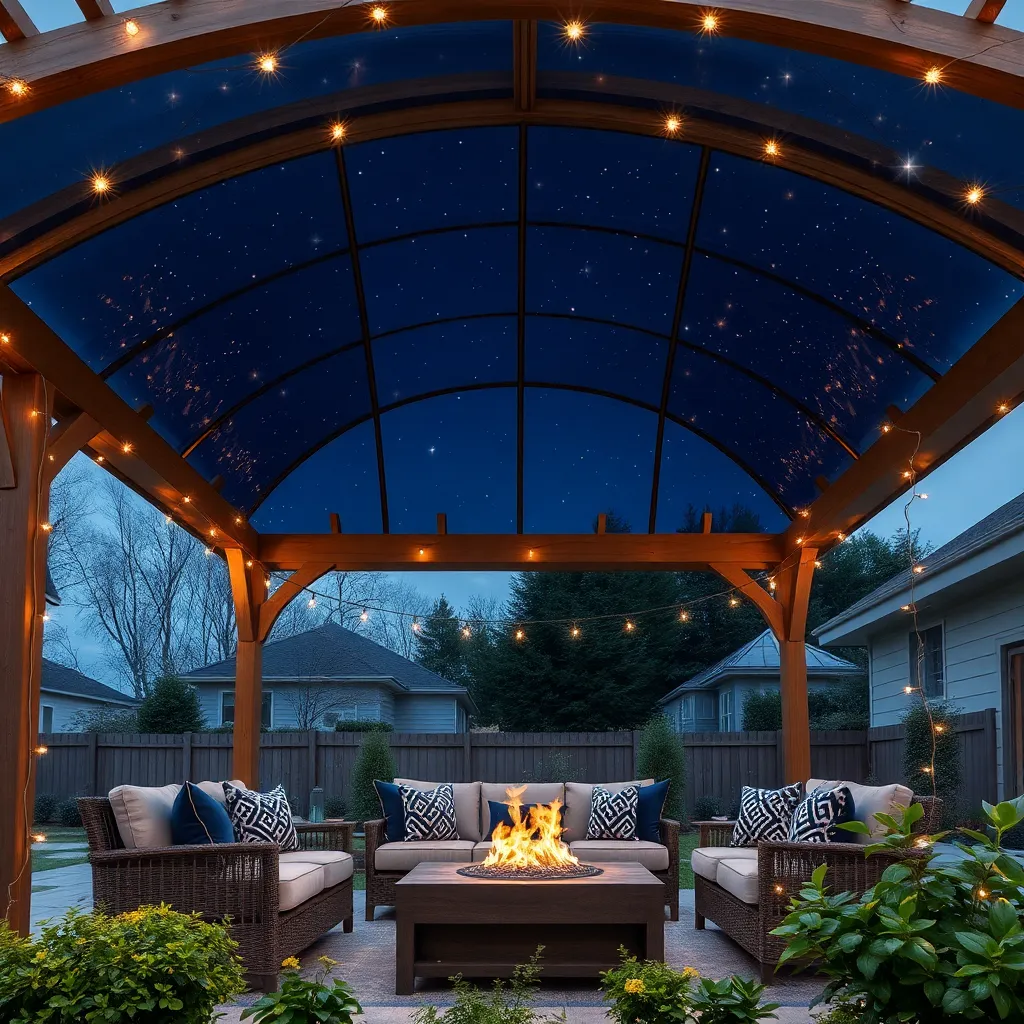
Transform your patio ceiling into a mesmerizing starry night by installing a ceiling-mounted LED light system. Opt for fiber optic lights that mimic the twinkling effect of stars, providing a magical ambiance. Beginners can start with a basic kit, which usually includes a light source and easy-to-follow instructions. For a more advanced setup, consider custom designs that integrate different sizes and colors of lights to simulate constellations or even galaxies.
For the best results, choose waterproof and weather-resistant LED systems specifically designed for outdoor use. Secure the light fibers to a plywood ceiling or directly onto a weatherproof fabric stretched across a pergola frame. Spacing the lights evenly across the surface will ensure a balanced distribution of light, while varying the fiber lengths can add depth to your starry sky. Finish the look with dark, matte paint on the ceiling to enhance the contrast and make the lights pop, creating a cozy outdoor retreat perfect for any evening gathering.
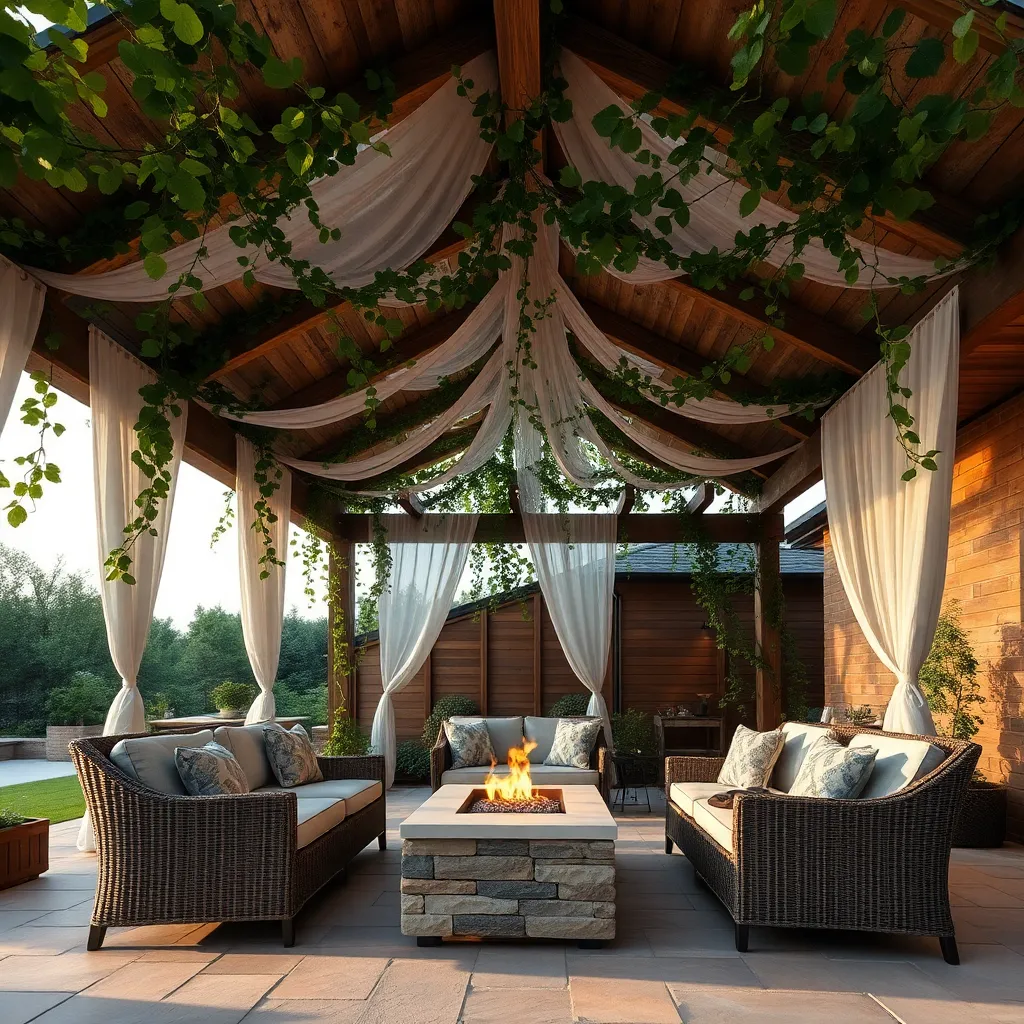
Hang Artistic Fabric Drapes

Transform your patio into a bohemian retreat by hanging artistic fabric drapes. Choose weather-resistant materials like outdoor polyester or acrylic fabric to ensure durability against the elements. Begin by selecting vibrant hues or intricate patterns that complement your outdoor décor. Secure the drapes with sturdy hooks or rods attached to the ceiling, allowing them to flow freely or be tied back for a more structured look. For beginners, consider pre-made curtain panels that come with grommets for easy installation.
Advanced decorators can experiment with layering multiple fabrics to create depth and visual interest. Incorporating sheer fabrics like voile can add a touch of elegance and softness. For an added decorative touch, use tiebacks made of natural materials such as jute or add decorative tassels. Ensure that the drapes are long enough to lightly touch the floor for a seamless appearance, typically measuring about 84 to 96 inches in length. This simple yet effective design choice can instantly elevate the ambiance of your patio, making it a cozy and inviting outdoor space.
Employ Eco-Friendly Green Roofing
Transform your patio into a sustainable oasis by installing a green roof. This eco-friendly option not only enhances the aesthetic appeal of your outdoor space but also provides excellent insulation. To start, ensure your patio structure can support the added weight of soil and plants. Use lightweight growing mediums like expanded clay or perlite to minimize the load. Beginners should consider hardy, low-maintenance plants such as sedums or native grasses, which thrive with minimal care.
For a more advanced project, create a layered system with drainage boards and moisture retention mats to promote healthy plant growth and manage water runoff. Incorporate a variety of plant species to boost biodiversity and attract pollinators. Keep in mind that green roofing requires periodic maintenance, such as weeding and irrigation during dry spells. By integrating these elements, you can craft a lush, living ceiling that offers natural beauty and environmental benefits year-round.
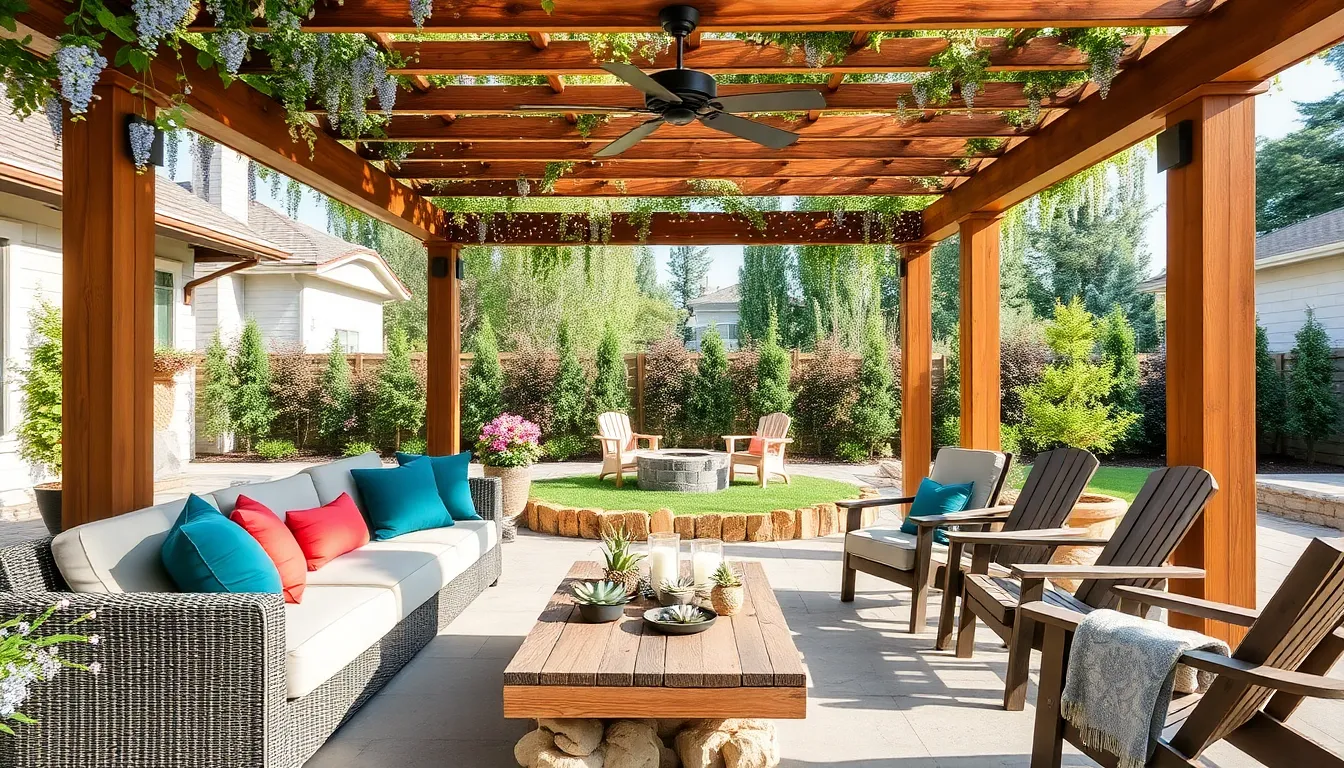
Integrate Ceiling Fans for Comfort
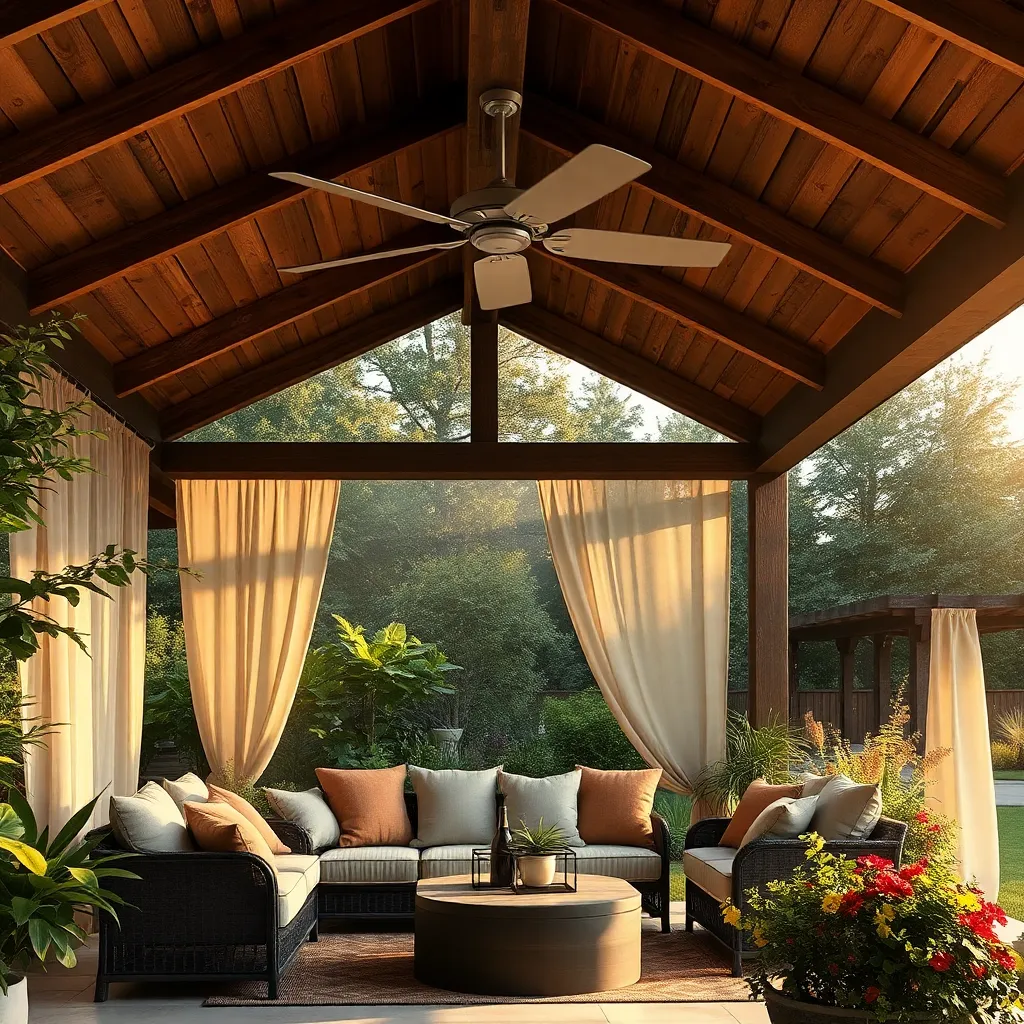
Integrating ceiling fans into your patio shelter can significantly enhance comfort by providing a refreshing breeze during warm months. When choosing a fan, consider materials that withstand outdoor conditions, such as stainless steel or weather-resistant plastics. Ensure the fan is rated for outdoor use and matches your patio’s size—larger fans with longer blades are ideal for expansive areas, while smaller models suit intimate settings. For optimal performance, install the fan at least 8-9 feet above the floor to maximize airflow.
For those looking to level up their patio experience, consider installing fans with additional features like integrated lighting or remote controls. These options not only add convenience but also enhance the overall ambiance of your outdoor space. To ensure energy efficiency, opt for Energy Star-rated fans, which consume less power and help reduce utility bills. Lastly, don’t forget to match the fan’s design with your patio’s aesthetic, whether it’s rustic, modern, or traditional, to create a cohesive and inviting environment.
Utilize Metal Sheets for Modern Look
For a sleek and modern patio ceiling, consider utilizing metal sheets. Galvanized steel or aluminum sheets are excellent choices due to their durability and resistance to weather elements. These materials not only provide a contemporary aesthetic but also require minimal maintenance. Begin by measuring your patio space to determine the number of sheets you’ll need; typically, 4×8 foot sheets are a standard size. Ensure that the metal sheets are securely fastened to a wooden or metal frame to prevent any movement or noise during windy conditions.
Incorporating metal sheets into your patio design allows for creative customization. Experiment with finishes such as brushed, polished, or even painted options to match your existing outdoor decor. For a more advanced touch, you can integrate recessed lighting between the sheets for a sophisticated ambiance. If you’re new to DIY projects, consult with a professional to ensure proper installation and safety. Investing in high-quality materials and taking the time to plan your design will ensure your patio remains a stunning and functional outdoor space for years to come.
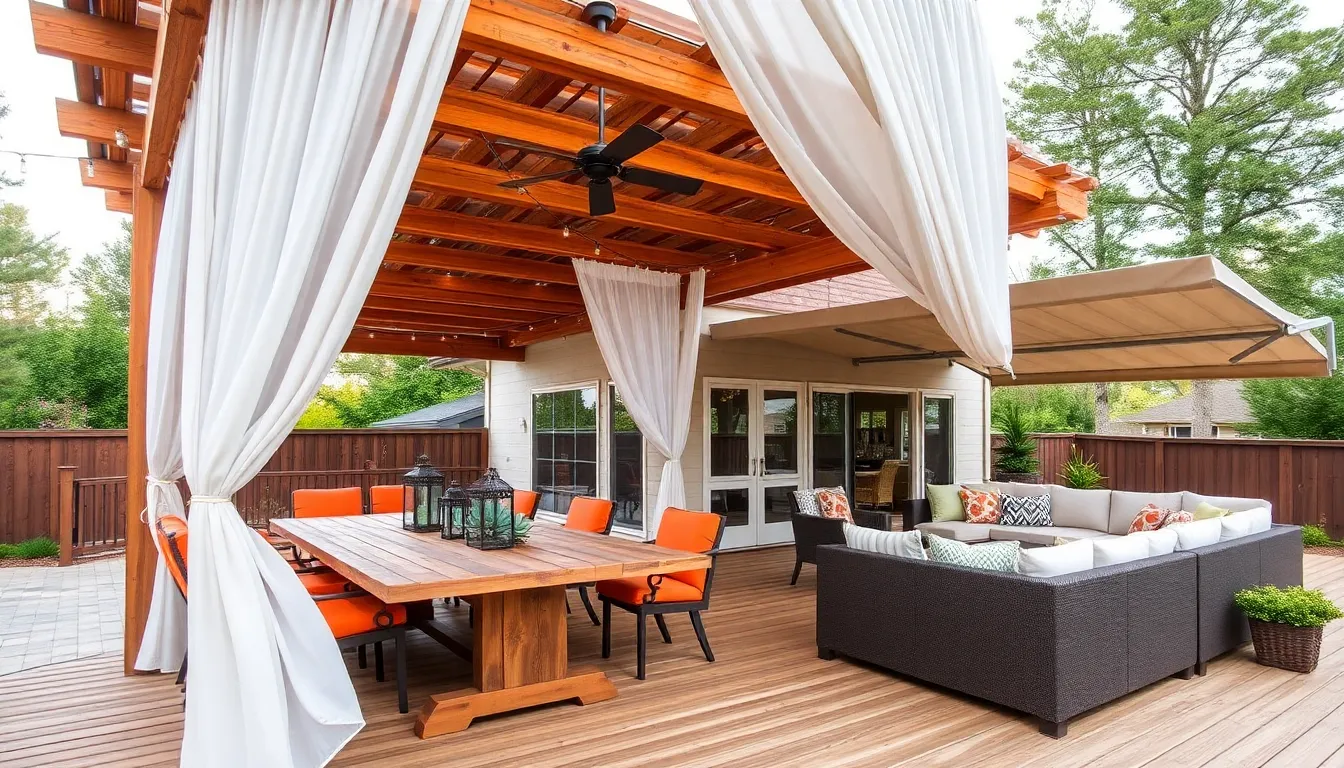
Install Retractable Awnings
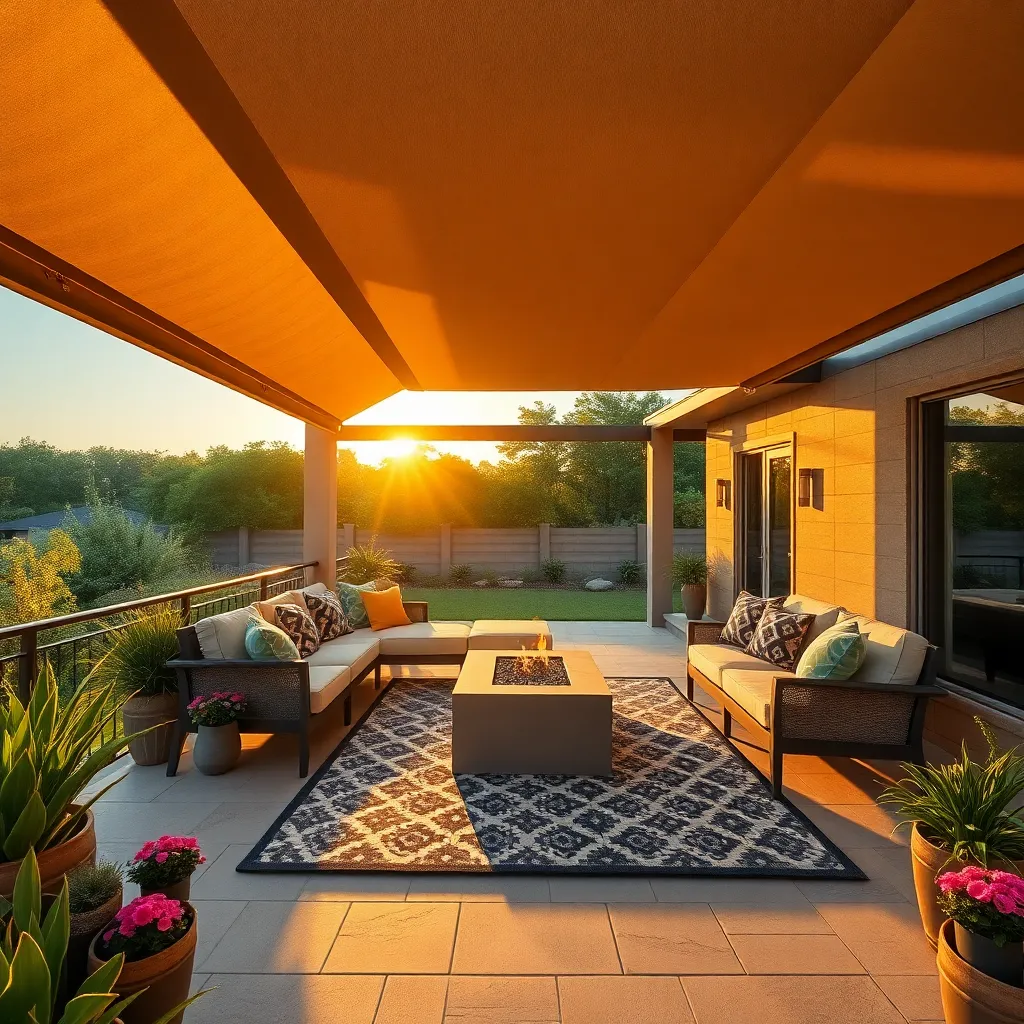
For a versatile and customizable patio ceiling option, consider installing retractable awnings. These awnings provide the ability to control sunlight exposure, offering shade when needed and allowing sunshine through on cooler days. Choose from durable materials like acrylic or polyester that are resistant to UV rays and weather conditions, ensuring longevity and minimal maintenance. Installation involves securing brackets to the exterior wall, but for a seamless experience, professional installation is recommended to ensure proper alignment and operation.
Homeowners can enhance their outdoor spaces by selecting awnings that complement their home’s style. Opt for neutral colors or stripes for a classic look, or bold patterns to make a statement. Advanced users might consider motorized awnings with remote controls or smart home integration for convenience. For best results, measure the patio area accurately to ensure the awning provides adequate coverage. This adaptable solution not only boosts comfort but also adds a touch of elegance to your patio.
Create Patterns with Stenciled Designs
Infuse your patio ceiling with personal charm by using stenciled designs. Start by selecting durable, weather-resistant stencils and exterior-grade paint suitable for your ceiling material, whether it’s wood, metal, or PVC. Choose a motif that complements your outdoor decor, such as geometric patterns or natural elements like leaves. With a basic stencil kit and foam rollers, even beginners can achieve stunning results. To begin, clean the ceiling surface thoroughly and use painter’s tape to secure the stencil, ensuring crisp, clean lines.
For more intricate designs, consider layering multiple stencils or using a variety of colors to add depth and interest. Advanced gardeners can experiment with custom stencils for a truly unique touch. Seal your artwork with a clear, waterproof sealant to protect it from the elements and extend its lifespan. Regular maintenance, like gentle cleaning and touch-ups, will keep your stenciled ceiling looking fresh for years to come. This creative project not only enhances your patio’s aesthetic but also provides a rewarding DIY experience.
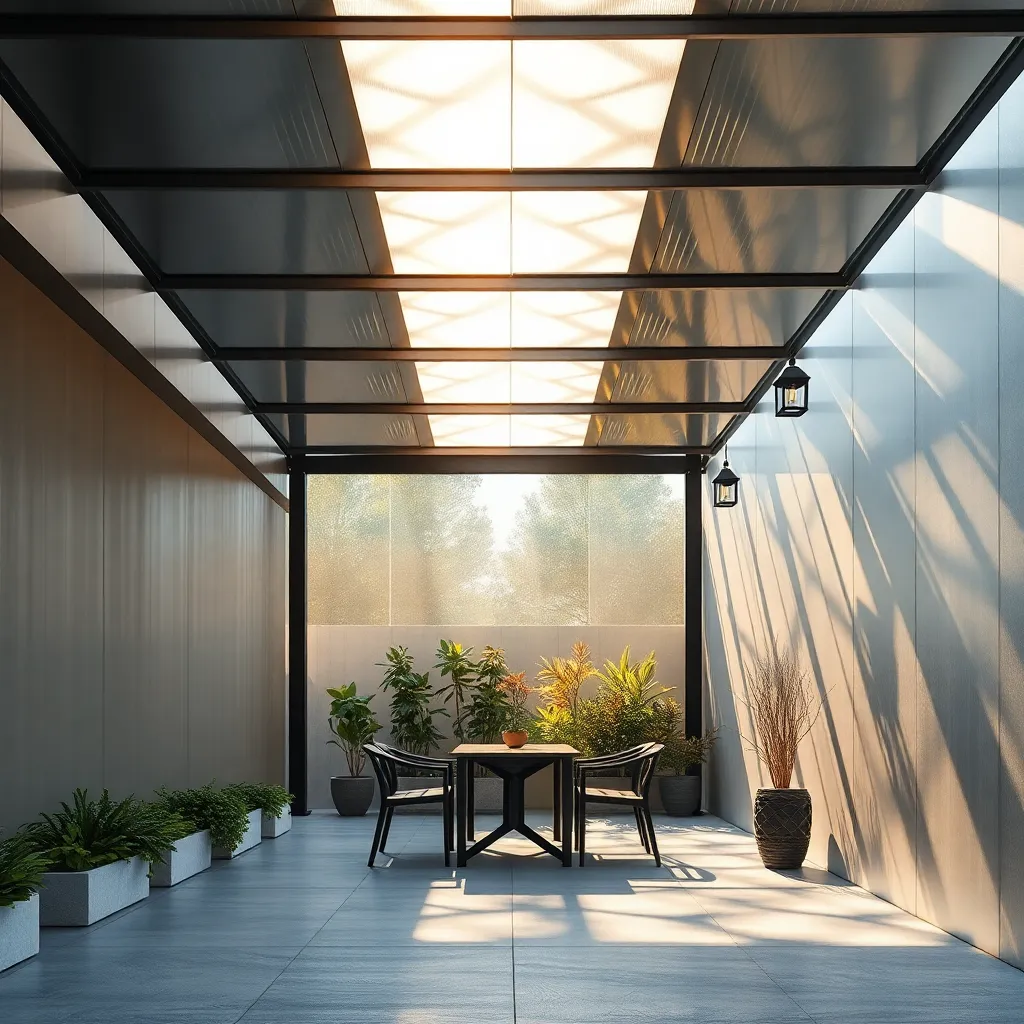
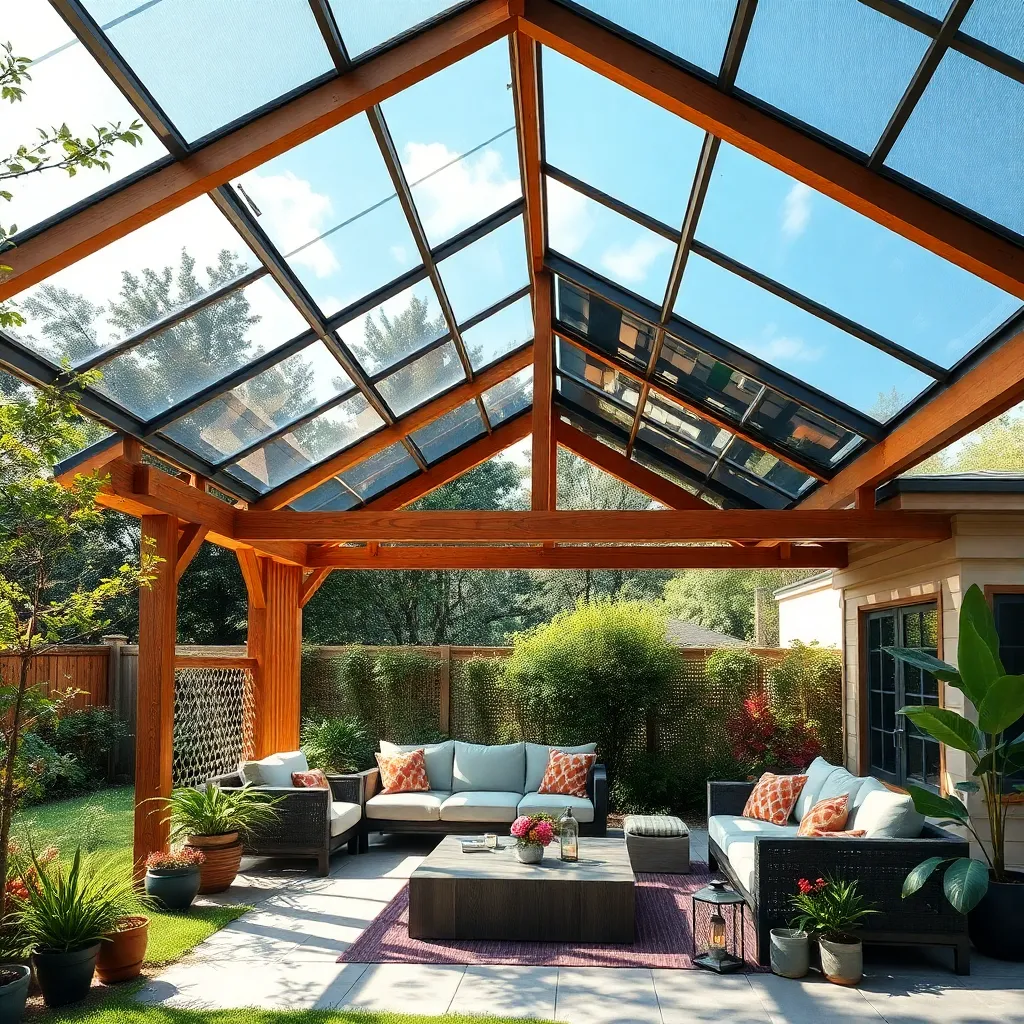
Use Polycarbonate Panels for Protection
Polycarbonate panels are a fantastic choice for enhancing your patio ceiling, as they offer both durability and versatility. These panels are lightweight yet incredibly strong, making them ideal for withstanding various weather conditions. For beginners, start with panels that are at least 6mm thick for optimal strength and light transmission. Advanced gardeners might consider tinted or twin-wall polycarbonate for added insulation and UV protection, ensuring your patio remains comfortable year-round.
Installing polycarbonate panels is a straightforward process that can add modern flair to your outdoor space. Begin by measuring your patio frame to cut the panels to the appropriate size, allowing for about a 5mm expansion gap around each panel. Use UV-resistant sealant to secure them, ensuring no leaks during rainy seasons. For a sleek, professional finish, mount the panels using aluminum profiles or clear polycarbonate connectors. This not only secures the panels but also enhances the visual appeal of your patio ceiling.
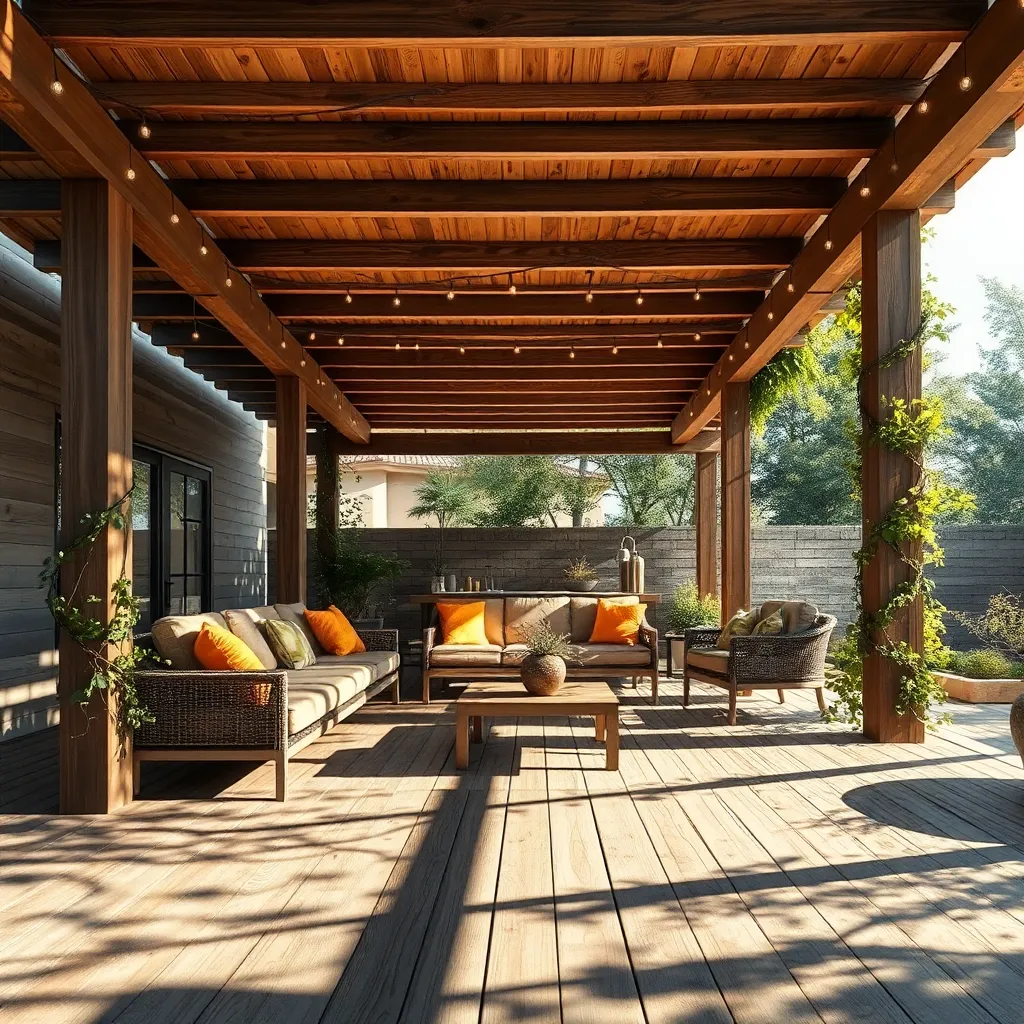
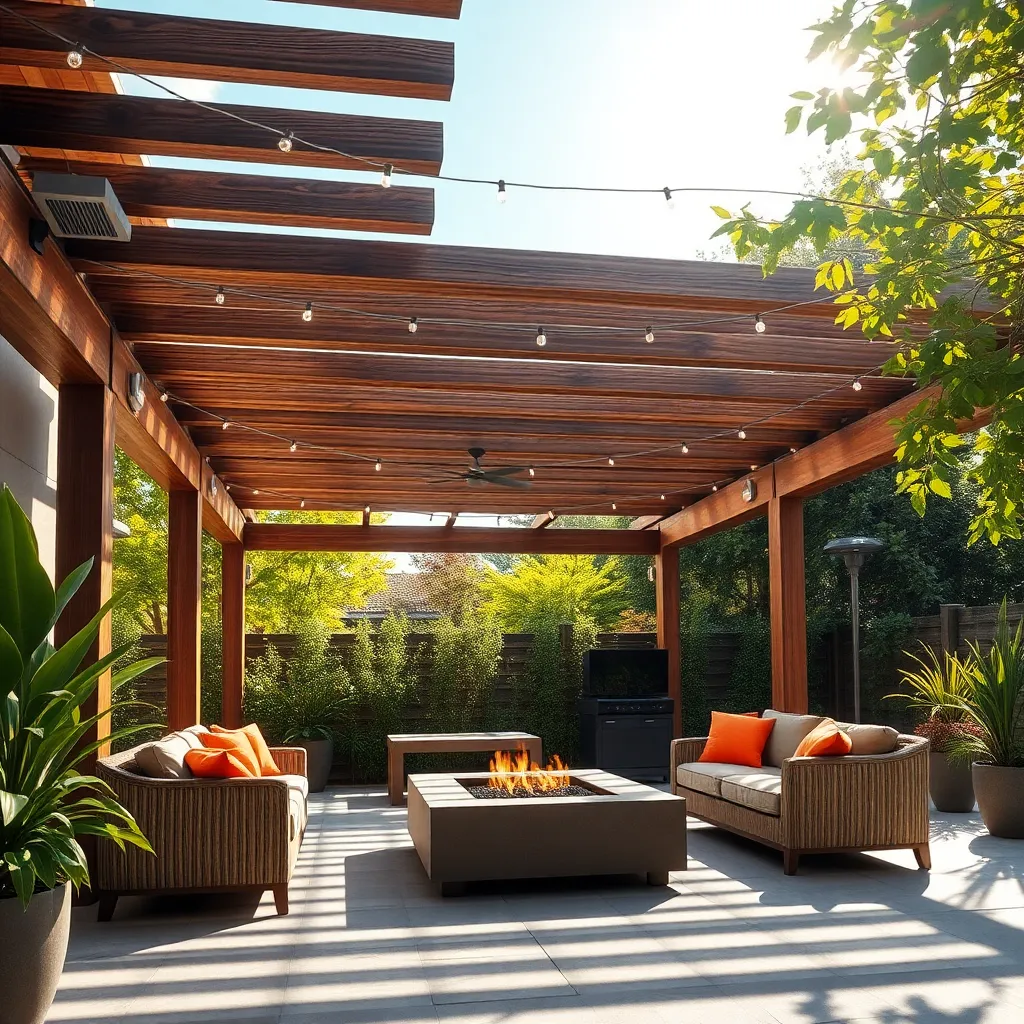
Attach String Lights for Ambiance
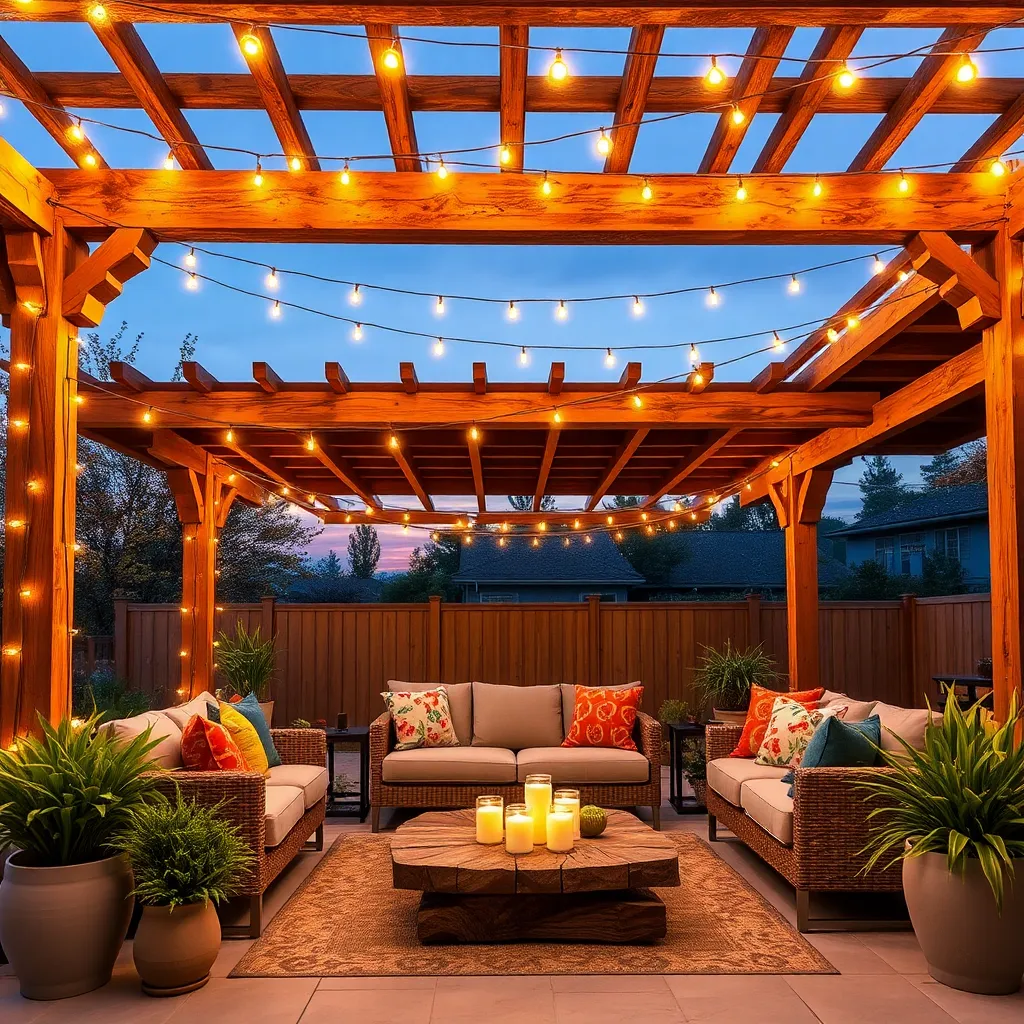
Transform your patio into a magical retreat by attaching string lights to create a cozy ambiance. Start by selecting durable, weather-resistant string lights, ideally with LED bulbs for energy efficiency. Consider using warm white lights for a soft, inviting glow or colored ones for a festive atmosphere. To attach the lights, use hooks or clips designed for outdoor use, ensuring they are spaced evenly across the ceiling for a balanced look. Beginners might find it easiest to use adhesive-backed hooks, while more experienced DIYers can opt for screw-in hooks for added stability.
For a more polished design, map out your lighting plan before installation, taking into account the length of the strings and the location of electrical outlets. Ensure your setup is waterproof by using outdoor-rated extension cords and connectors. For advanced enthusiasts, consider setting up a dimmer switch to adjust brightness levels according to the occasion. For patios with unique ceiling shapes, experiment with zigzag patterns or create a canopy effect by draping lights in a U-shape. These thoughtful touches can dramatically enhance your outdoor experience, making your patio a favored gathering spot any time of the year.
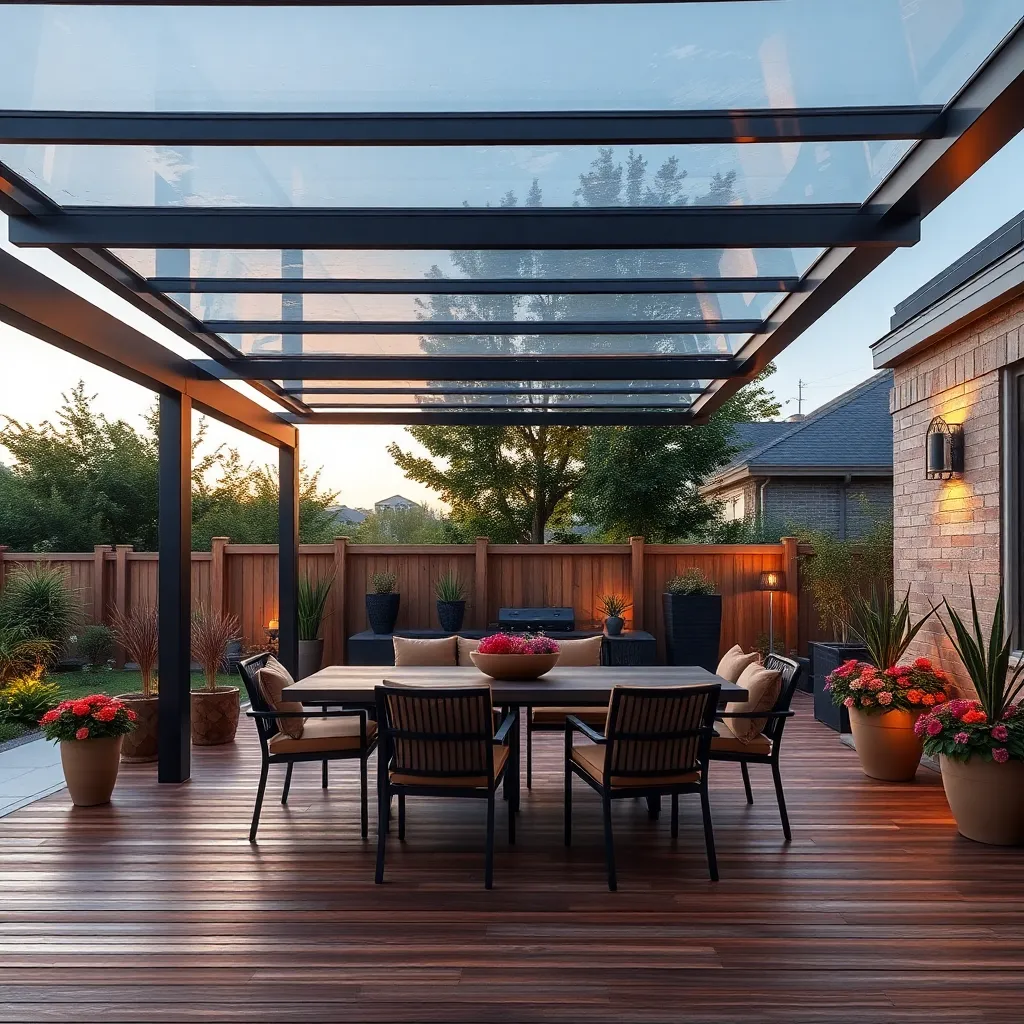
Opt for a Transparent Roof Cover
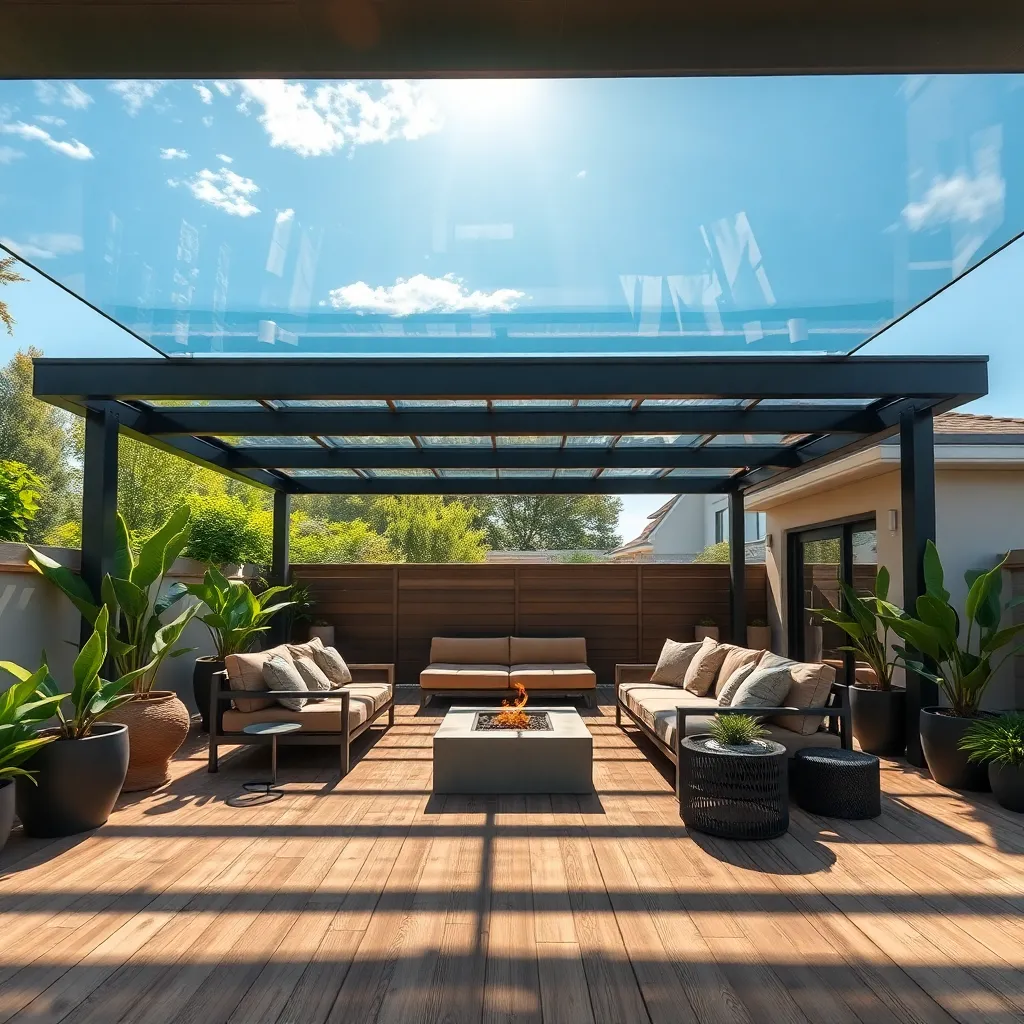
Incorporating a transparent roof cover into your patio design can instantly transform the space by allowing natural light to flood in while still providing shelter from the elements. Consider materials like polycarbonate or tempered glass, which are not only durable but also UV-resistant, protecting you from harmful rays. For beginners, a polycarbonate roof is an excellent choice due to its lightweight nature and ease of installation. Meanwhile, experienced DIYers might explore adding frosted or tinted panels to balance light and privacy, creating the perfect blend of openness and comfort.
Installing a transparent roof cover can encourage plant growth, making your patio a lush, inviting oasis. Design elements to consider include integrating retractable panels or shades that provide flexibility for varying weather conditions. Ensure the structure is sturdy enough to support the transparent material; typically, a framework of treated wood or powder-coated aluminum works well.
- For a seamless look, match the color of the framework to your home’s existing trim.
- Maintain cleanliness by regularly washing the panels with mild soap and water to prevent clouding.
With these actionable tips, your patio will become a sunny, attractive retreat perfect for relaxation or entertaining.
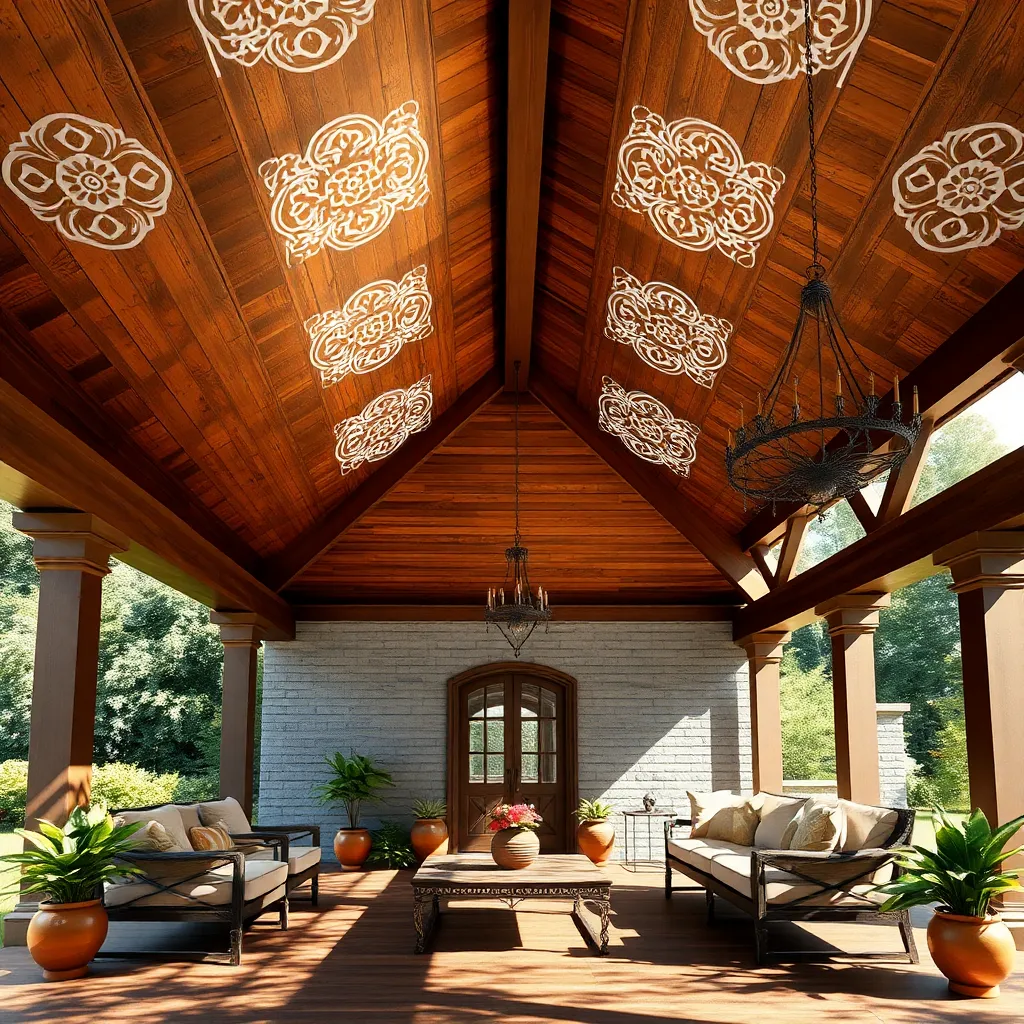
Incorporate Wood Beams for Rustic Feel
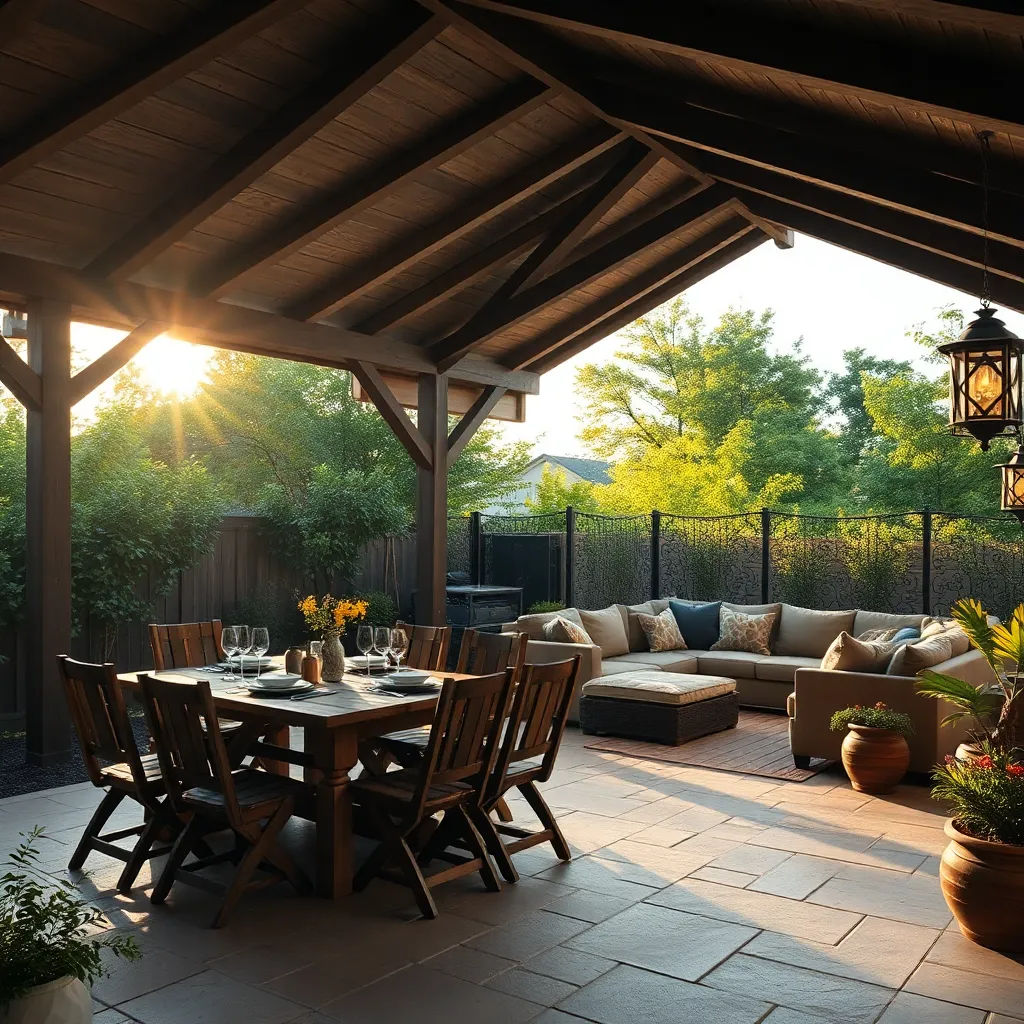
Adding wood beams to your patio ceiling can infuse a rustic charm that enhances the warmth and coziness of your outdoor space. For those new to DIY projects, consider using pre-treated cedar or pine beams, which are widely available and resistant to weathering. Beginners might start with simpler designs, such as installing parallel beams that run the length of your patio. For a more advanced touch, try creating a crisscross or grid pattern that adds depth and visual interest.
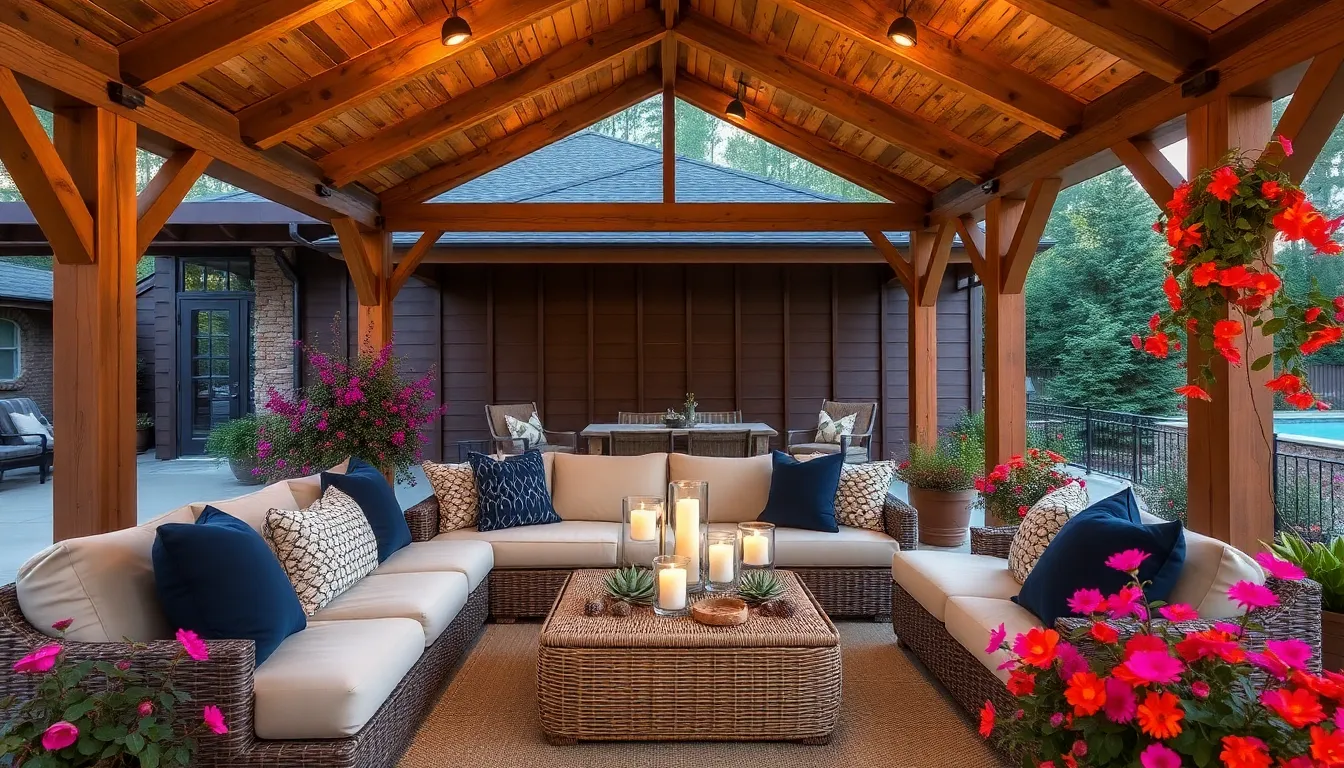
Remember, the dimensions of your beams matter: 6×6 inches is a popular choice for both aesthetics and structural support. Ensure that they’re securely anchored to the existing structure using galvanized brackets, which are essential for withstanding outdoor conditions. For those with a bit more experience, consider incorporating integrated lighting along the beams to create ambiance after sunset. This project not only elevates your patio’s design but also encourages year-round use by providing a sturdy, weather-resistant cover.
Mount Solar Panels for Sustainability
Embrace sustainability by integrating solar panels into your patio ceiling design. Begin by assessing the sun exposure your patio receives to ensure maximum efficiency. Opt for durable materials like tempered glass panels with embedded photovoltaic cells, which can withstand outdoor conditions. For beginners, consider hiring a professional to assist with installation and wiring to safely connect the system to your home’s energy supply.
For those with some DIY experience, you can mount the panels using an adjustable racking system to optimize the angle for sun capture. Ensure the structure is sturdy and can support the added weight—reinforcing the ceiling with metal brackets may be necessary. Enhance the aesthetic by choosing sleek black frames or even bifacial panels that capture sunlight from both sides, offering a modern and efficient solution to energy needs. This not only reduces your carbon footprint but can also significantly lower your energy bills over time.
Add Built-In Speakers for Entertainment
Transform your patio into an entertainment hub by installing built-in speakers. Begin by selecting weather-resistant speakers designed for outdoor use to ensure durability and longevity. For a seamless look, consider embedding speakers into the ceiling or placing them within the beams of your shelter. This not only keeps the equipment protected from the elements but also prevents clutter. A basic setup involves running wires through the ceiling space, but for a more advanced installation, use wireless speakers powered by a central hub to avoid visible wiring.
For enhanced sound quality, position the speakers strategically to cover the entire patio area. Place them at opposite ends of the ceiling to maximize coverage and create an immersive audio experience. If you’re handy with tools, DIY installation can be straightforward, but don’t hesitate to consult a professional for complex setups. When choosing your speakers, focus on models that offer 360-degree sound projection to fill your outdoor space evenly. By integrating audio into your patio design, you can create the perfect atmosphere for relaxing evenings or lively gatherings.
Layer Textures with Mixed Materials
Layering textures with mixed materials can transform your patio ceiling into a visually engaging and unique feature. Consider combining natural elements like wood with industrial materials such as metal or glass. For a more rustic look, use reclaimed wood beams, which add warmth and character, while incorporating metal accents like steel cables or rods for a modern twist. Ensure you choose materials that complement your existing outdoor decor to create a cohesive design.
Integrating mixed materials not only enhances aesthetics but also improves the durability of your patio ceiling. For instance, using weather-resistant wood, such as cedar or teak, ensures longevity when paired with galvanized steel components that resist corrosion. Experiment with staggered panel arrangements or alternating textures to add depth and interest. For advanced enthusiasts, consider installing a transparent polycarbonate section to allow natural light in, creating a dynamic interplay between light and shadow throughout the day.
Use Corrugated Steel for Industrial Edge
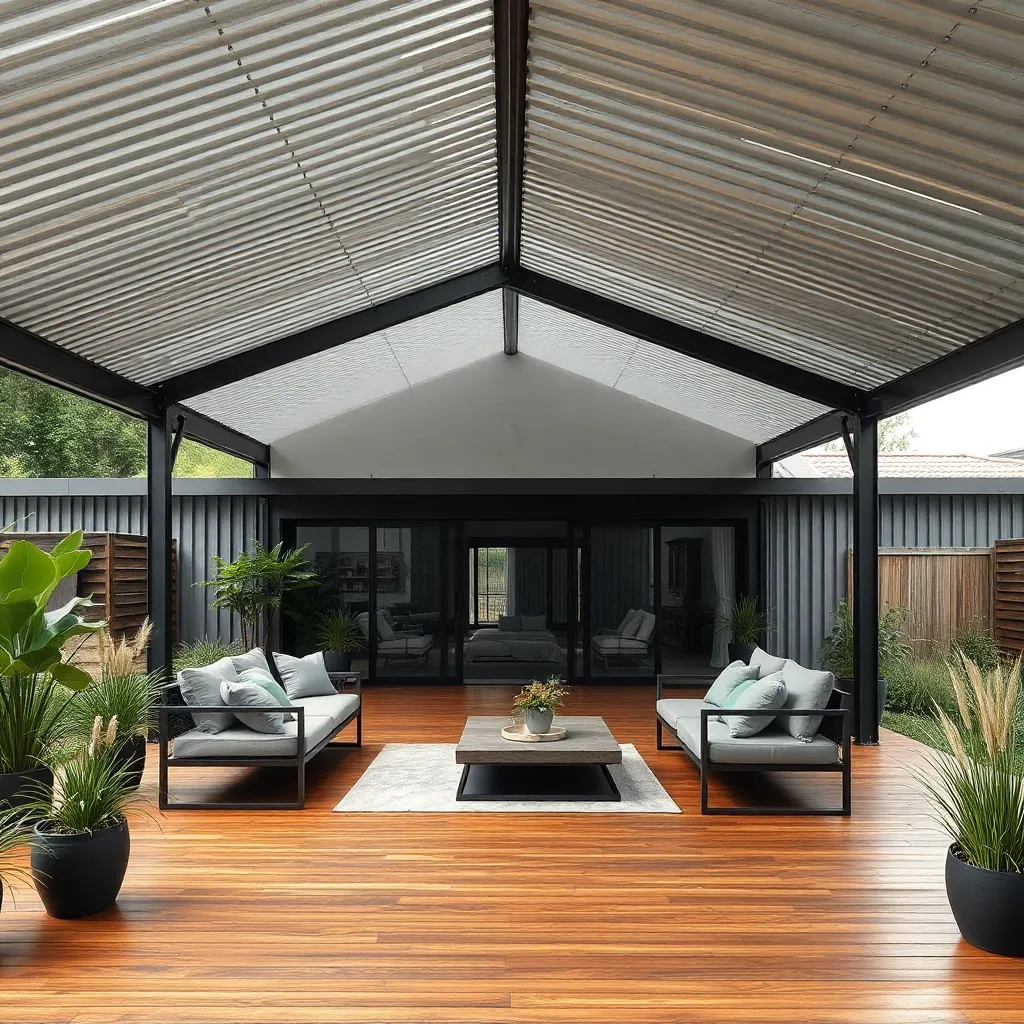
Transform your patio into a modern retreat by incorporating corrugated steel for an industrial edge. This material is not only budget-friendly but also durable and weather-resistant, making it ideal for outdoor use. For beginners, start by selecting high-quality galvanized steel panels, which are resistant to rust and can withstand various climates. Ensure the panels are securely fastened to a wooden framework using self-tapping screws, maintaining a slight slope for water runoff.
For those looking to elevate their design, consider pairing corrugated steel with materials like wood or glass for a striking contrast. Opt for steel panels in vibrant or matte finishes to match your existing patio decor. Advanced DIY enthusiasts might explore adding insulation panels underneath the steel to control temperature and reduce noise. Incorporating LED strip lighting along the ceiling’s edges can enhance the industrial ambiance while providing functional illumination.
Conclusion: Creating Beautiful Outdoor Spaces
In exploring the 20 unique patio ceiling ideas, we’ve touched on key concepts crucial to nurturing a thriving relationship—creativity, adaptability, and shared vision. From embracing nature with green ceilings to fostering intimacy through soft lighting and creating shared projects like DIY designs, these ideas reflect the essence of a strong partnership: collaboration, innovation, and personal growth.
Now, it’s time to take action. Choose one idea that resonates with you and your partner, and make a plan to incorporate it into your outdoor space. Whether it’s starting a small DIY project together or planning a weekend to explore new design options, this shared endeavor can strengthen your bond and create lasting memories.
To keep these inspiring ideas at your fingertips, bookmark this article and revisit it whenever you’re looking to infuse new energy into your relationship. As you and your partner continue to build and nurture your connection, remember that relationships, like beautifully designed patios, thrive with care, creativity, and a touch of personal flair. Looking ahead, may your journey together be filled with endless possibilities and joy, as you create a sanctuary of love and unity.