Creating a comfortable outdoor space is essential for enjoying fresh air and sunshine without the harsh glare or heat. Whether you’re just starting to explore backyard upgrades or you’re a seasoned DIYer looking for quick, impactful projects, adding shade shelters can transform your patio into a relaxing retreat.
In this article, you’ll discover 10 practical shade structures you can build in a single weekend, with clear guidance tailored for all skill levels. From simple canopies to charming pergolas, each idea balances style and function—making it easy to enhance your outdoor living area without a major time commitment.
Choosing the Right Shelter Style
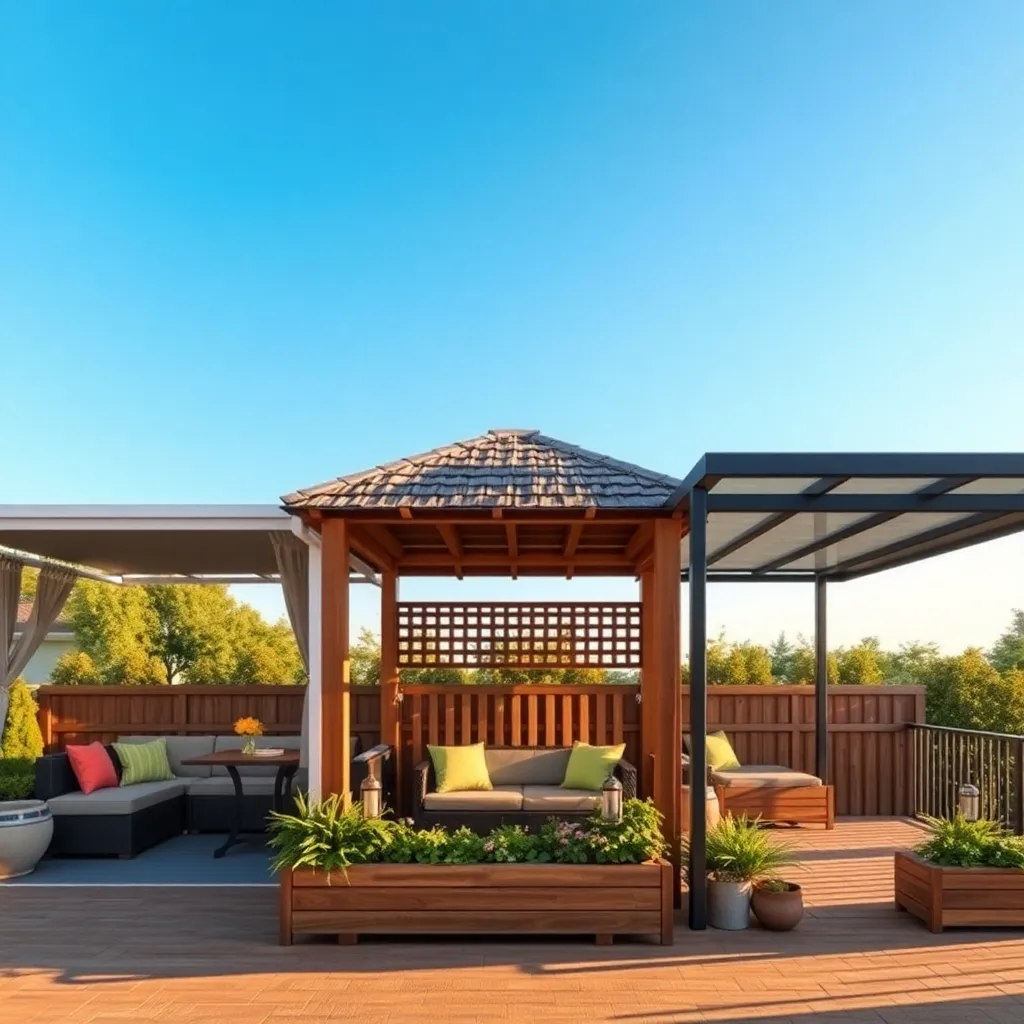
When choosing the right shelter style, consider the primary purpose—whether it’s for relaxing, dining, or protecting plants. Simple structures like pergolas or pop-up canopies are quick to build and perfect for beginners, using materials such as pressure-treated wood or aluminum for durability. For more advanced projects, incorporating elements like adjustable louvers or retractable roofs can provide flexible shade control and enhance comfort throughout the day.
Size and placement are equally important; a shelter around 10×10 feet offers enough space for seating or a small table without overwhelming your yard. Don’t forget to factor in local weather by choosing materials that withstand sun, wind, and rain—consider galvanized steel posts or weather-resistant fabrics like solution-dyed acrylic. To improve stability and aesthetics, anchor your shelter securely with concrete footings and add decorative trim or climbing plants to integrate it seamlessly into your outdoor space.
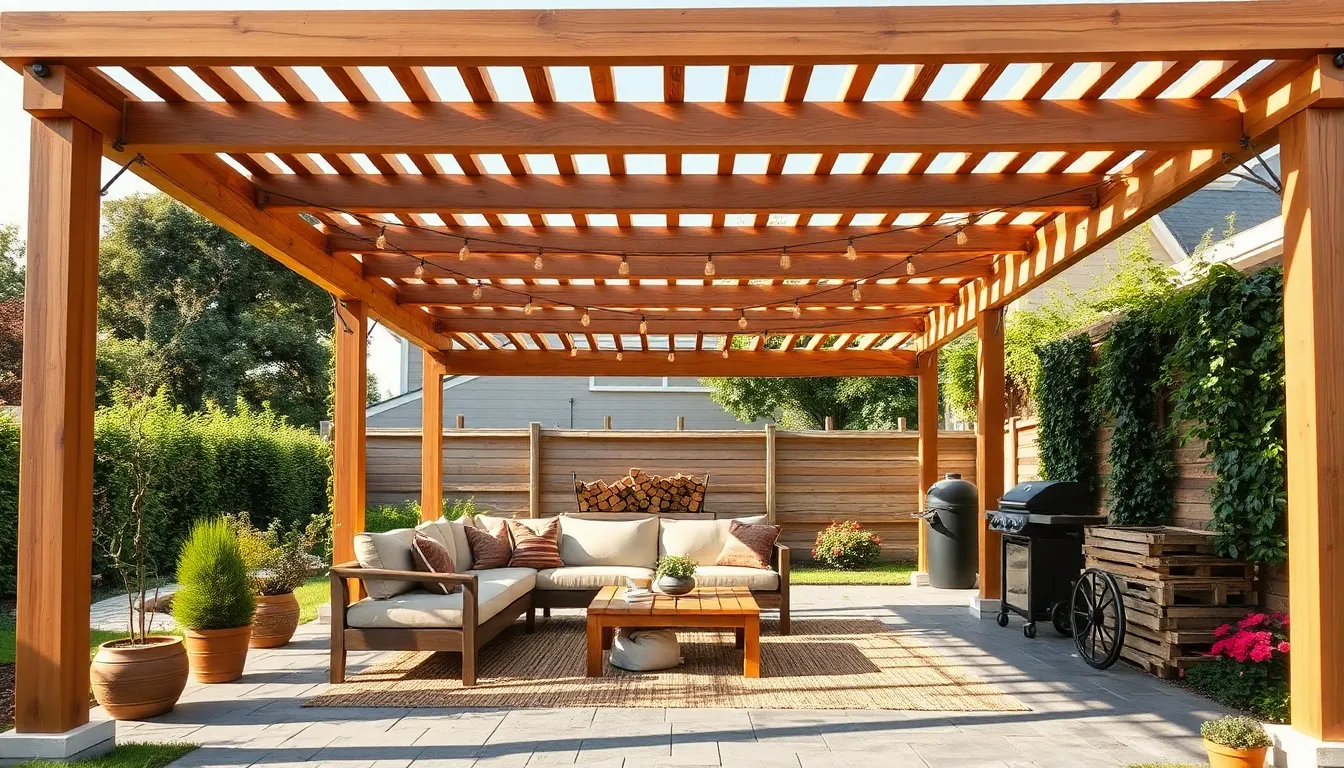
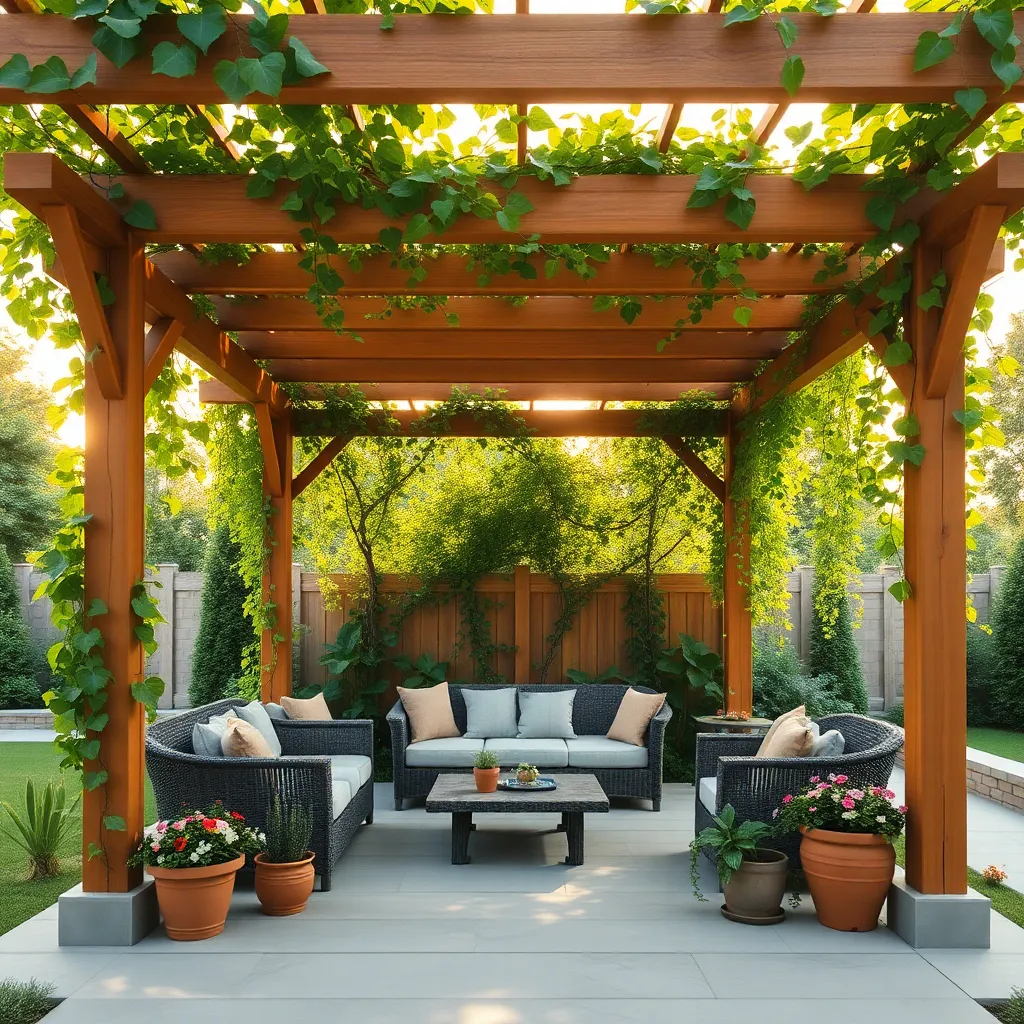
Building a Classic Wooden Pergola

Building a classic wooden pergola starts with selecting durable materials like **cedar or redwood**, which resist rot and insects naturally. Aim for posts at least **4×4 inches** thick and space them about **8 to 10 feet apart** to ensure sturdy support. Incorporating crossbeams with evenly spaced rafters not only provides partial shade but also creates a visually appealing lattice effect that can support climbing plants.
For a more advanced touch, consider adding adjustable louvers or a retractable canopy to control sunlight and rain protection. Secure your pergola to a concrete footing for long-lasting stability, and apply a high-quality outdoor sealant to protect the wood from weathering. These design elements will enhance both function and style, making your pergola a welcoming outdoor retreat you’ll enjoy for years.
Constructing a Simple Canvas Canopy
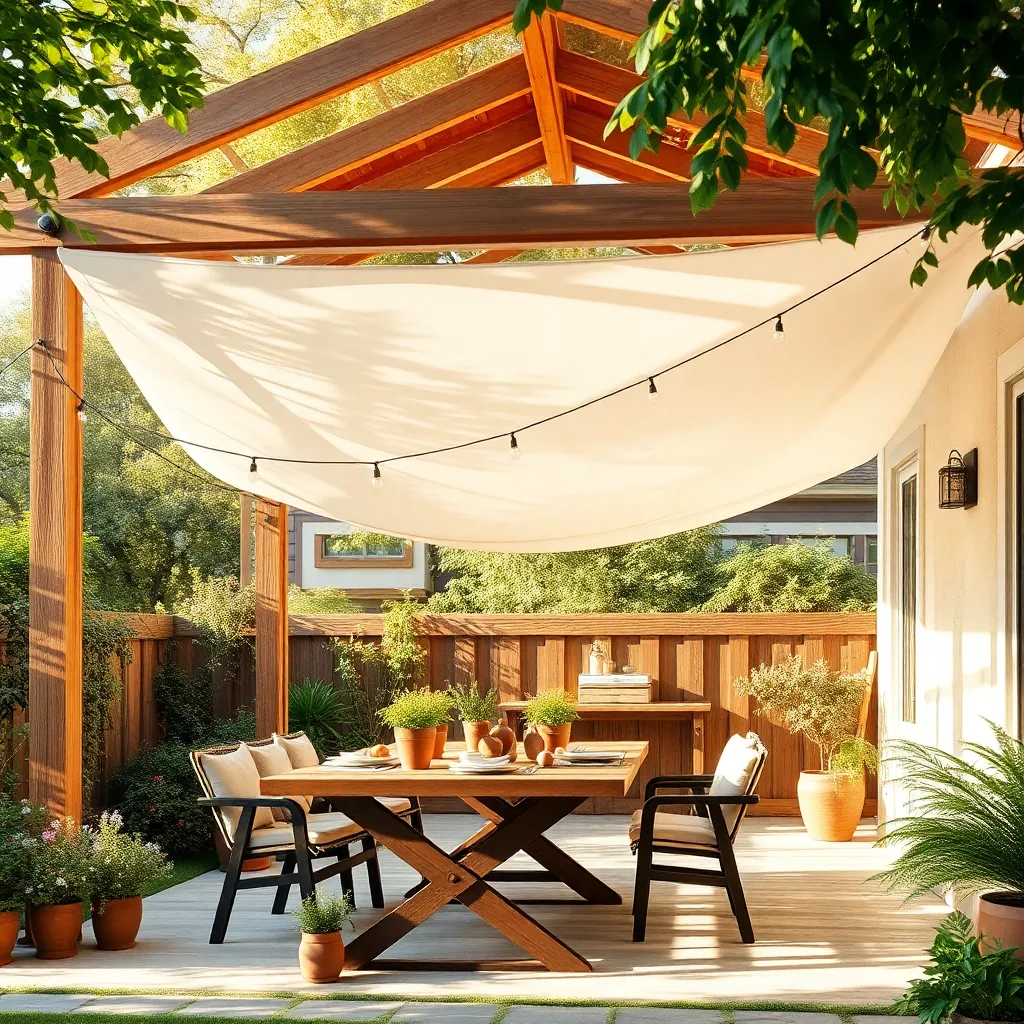
Creating a simple canvas canopy is a cost-effective way to add instant shade to your outdoor space. Start by selecting a sturdy, waterproof canvas fabric—ideally, a heavy-duty, UV-resistant material around 10×12 feet for ample coverage. Use durable metal or wooden poles spaced evenly to support the canopy, ensuring they are at least 8 feet tall for comfortable headroom. Secure the canvas tightly with weather-resistant ropes or bungee cords, attaching them to ground anchors or nearby structures to keep the canopy stable in wind.
For a more polished look, consider adding a slight pitch to the canopy by adjusting pole heights, which helps with water runoff and prevents sagging. Beginners should focus on simple square or rectangular layouts, while advanced builders can incorporate adjustable tensioning systems or removable side panels for added versatility. Remember to check all knots and anchor points regularly, and treat the canvas with a fabric protector spray to extend its lifespan and maintain its shade quality.
Installing a Retractable Shade Sail
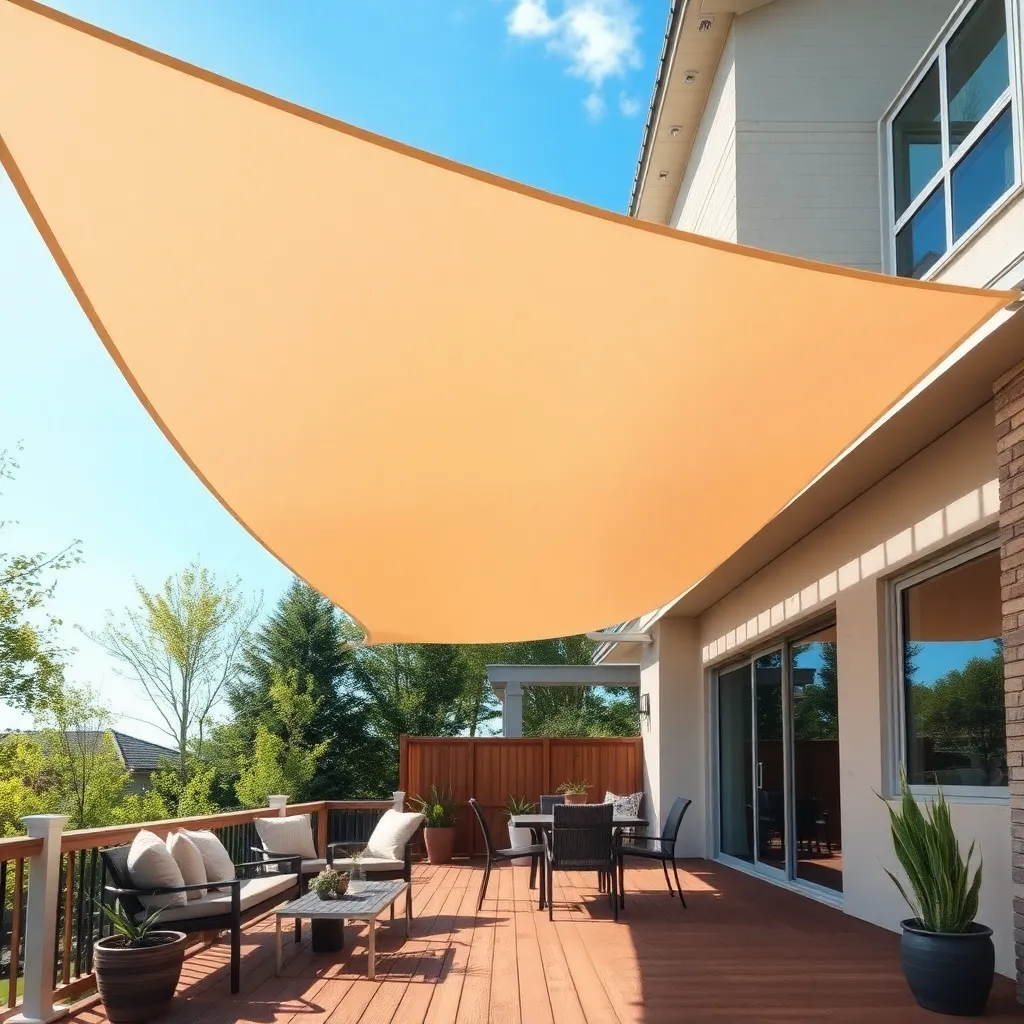
Installing a retractable shade sail offers flexible sun protection that adjusts to your outdoor needs. Start by selecting durable, UV-resistant fabric like high-density polyethylene (HDPE) for long-lasting performance, and mount strong stainless steel hardware at secure anchor points such as walls or posts spaced 10 to 15 feet apart. For best results, tension the sail properly using turnbuckles or ratchets to prevent sagging and ensure water runoff in rainy weather.
To enhance your installation, consider adding a manual or motorized retracting mechanism for easy operation and storage during storms. Additionally, plan the layout to maximize shade during peak sun hours while maintaining airflow to keep the area cool. Remember to regularly inspect attachment points and fabric condition to maintain safety and extend the lifespan of your shade sail.
DIY Bamboo Shade Structure Tips
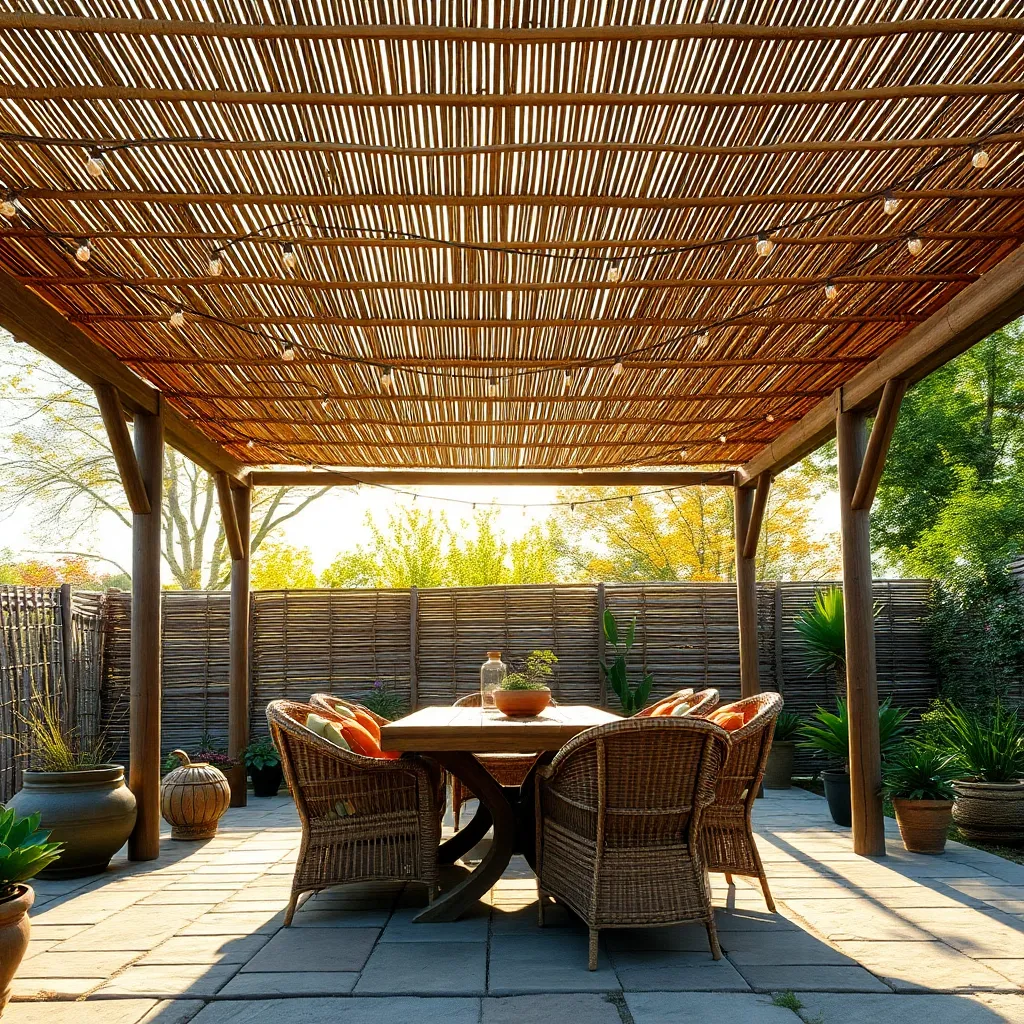
Bamboo is an excellent material for building a DIY shade structure due to its strength, flexibility, and natural aesthetic. Start by selecting mature, thick bamboo poles (at least 2-3 inches in diameter) to ensure durability. For a simple frame, cut poles to desired lengths, then securely join them using galvanized wire or heavy-duty zip ties at corners and joints. To protect the bamboo from weathering, apply a clear outdoor sealant, which also helps maintain its vibrant look.
When designing your bamboo shade, consider adding a woven bamboo mat or outdoor fabric roof for enhanced sun protection and airflow. For added stability, anchor the frame into the ground with concrete footings or metal stakes. Advanced builders can experiment with angled supports or cross beams to increase structural integrity and create a visually appealing pattern. Don’t forget to leave at least 6-8 feet of headroom for comfortable use underneath your shade.
Assembling a Pop-Up Shade Tent
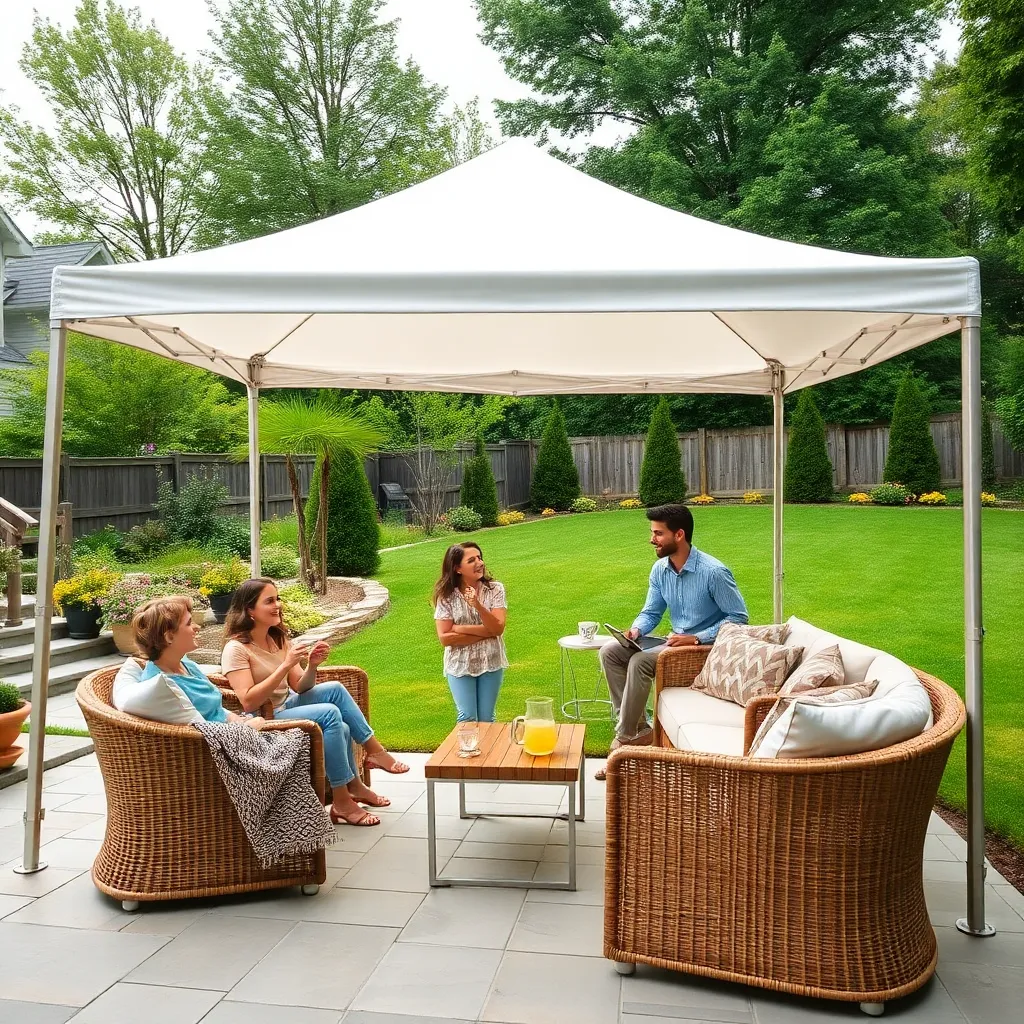
Setting up a pop-up shade tent is a straightforward way to create instant shelter for your backyard or outdoor event. Start by choosing a tent with a durable steel or aluminum frame and a water-resistant polyester canopy—these materials offer both strength and weather protection. For optimal shade, select a tent size that fits your space, typically ranging from 8×8 to 10×10 feet, and secure it with stakes or weighted bags to prevent movement in windy conditions.
To enhance your tent’s functionality, consider adding sidewalls or mesh panels for extra sun protection and improved airflow. When assembling, it helps to have a second person to stabilize the frame while you extend the legs and lock the joints into place. For longer-term use, apply UV-resistant spray on the canopy and regularly check connections and stakes to maintain stability and extend the life of your pop-up shade tent.
Crafting a Rustic Pallet Gazebo
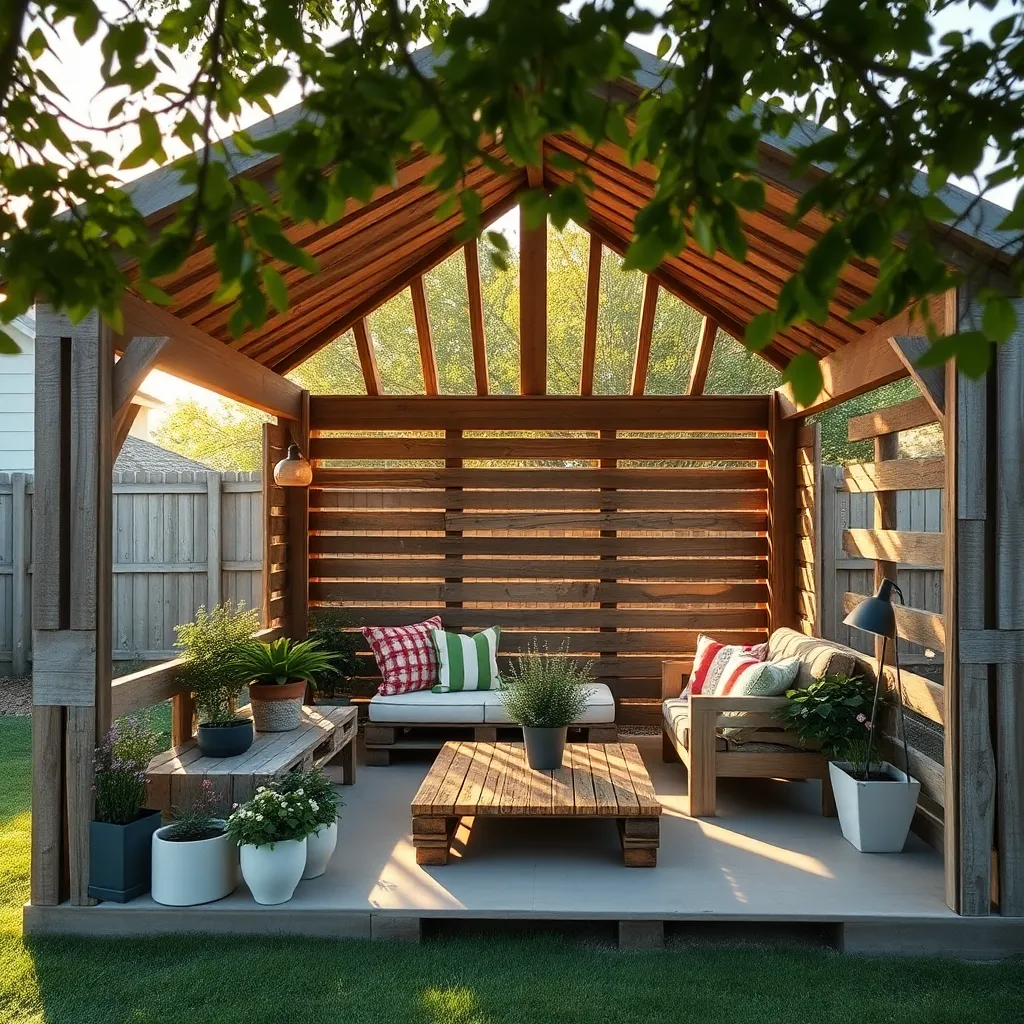
Building a rustic pallet gazebo is a budget-friendly way to add charming shade to your outdoor space using reclaimed wood pallets. Start by selecting sturdy pallets, preferably heat-treated and untreated by chemicals, and dismantle them carefully to preserve the slats. For a simple yet durable structure, aim for a 6×6-foot base framed with thicker pallet boards for stability, supported by four strong vertical posts anchored securely into the ground or concrete footings.
To enhance both function and aesthetics, arrange the pallet slats for the roof with a slight pitch to allow rain runoff, and consider adding a clear or tinted polycarbonate panel atop for weather protection without sacrificing rustic appeal. For advanced builders, sanding the wood smooth and treating it with a weatherproof sealant will extend the gazebo’s life, while incorporating hanging hooks or side curtains can make this shelter versatile for relaxing or entertaining outdoors.
Erecting a Metal Frame Pavilion
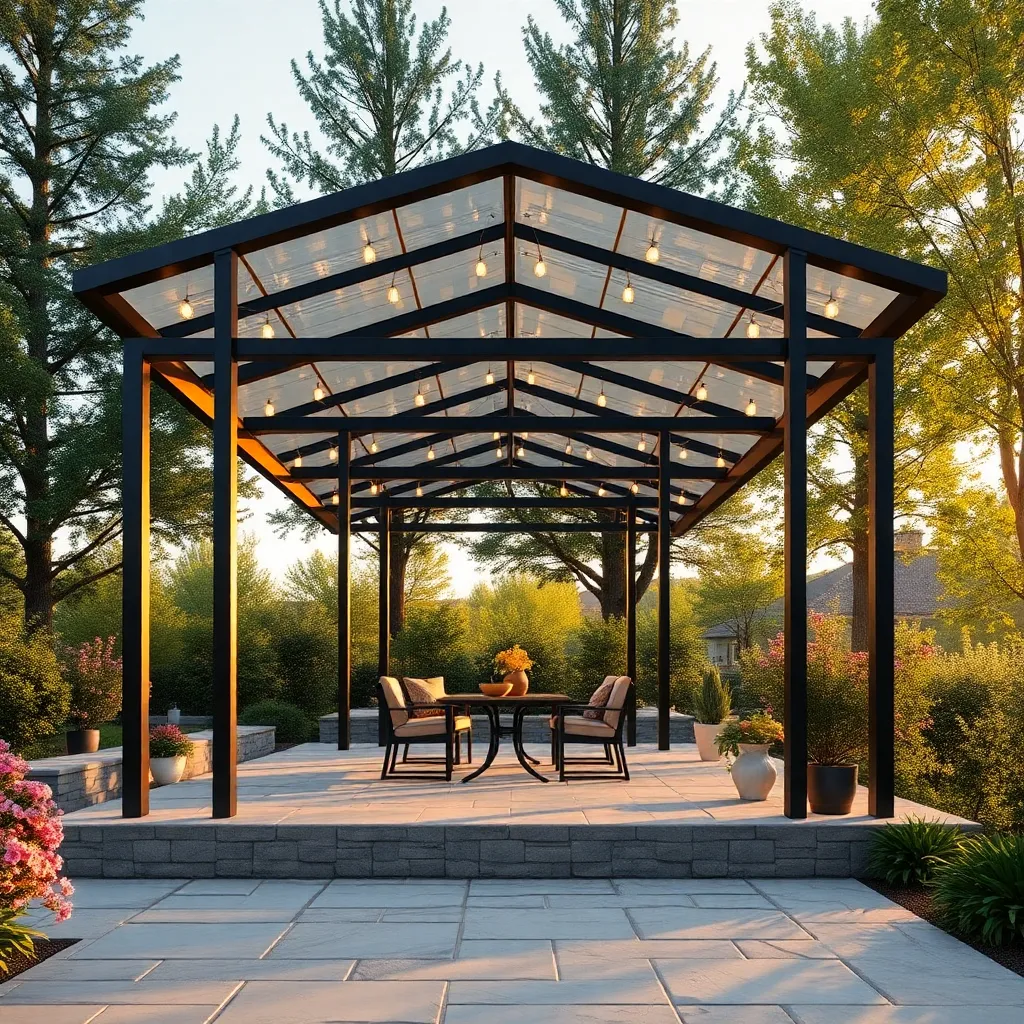
Starting with a metal frame pavilion is a smart choice for durability and quick assembly. Use
To streamline construction, assemble the frame on a flat surface first and enlist a helper for lifting and positioning. For advanced customization, consider adding adjustable roof panels or side curtains for extra shade and weather protection. Remember to follow the manufacturer’s instructions closely and double-check all bolts and connections for safety.
Adding Climbing Plants for Shade
Incorporating climbing plants into your outdoor shelter design is a smart way to add natural shade and beauty simultaneously. Start with a sturdy framework like a pergola or trellis made from weather-resistant wood or powder-coated metal, ensuring the structure can support vigorous vines. Choose fast-growing, hardy climbers such as wisteria, clematis, or trumpet vine for quick coverage, and position plants where they receive the appropriate sunlight—most prefer full to partial sun.
For optimal shade and maintenance, train your climbers by tying new growth gently to the support structure using soft garden ties or twine. To keep the shelter airy and prevent overcrowding, regularly prune the vines in early spring and late summer. Consider installing a drip irrigation system to keep the roots evenly moist, promoting vigorous growth without water waste. This combination of smart design and ongoing care ensures your shelter will be both inviting and comfortably shaded all season long.
Finishing Touches for Outdoor Comfort
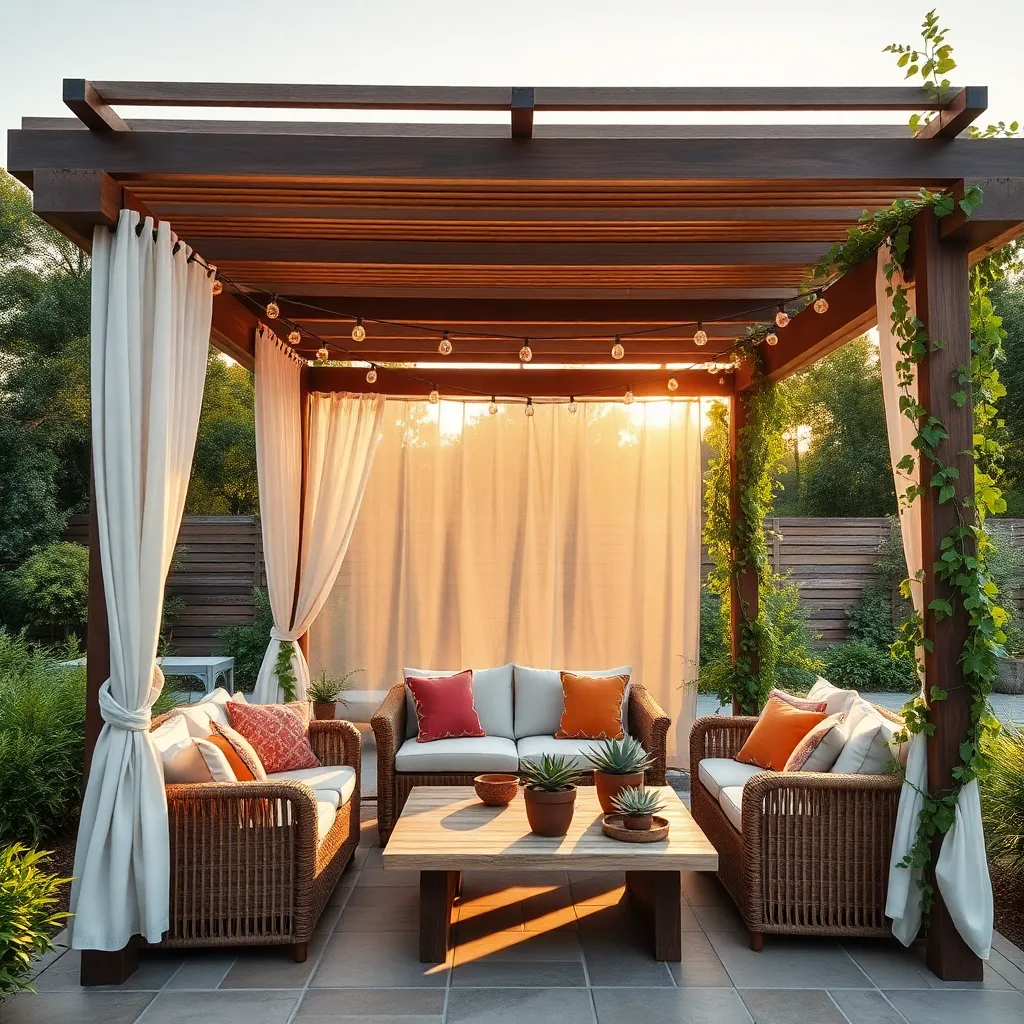
To enhance your outdoor shelter’s comfort, consider installing weather-resistant curtains or bamboo shades that can be drawn to block sun or wind as needed. Use sturdy, rust-proof hardware like stainless steel hooks and grommets to ensure durability, and choose fabrics rated for outdoor use to prevent fading and mildew. Adding a soft, all-weather rug will define the space and provide a cozy feel underfoot, making your shelter inviting year-round.
For advanced customization, incorporate adjustable louvers or retractable awnings that let you control light and airflow precisely. Integrate low-voltage LED lighting along the frame or inside hanging lanterns to create ambiance without harsh glare. Remember to anchor furniture securely and use non-slip mats to maintain safety, especially if you live in windy or rainy climates—small details like these make your shelter both stylish and practical.
Conclusion: Creating Beautiful Outdoor Spaces
Building a beautiful outdoor shade shelter in a weekend is not just about creating a cozy space—it’s about enhancing your connection with loved ones through shared experiences and thoughtful design. From simple DIY pergolas and sail shades to charming gazebo kits and retractable awnings, each option offers a unique way to bring comfort, style, and togetherness to your outdoor moments. Whether you prefer a budget-friendly pallet canopy or a more permanent pavilion, these ideas encourage collaboration, creativity, and enjoyment.
Ready to get started? Choose one shelter idea that excites you, gather your materials, and invite a partner or friend to join the build this weekend. It’s the perfect opportunity to bond while making your outdoor space inviting and functional.
Don’t forget to save or bookmark this article so you can revisit these inspiring projects whenever you want to refresh your space or spark new outdoor memories. By investing time and care into your shared environment, you’re setting the stage for many joyful, lasting moments—because nurturing your surroundings nurtures your relationships too. Here’s to creating comfort, connection, and countless beautiful days ahead!